

How To Track Form Submissions from Squarespace in GA4
Wondering how to add form submission tracking in GA4 to your Squarespace site? I’ve got your back!
Requirements
You’ll need to have:
Squarespace Core plan (or higher)
Google Tag Manager Account
Google Analytics account
Why Do I Need To Have The Squarespace Core Plan?
We have to inject custom code (the Google Tag Manager script) onto your site, and the Core plan is the lowest plan that allows this.
Create a Google Tag Manager Account
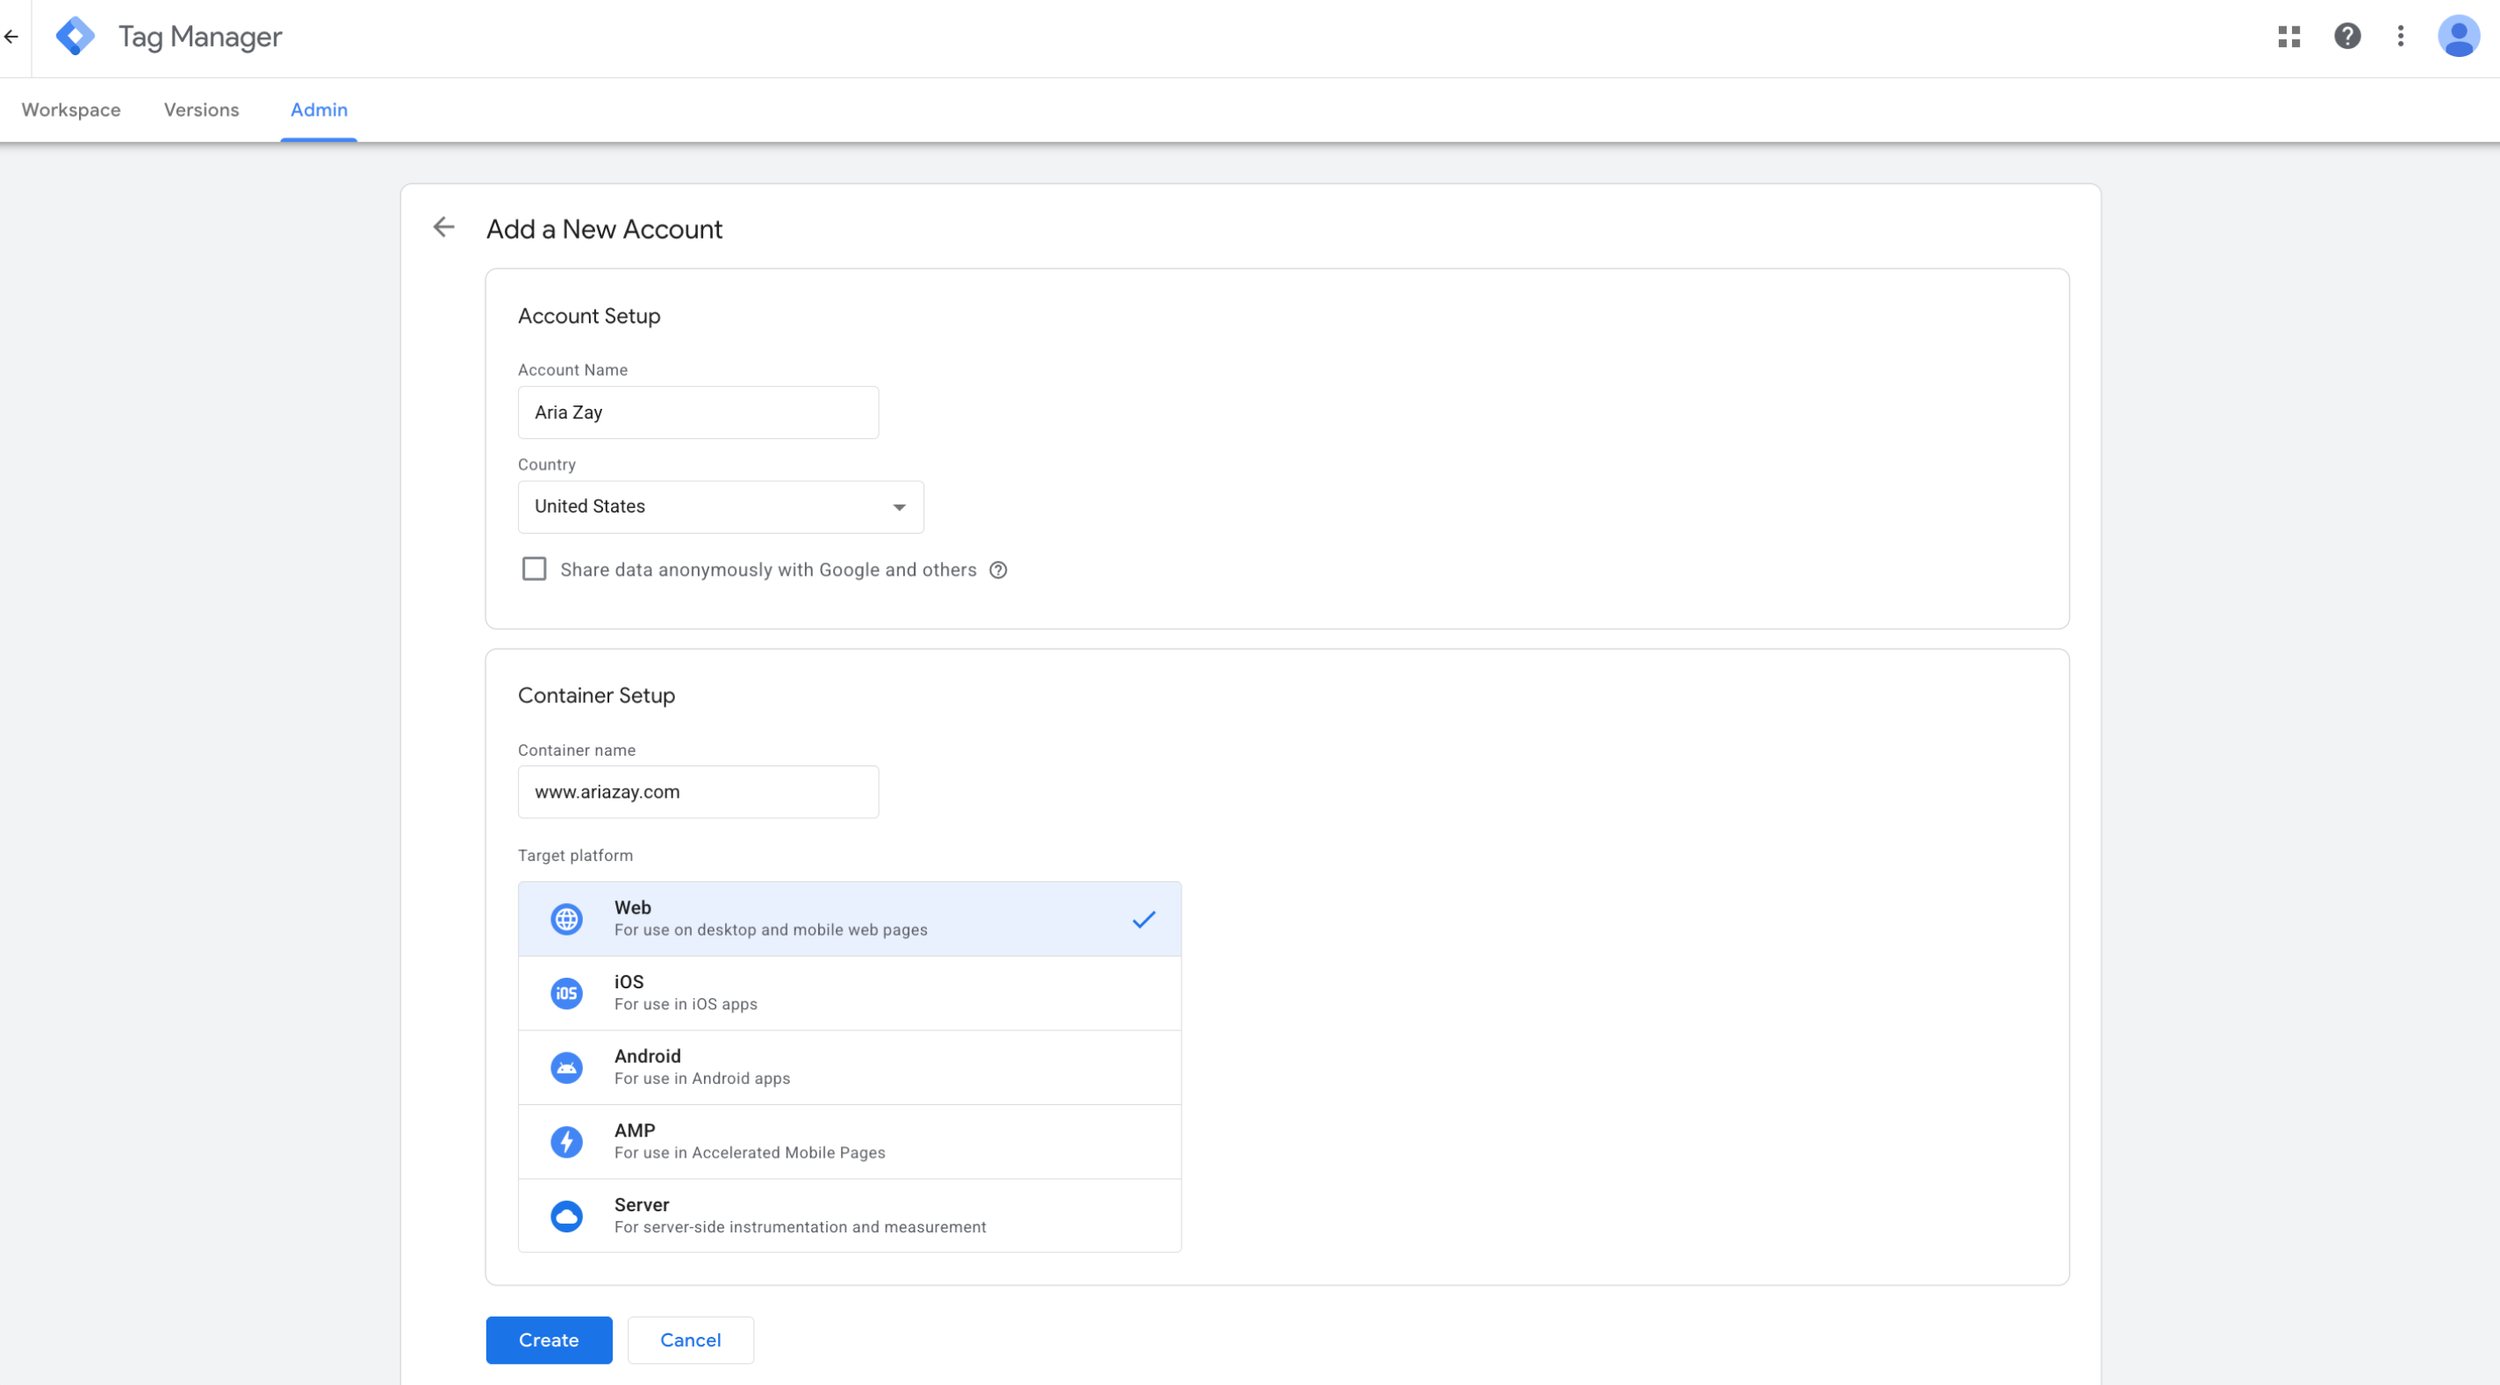
The first thing you need to do is create your Google Tag Manager account.
Fill out the name, your website, and select “Web.”
When you hit Create, you’ll need to accept the terms of service.
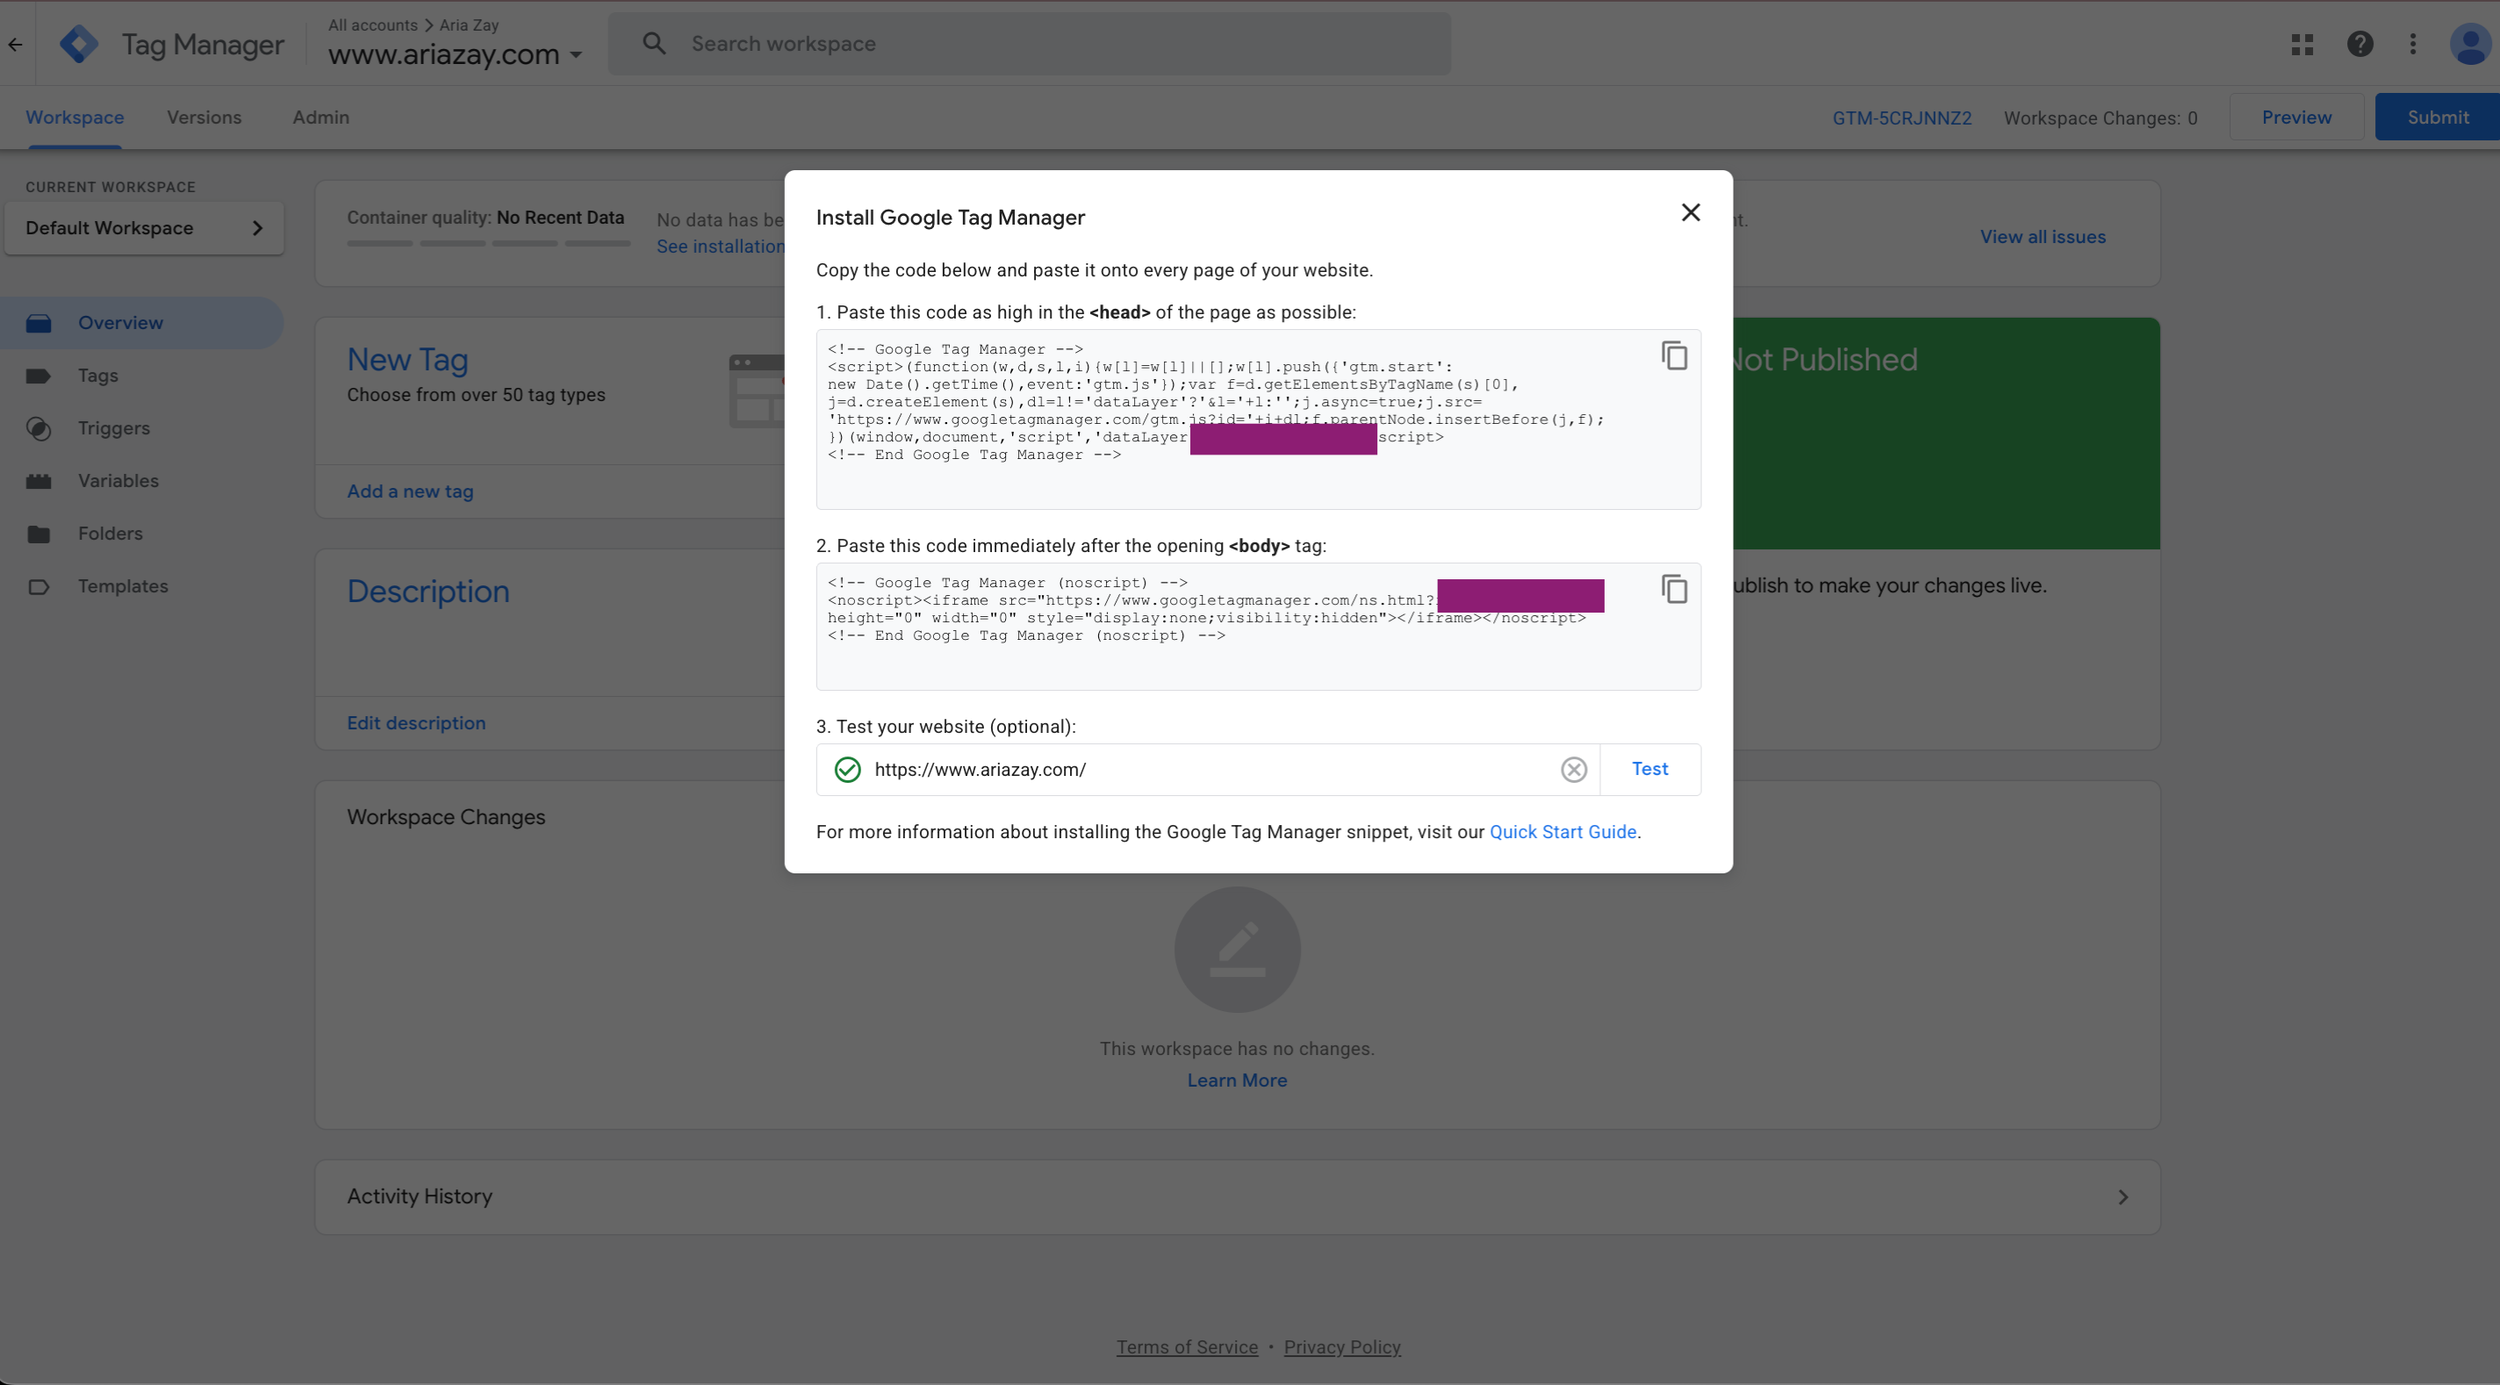
You’ll now be prompted to install the Tag on your site.
Install The Google Tag On Your Squarespace Site
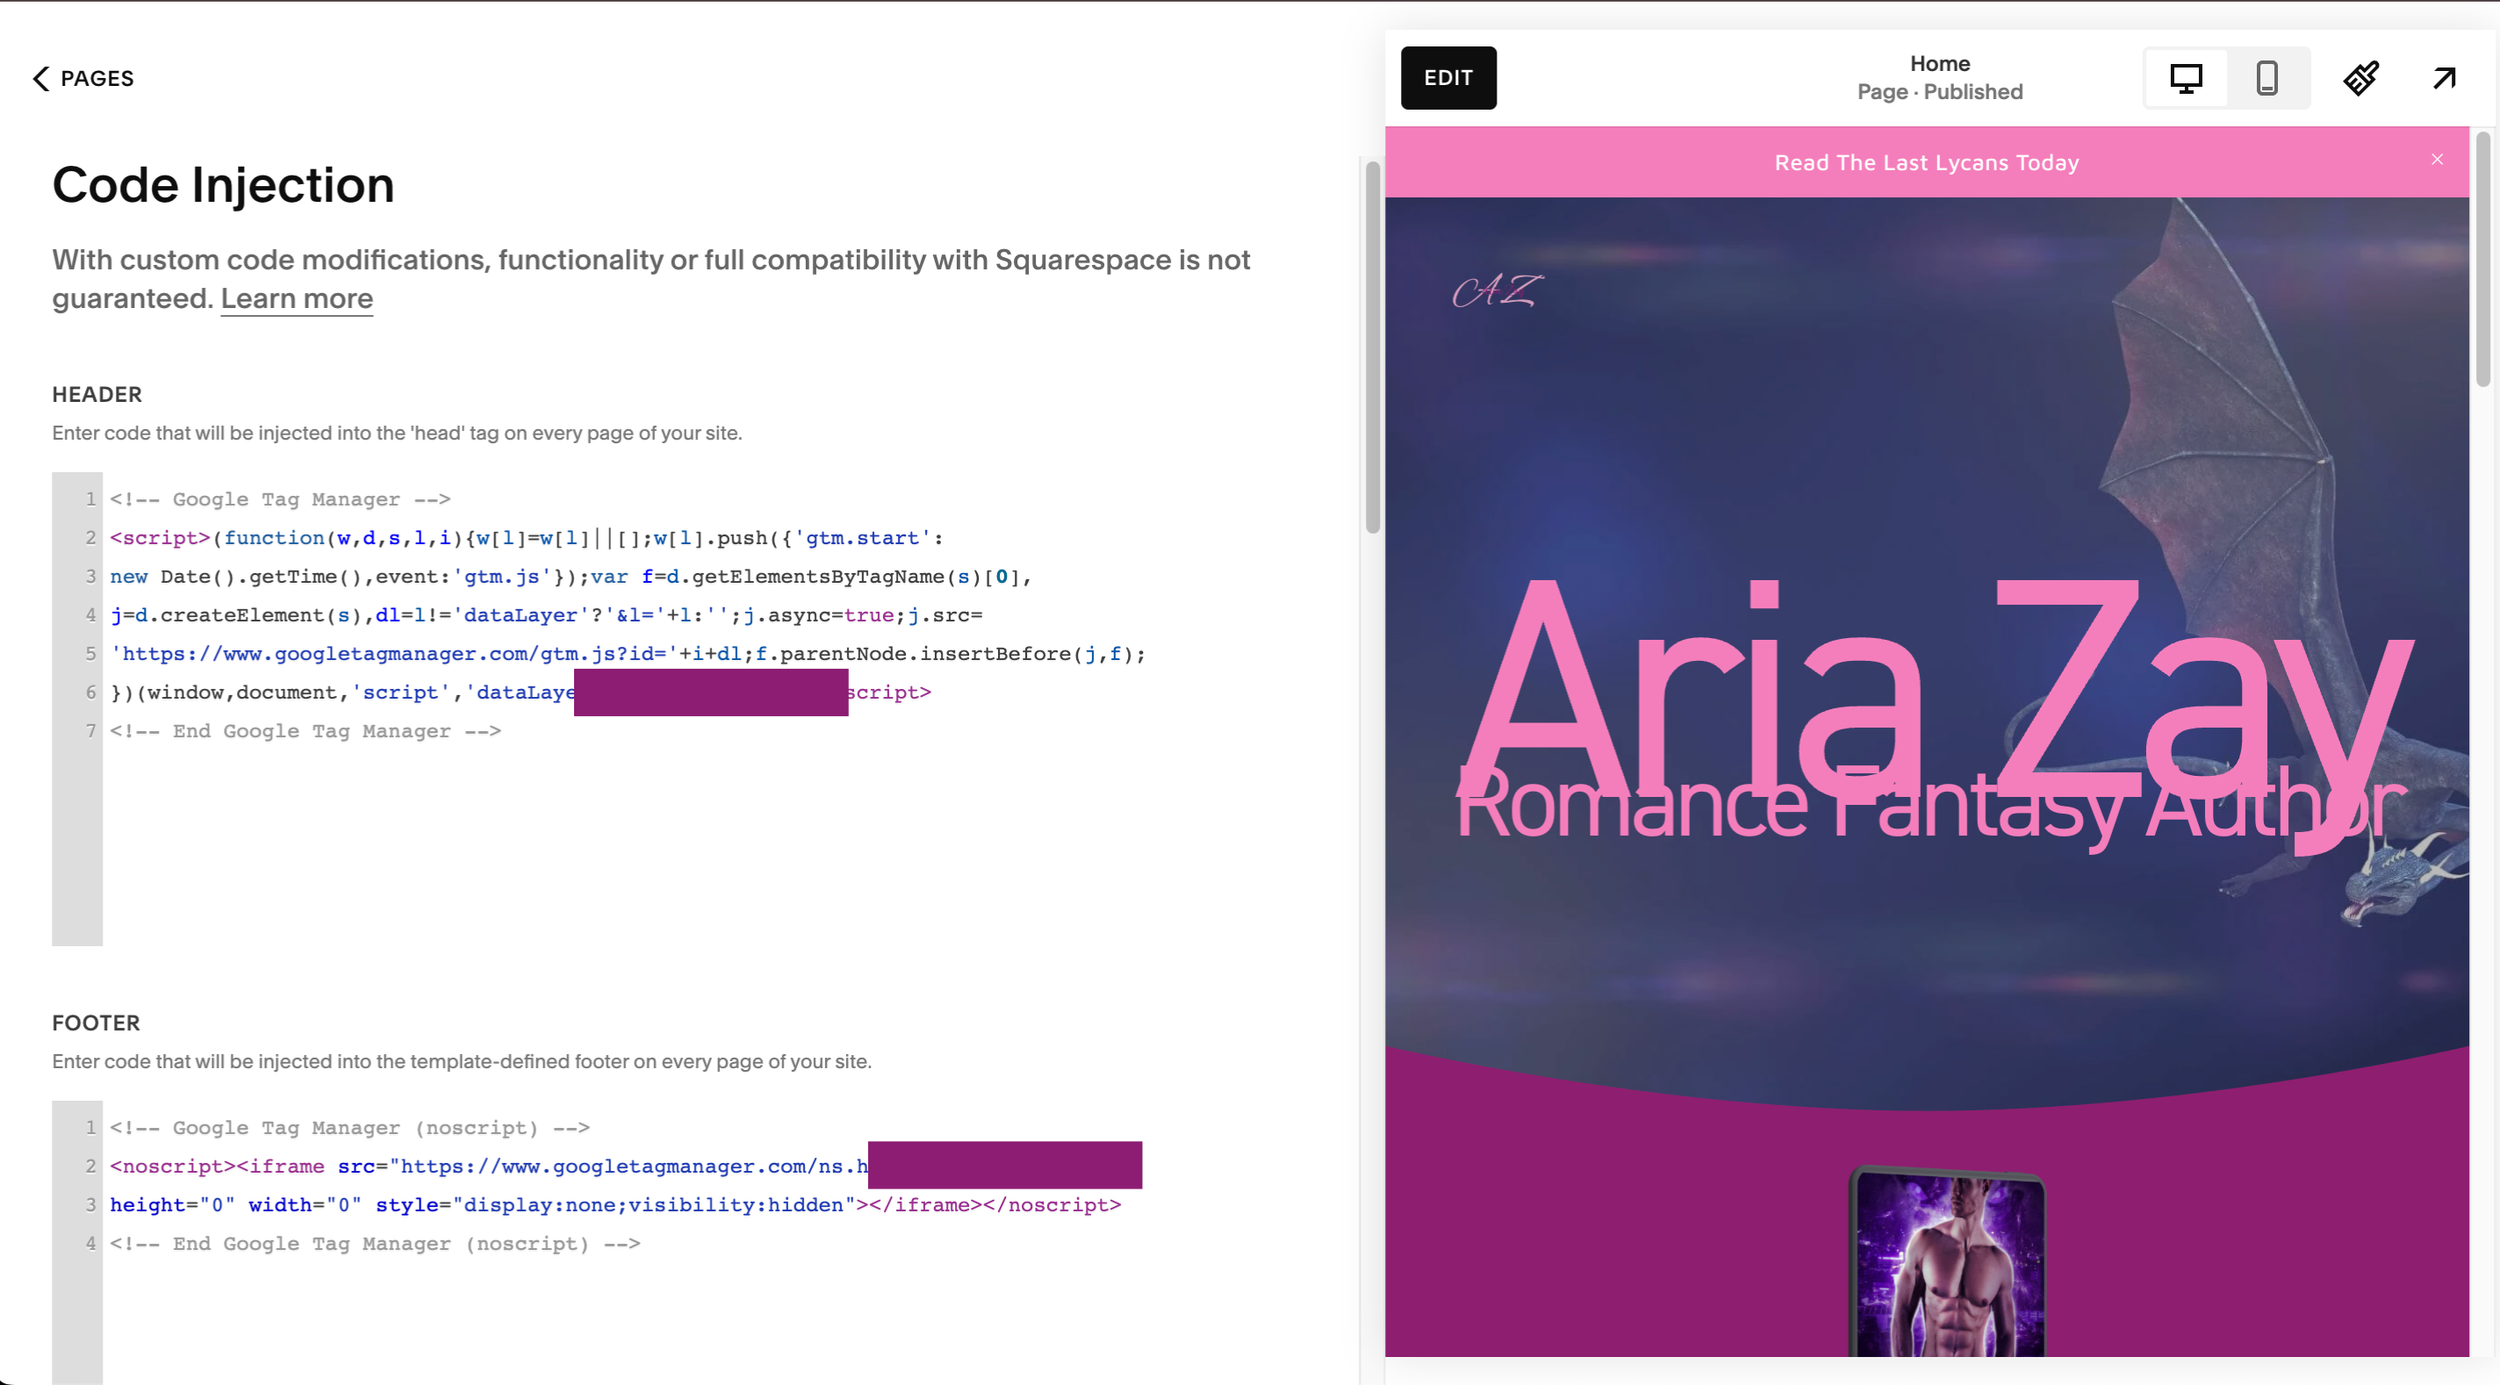
Log in to Squarespace, and go to Website-> Pages
Then, go to Custom Code, and select Code Injection.

You’ll enter the top code into the Header, and then the second code into the Footer section.
Save it on Squarespace, and then go back to Google Tag Manager and test the connection by entering your website url and selecting “test” You should get a green checkmark next to your url. This happened almost immediately for me, but, if it doesn’t work for you, give it a little bit of time and try again. If it still doesn’t work, verify that you saved the code injection inside of Squarespace.
Create GA4 Account
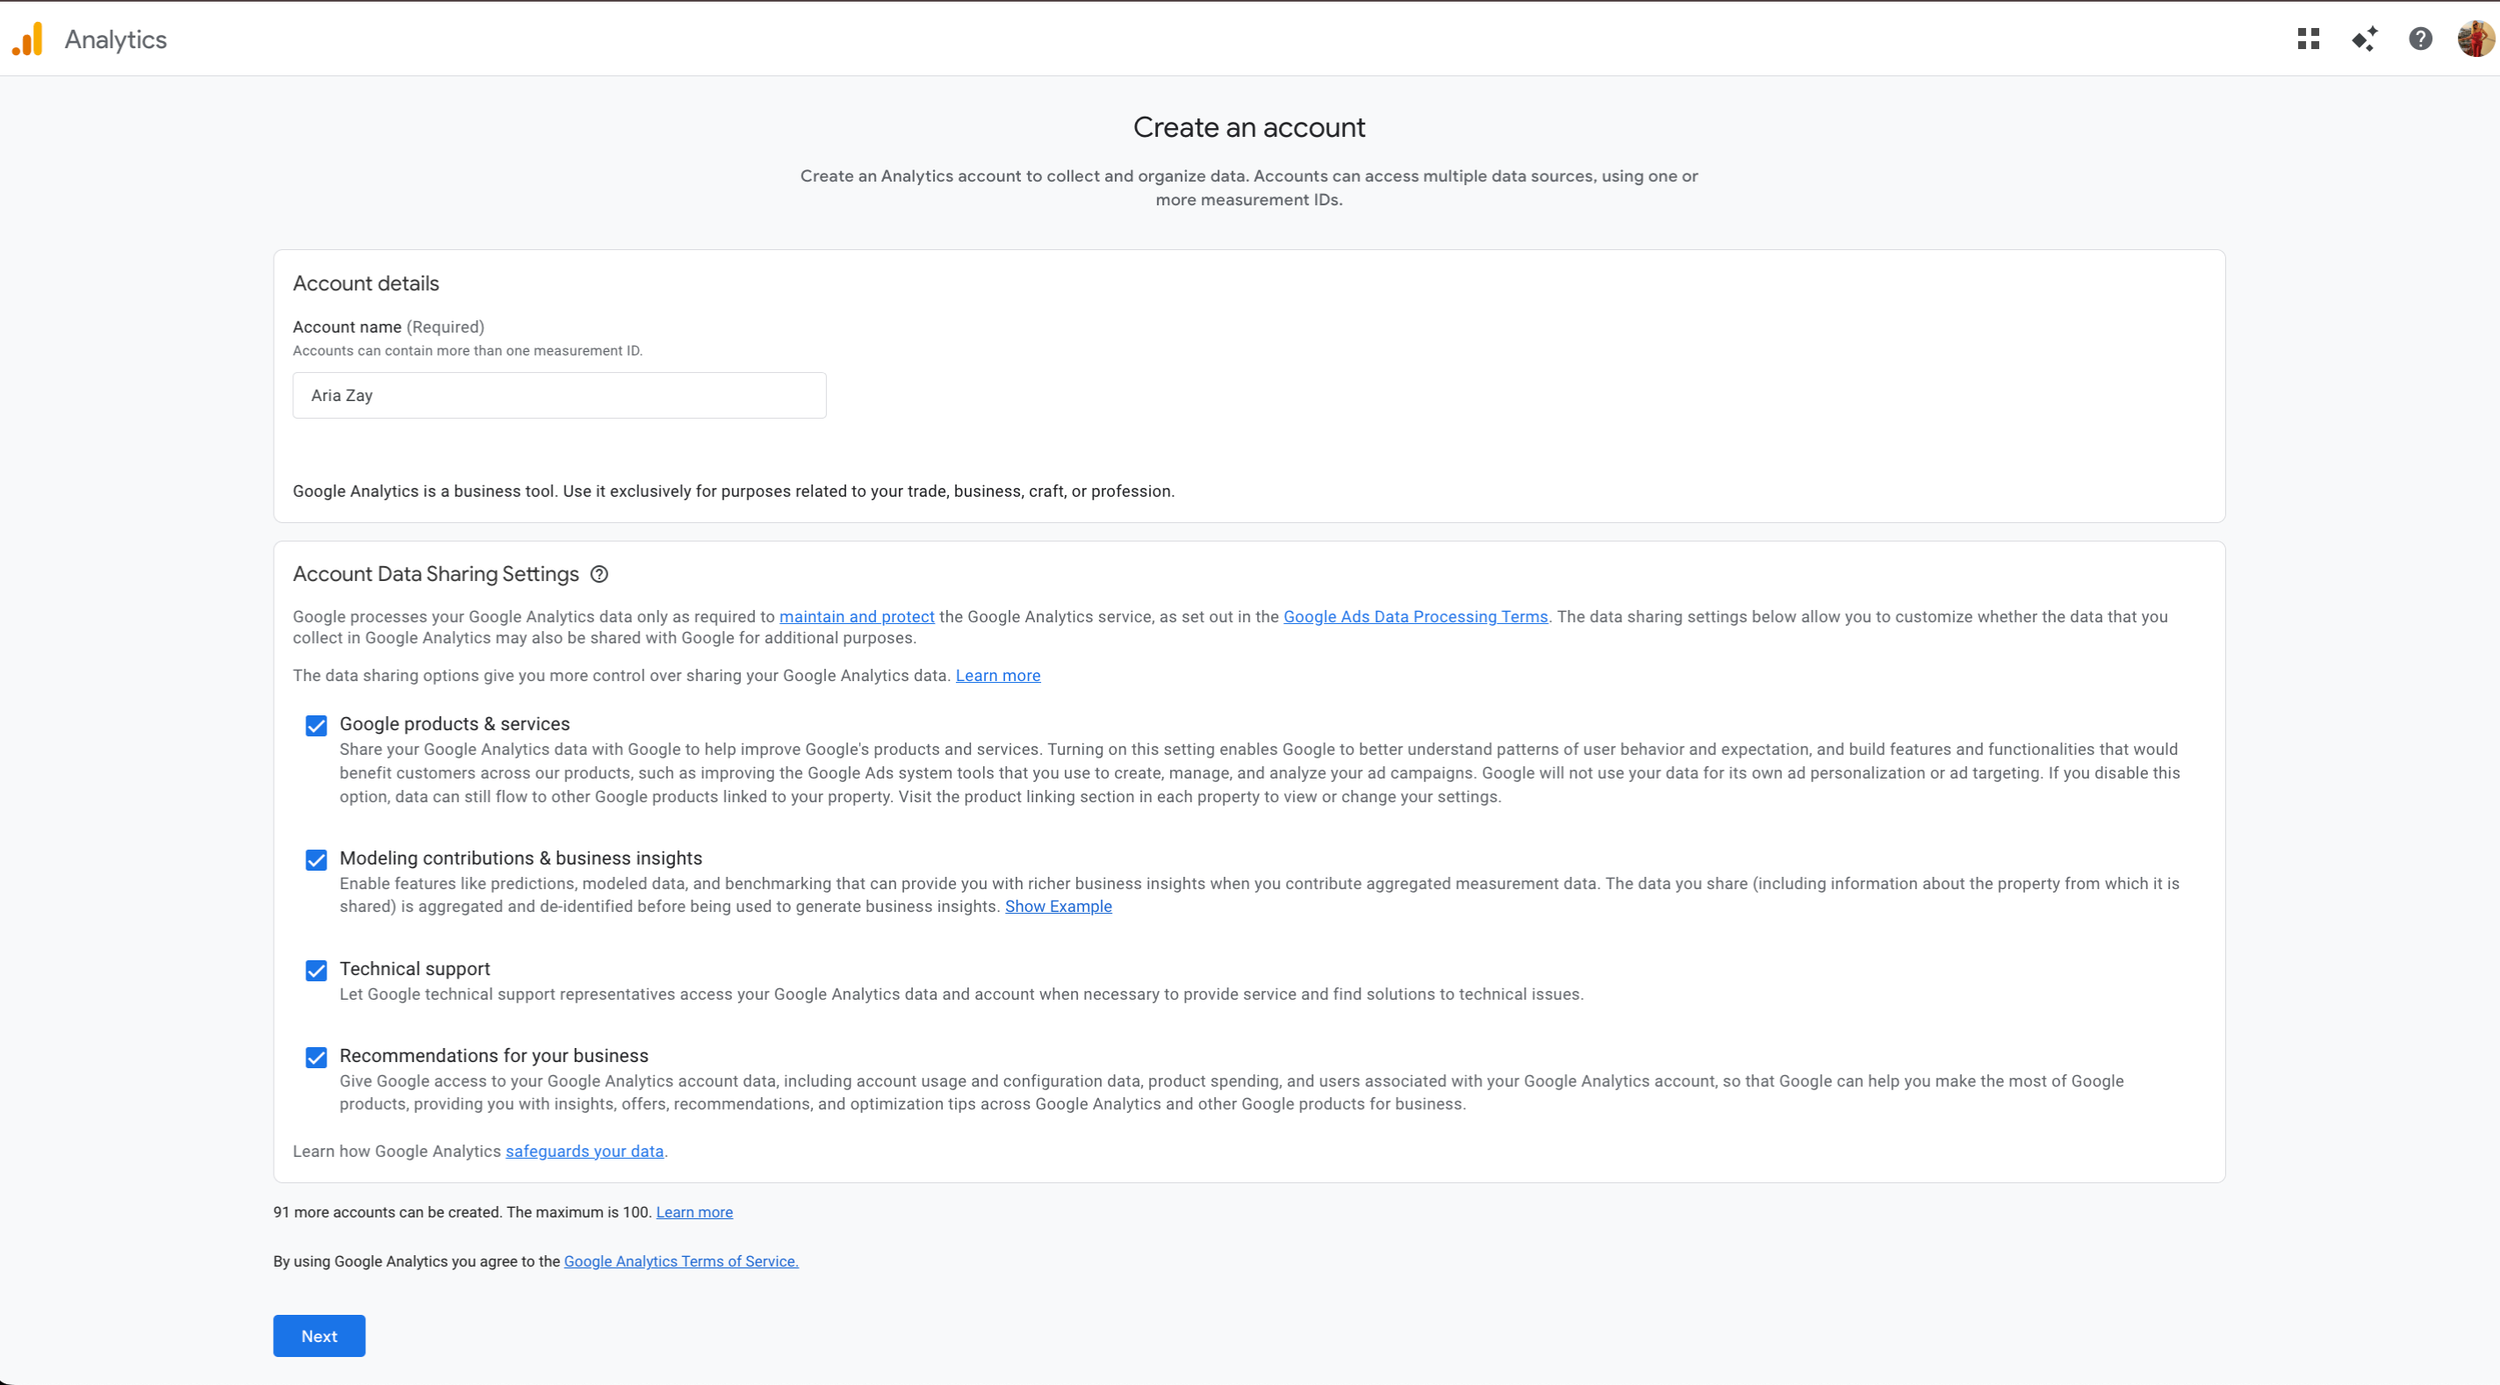
Now, if you don’t already have a GA4 account, you need to make one. I already have multiple accounts, so my pages are going to look a little different, but once you get into the Create, you’ll see this:
1. Create Your Account
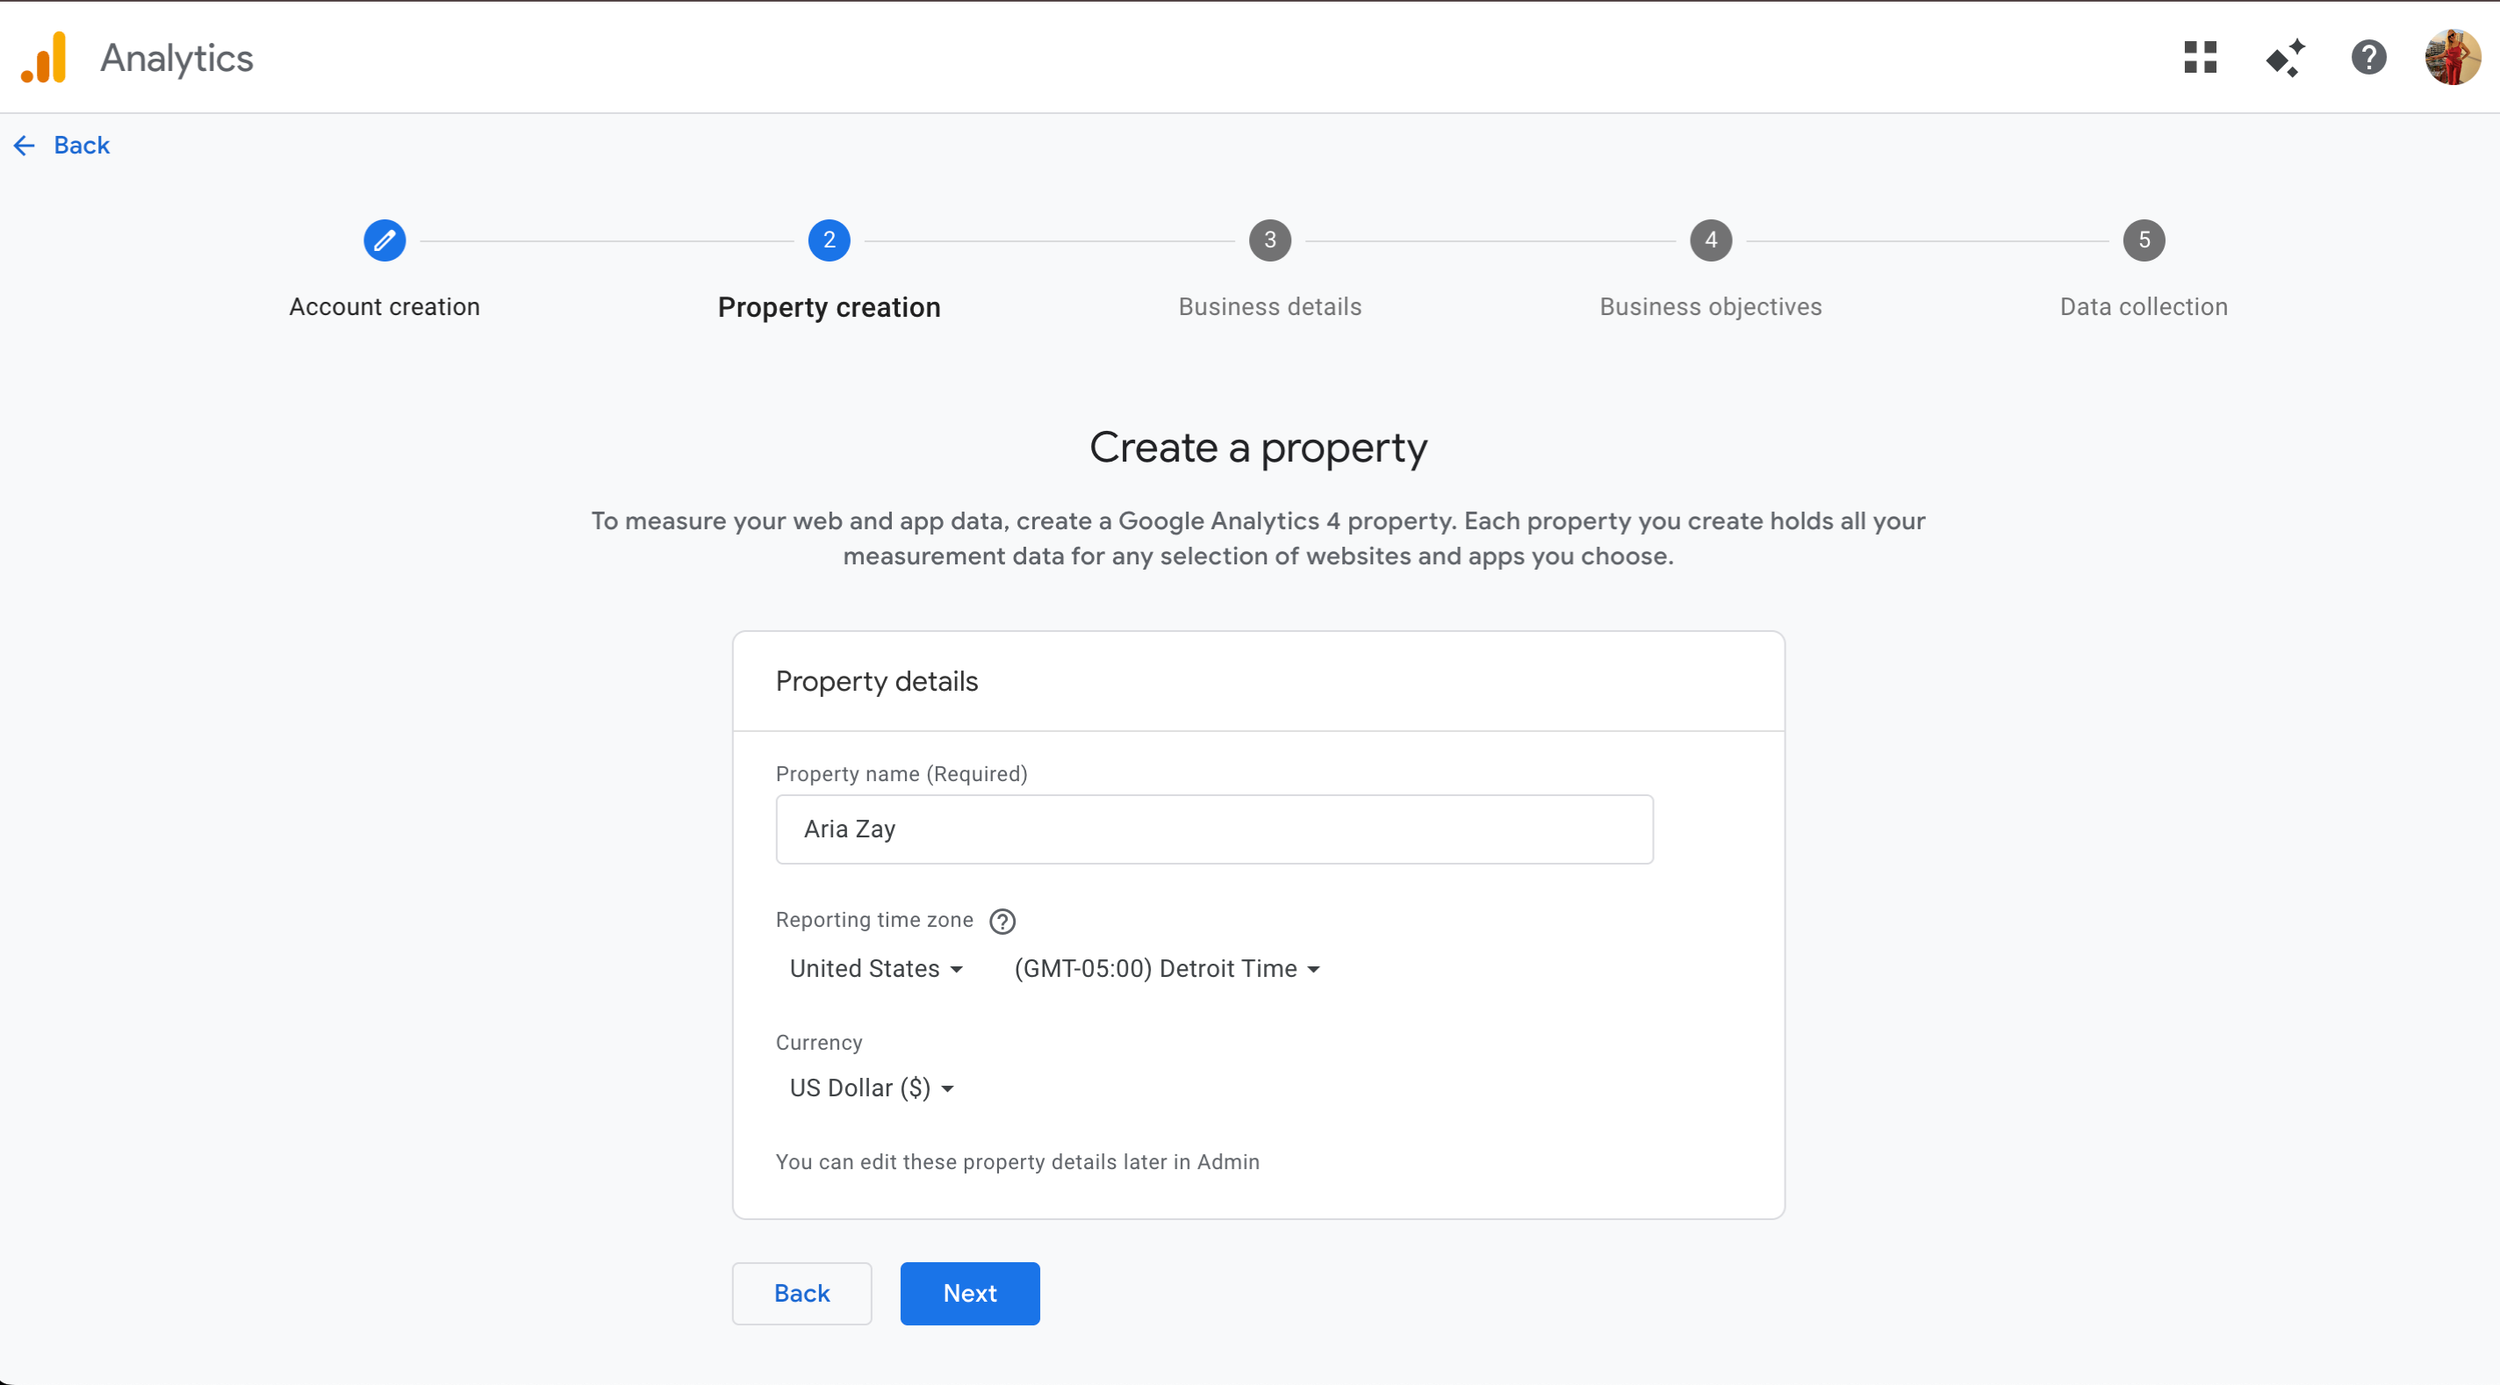
2. Create Your Property
3. Enter your Business Details

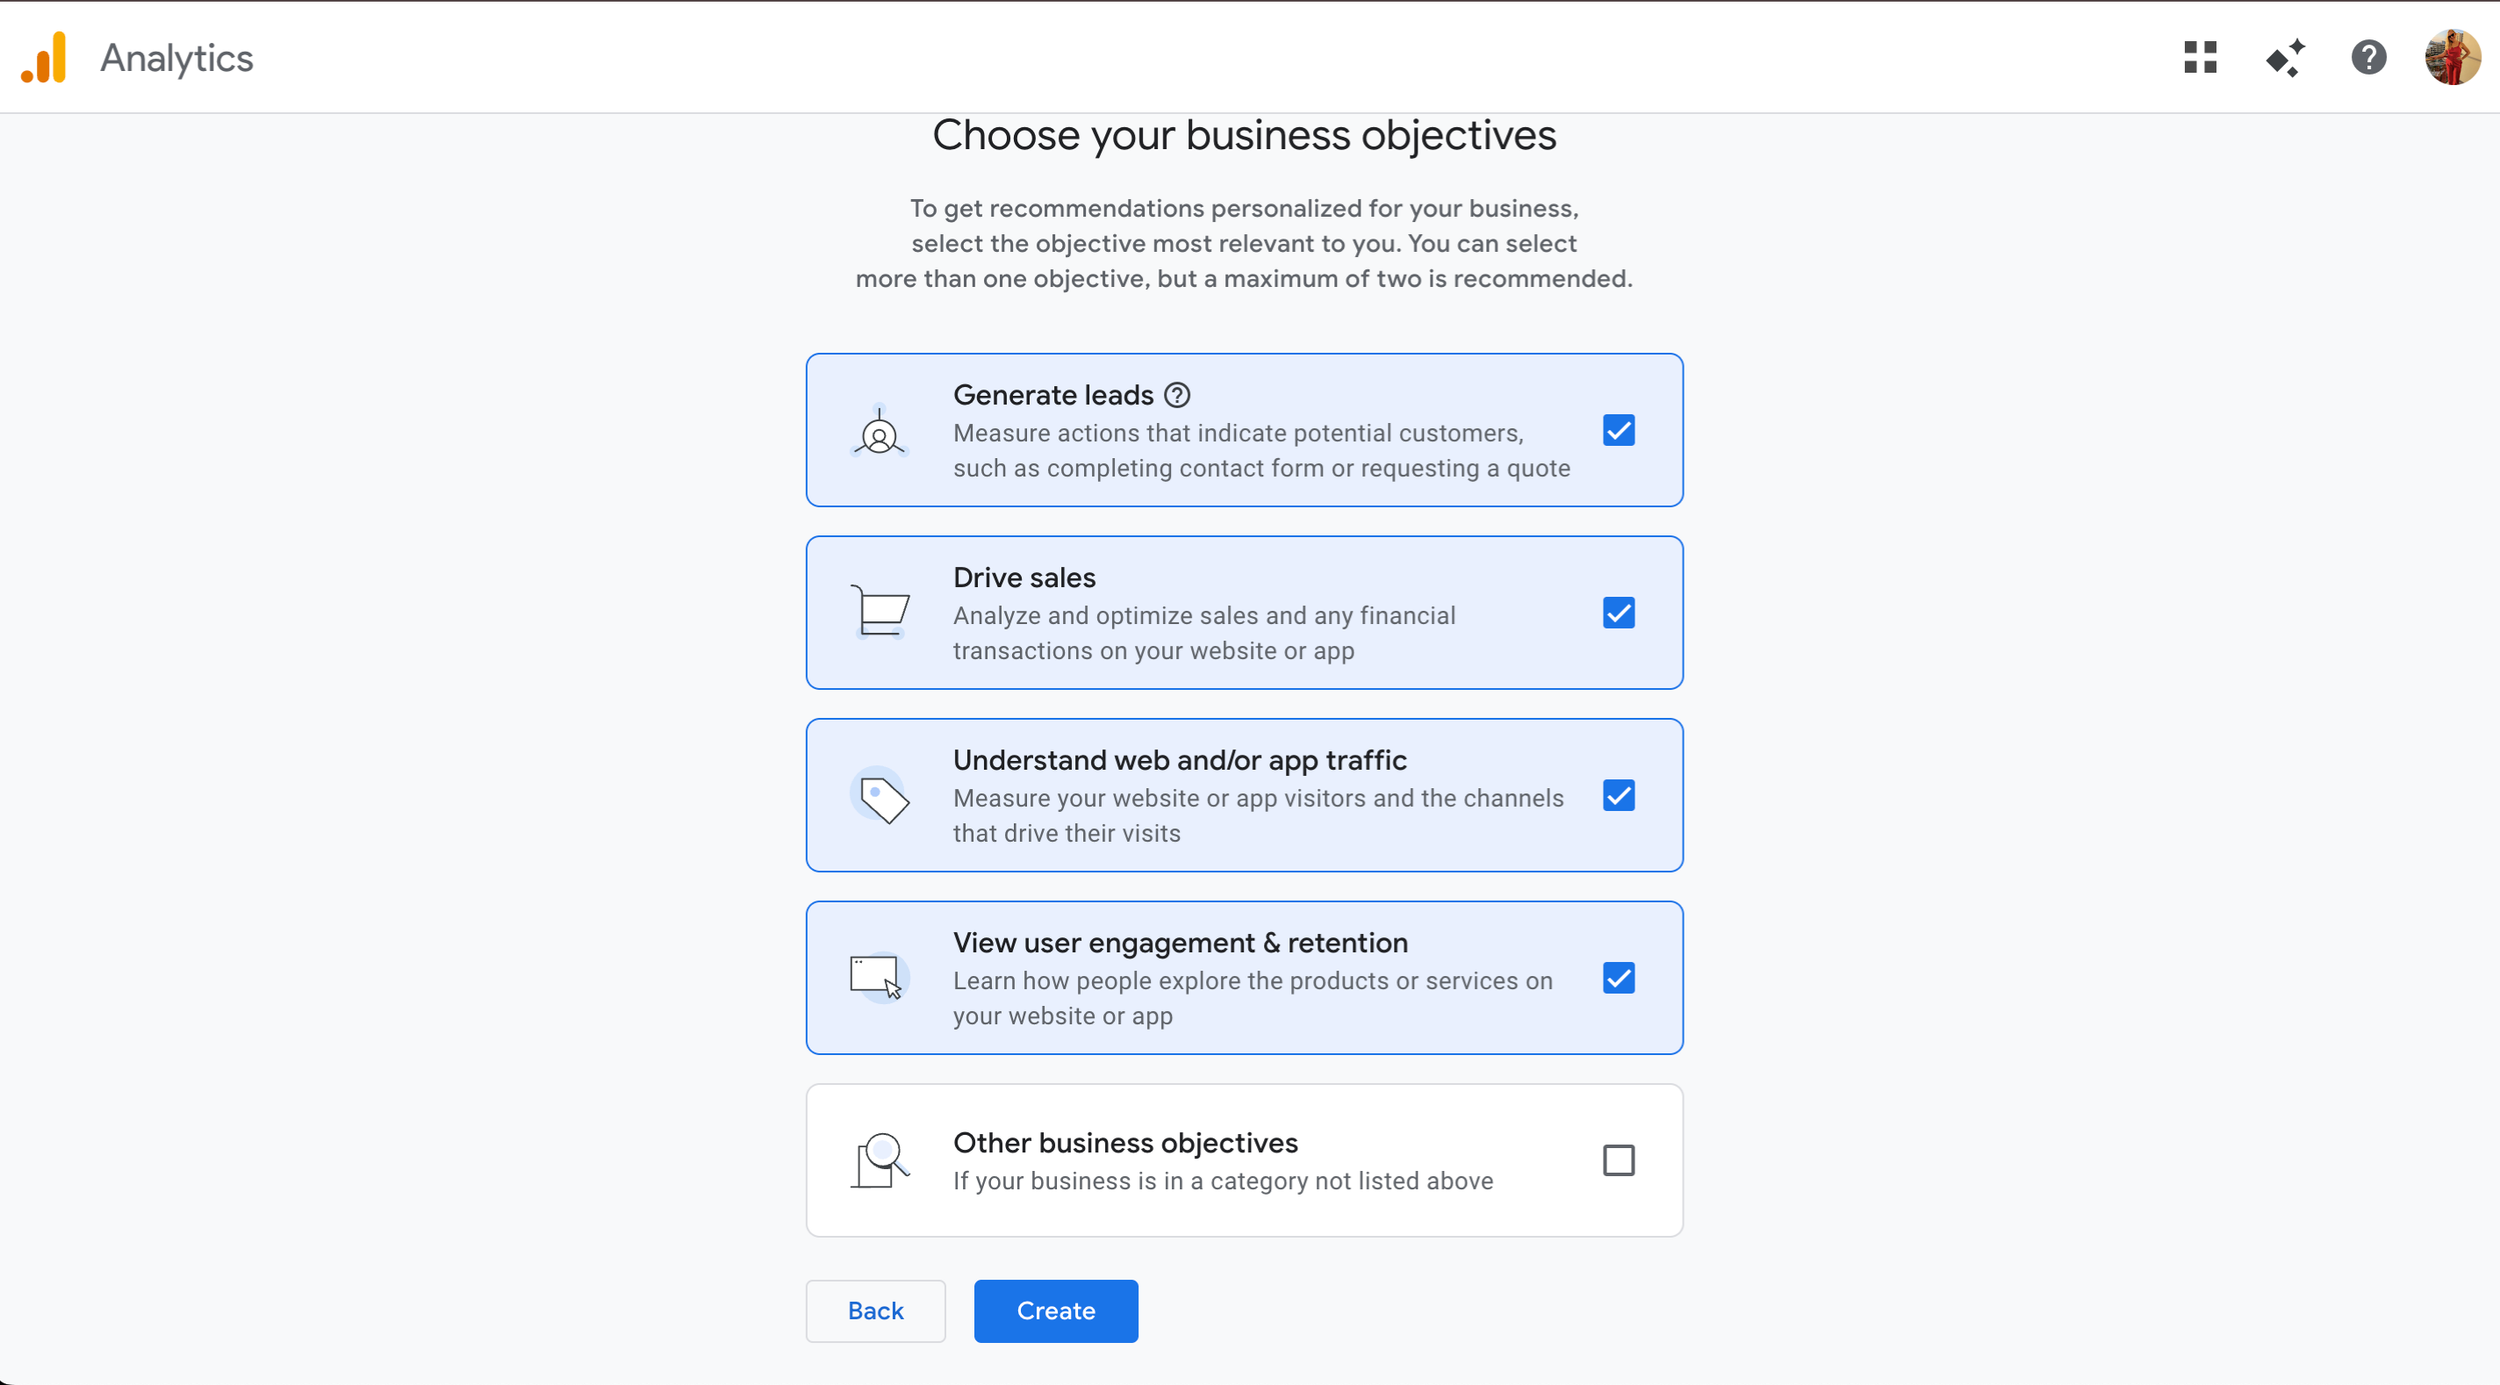
4. Enter Your Business Objectives
5. Accept The Terms
There are two to accept, so be sure to scroll inside the popup otherwise the I Accept won’t work.

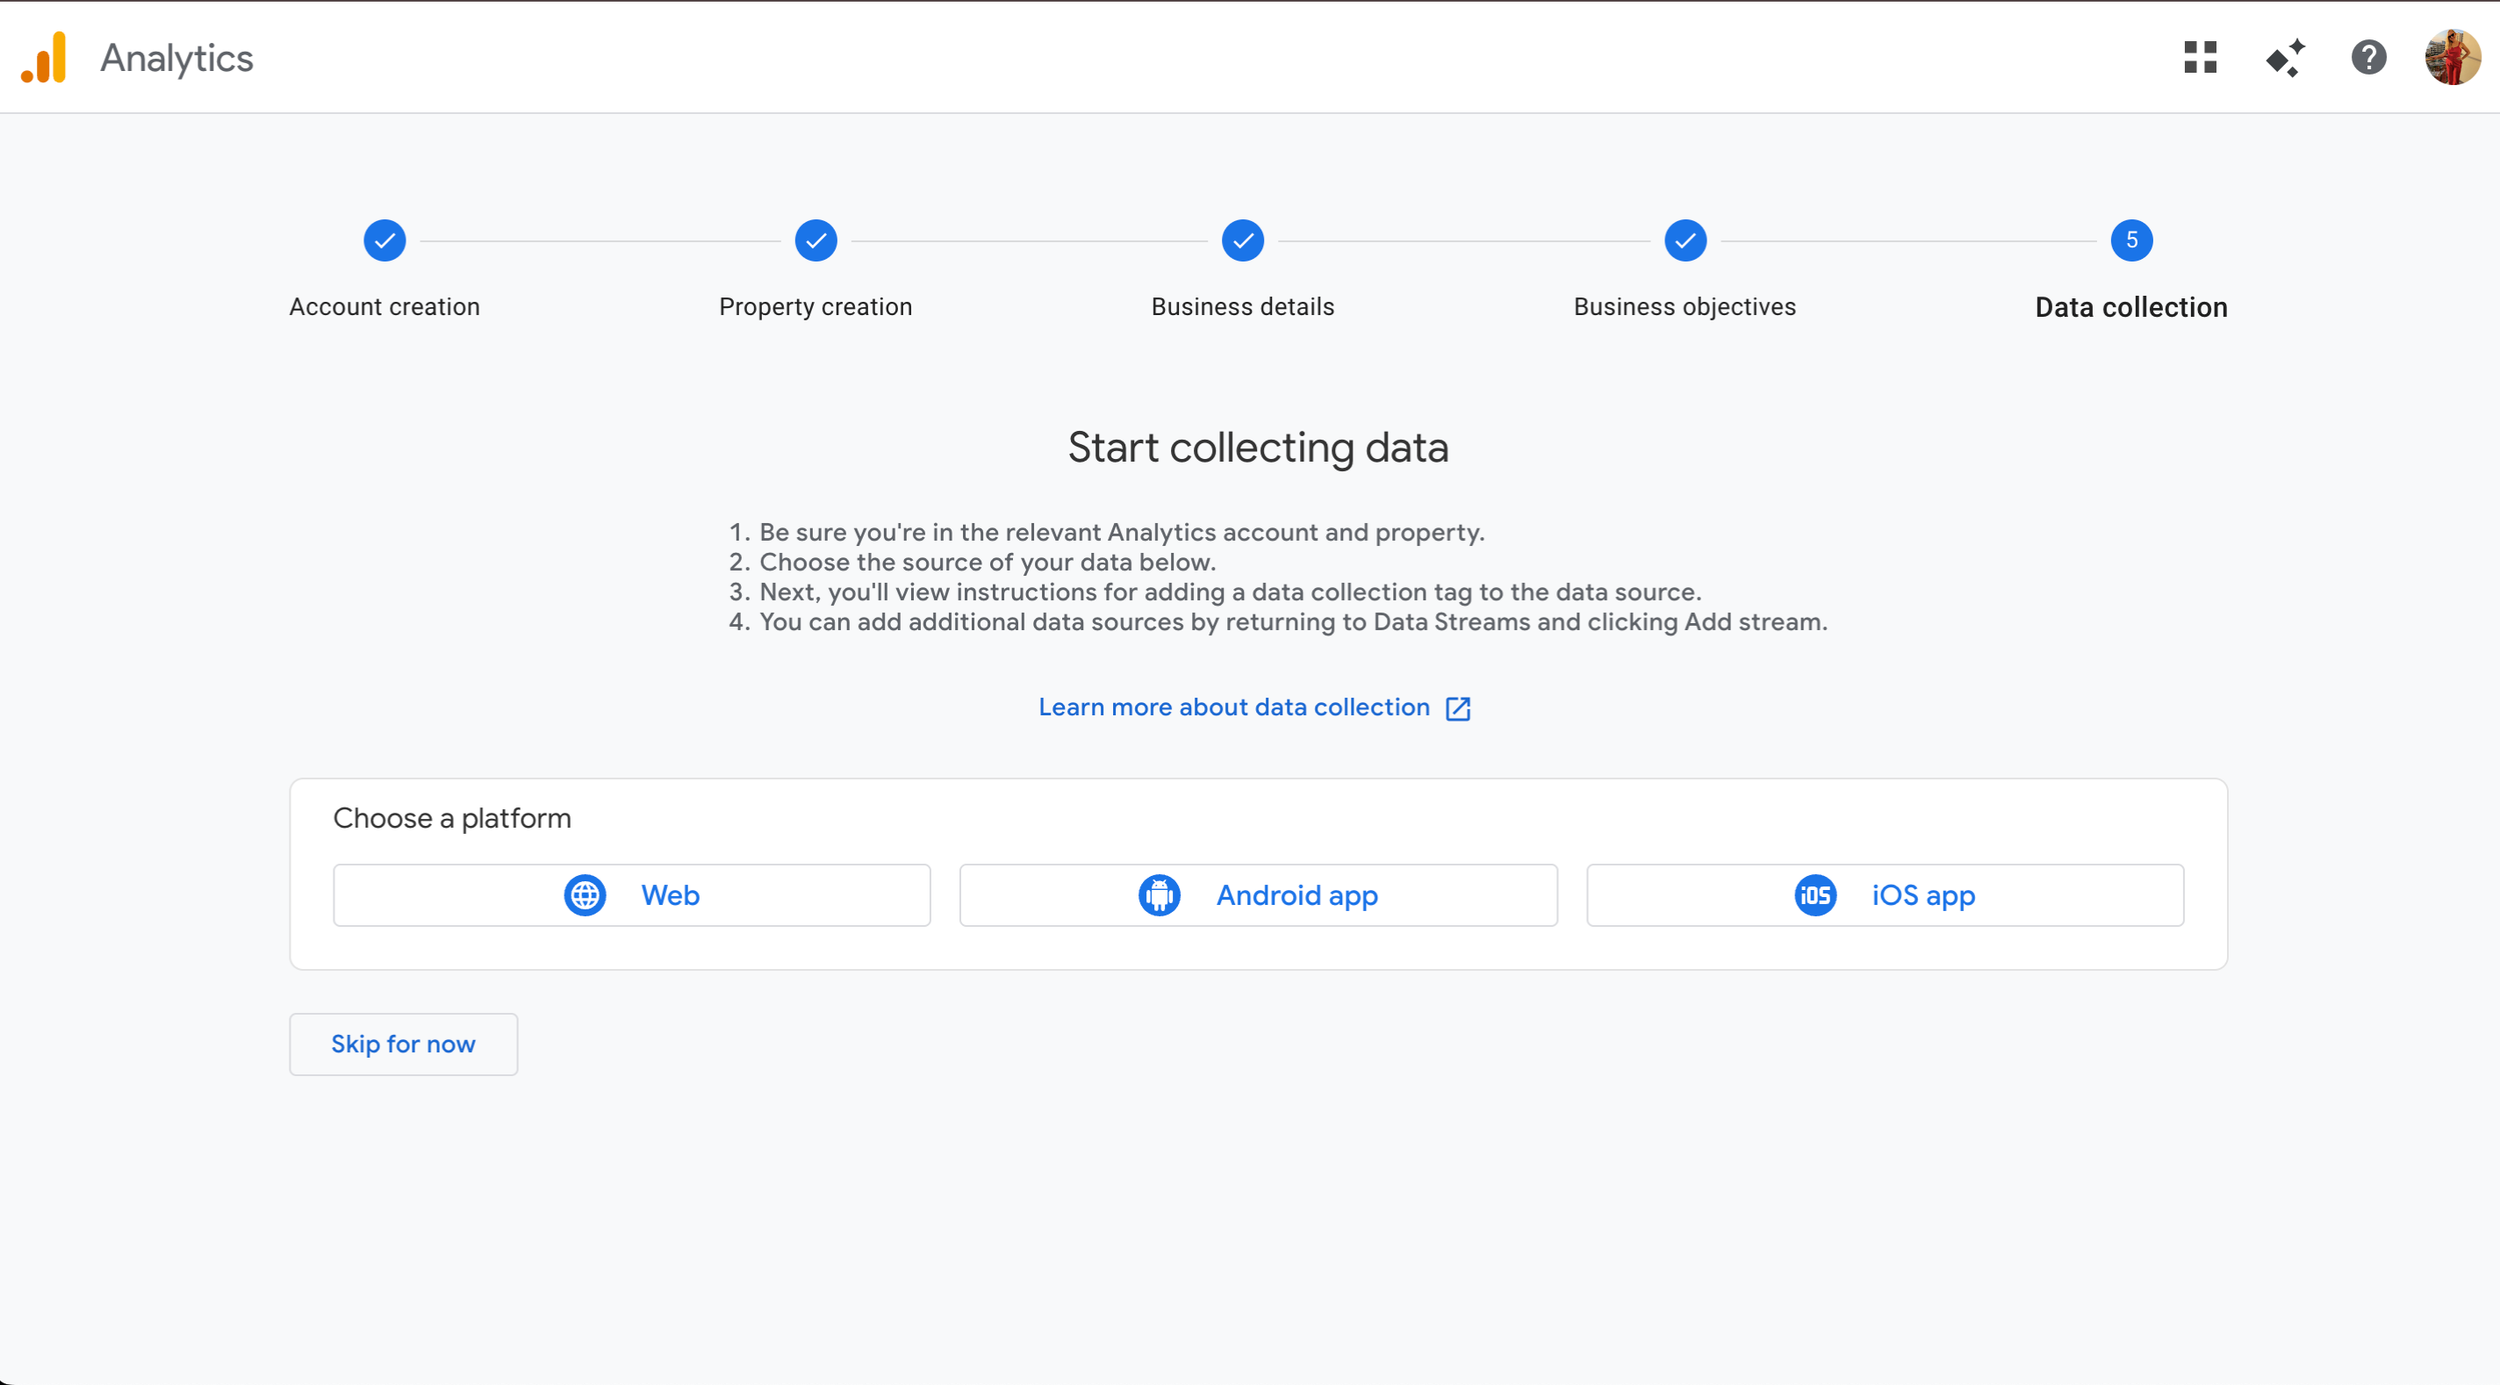
6. Start The Data Collection
You’ll want to choose Web.
7. Set Up The Data Stream
Enter your website’s URL and give it a name.
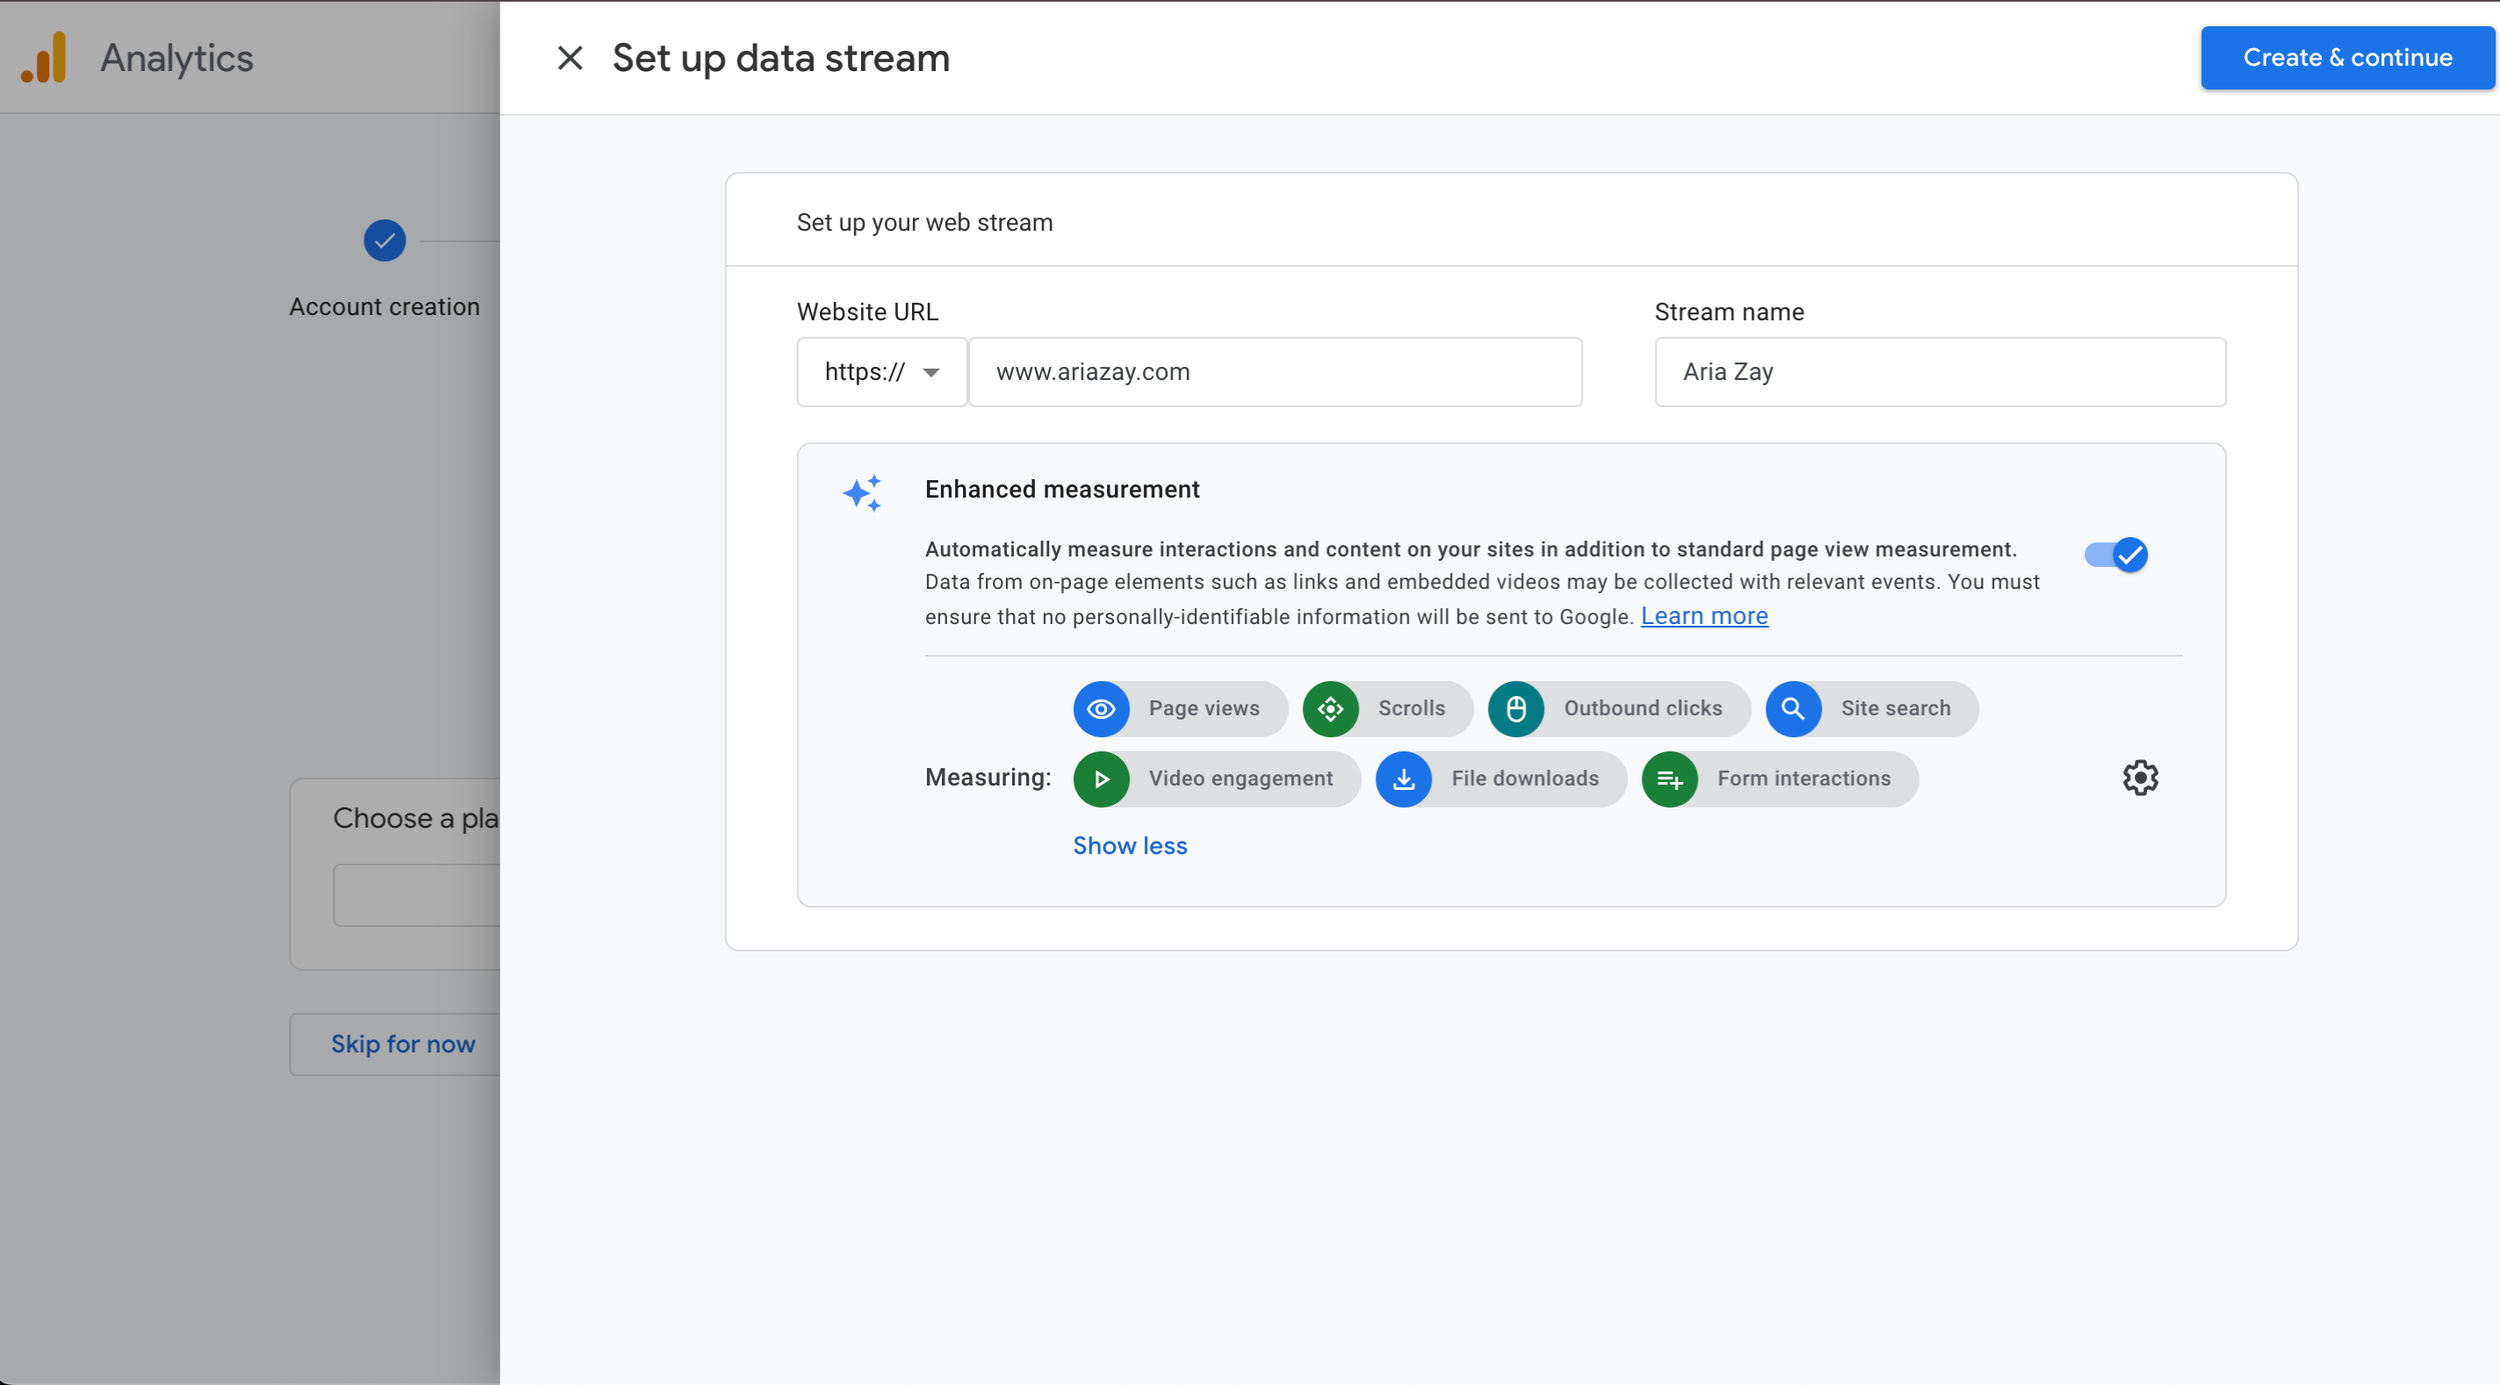
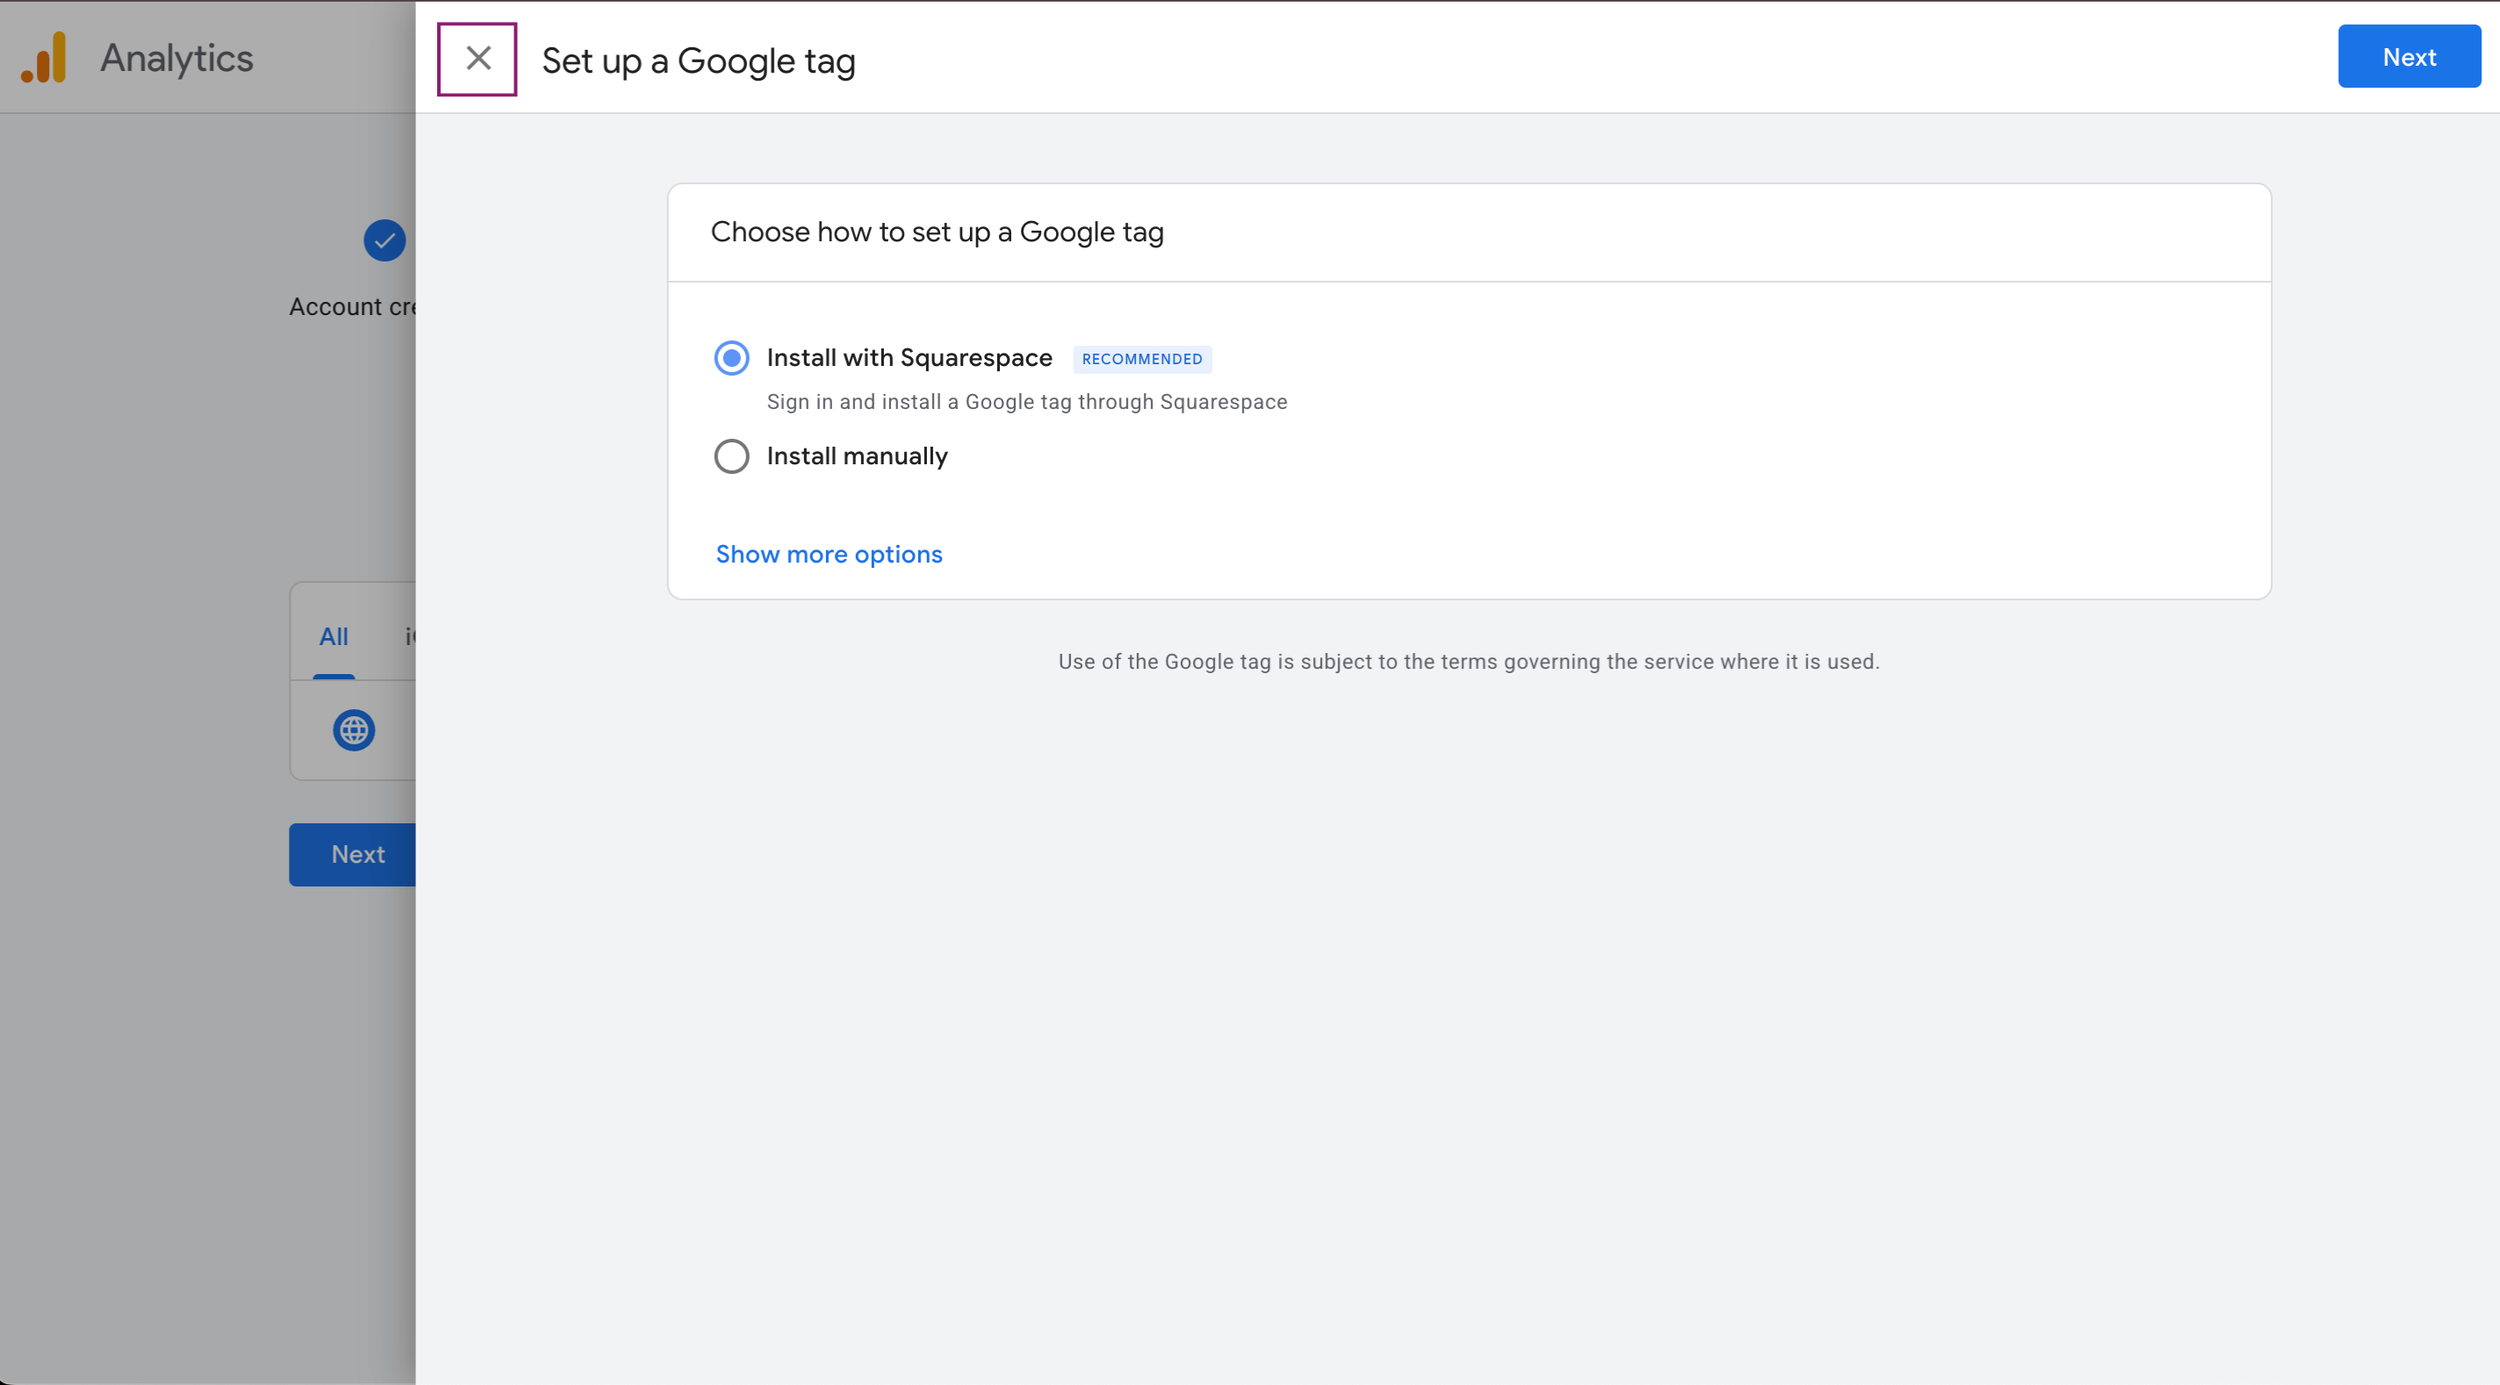
You’ll then have to Set up a Google Tag. While we do have Squarespace, this is not how we’ll be setting it up. We also aren’t going to follow the install manually, so just hit the X on this screen.
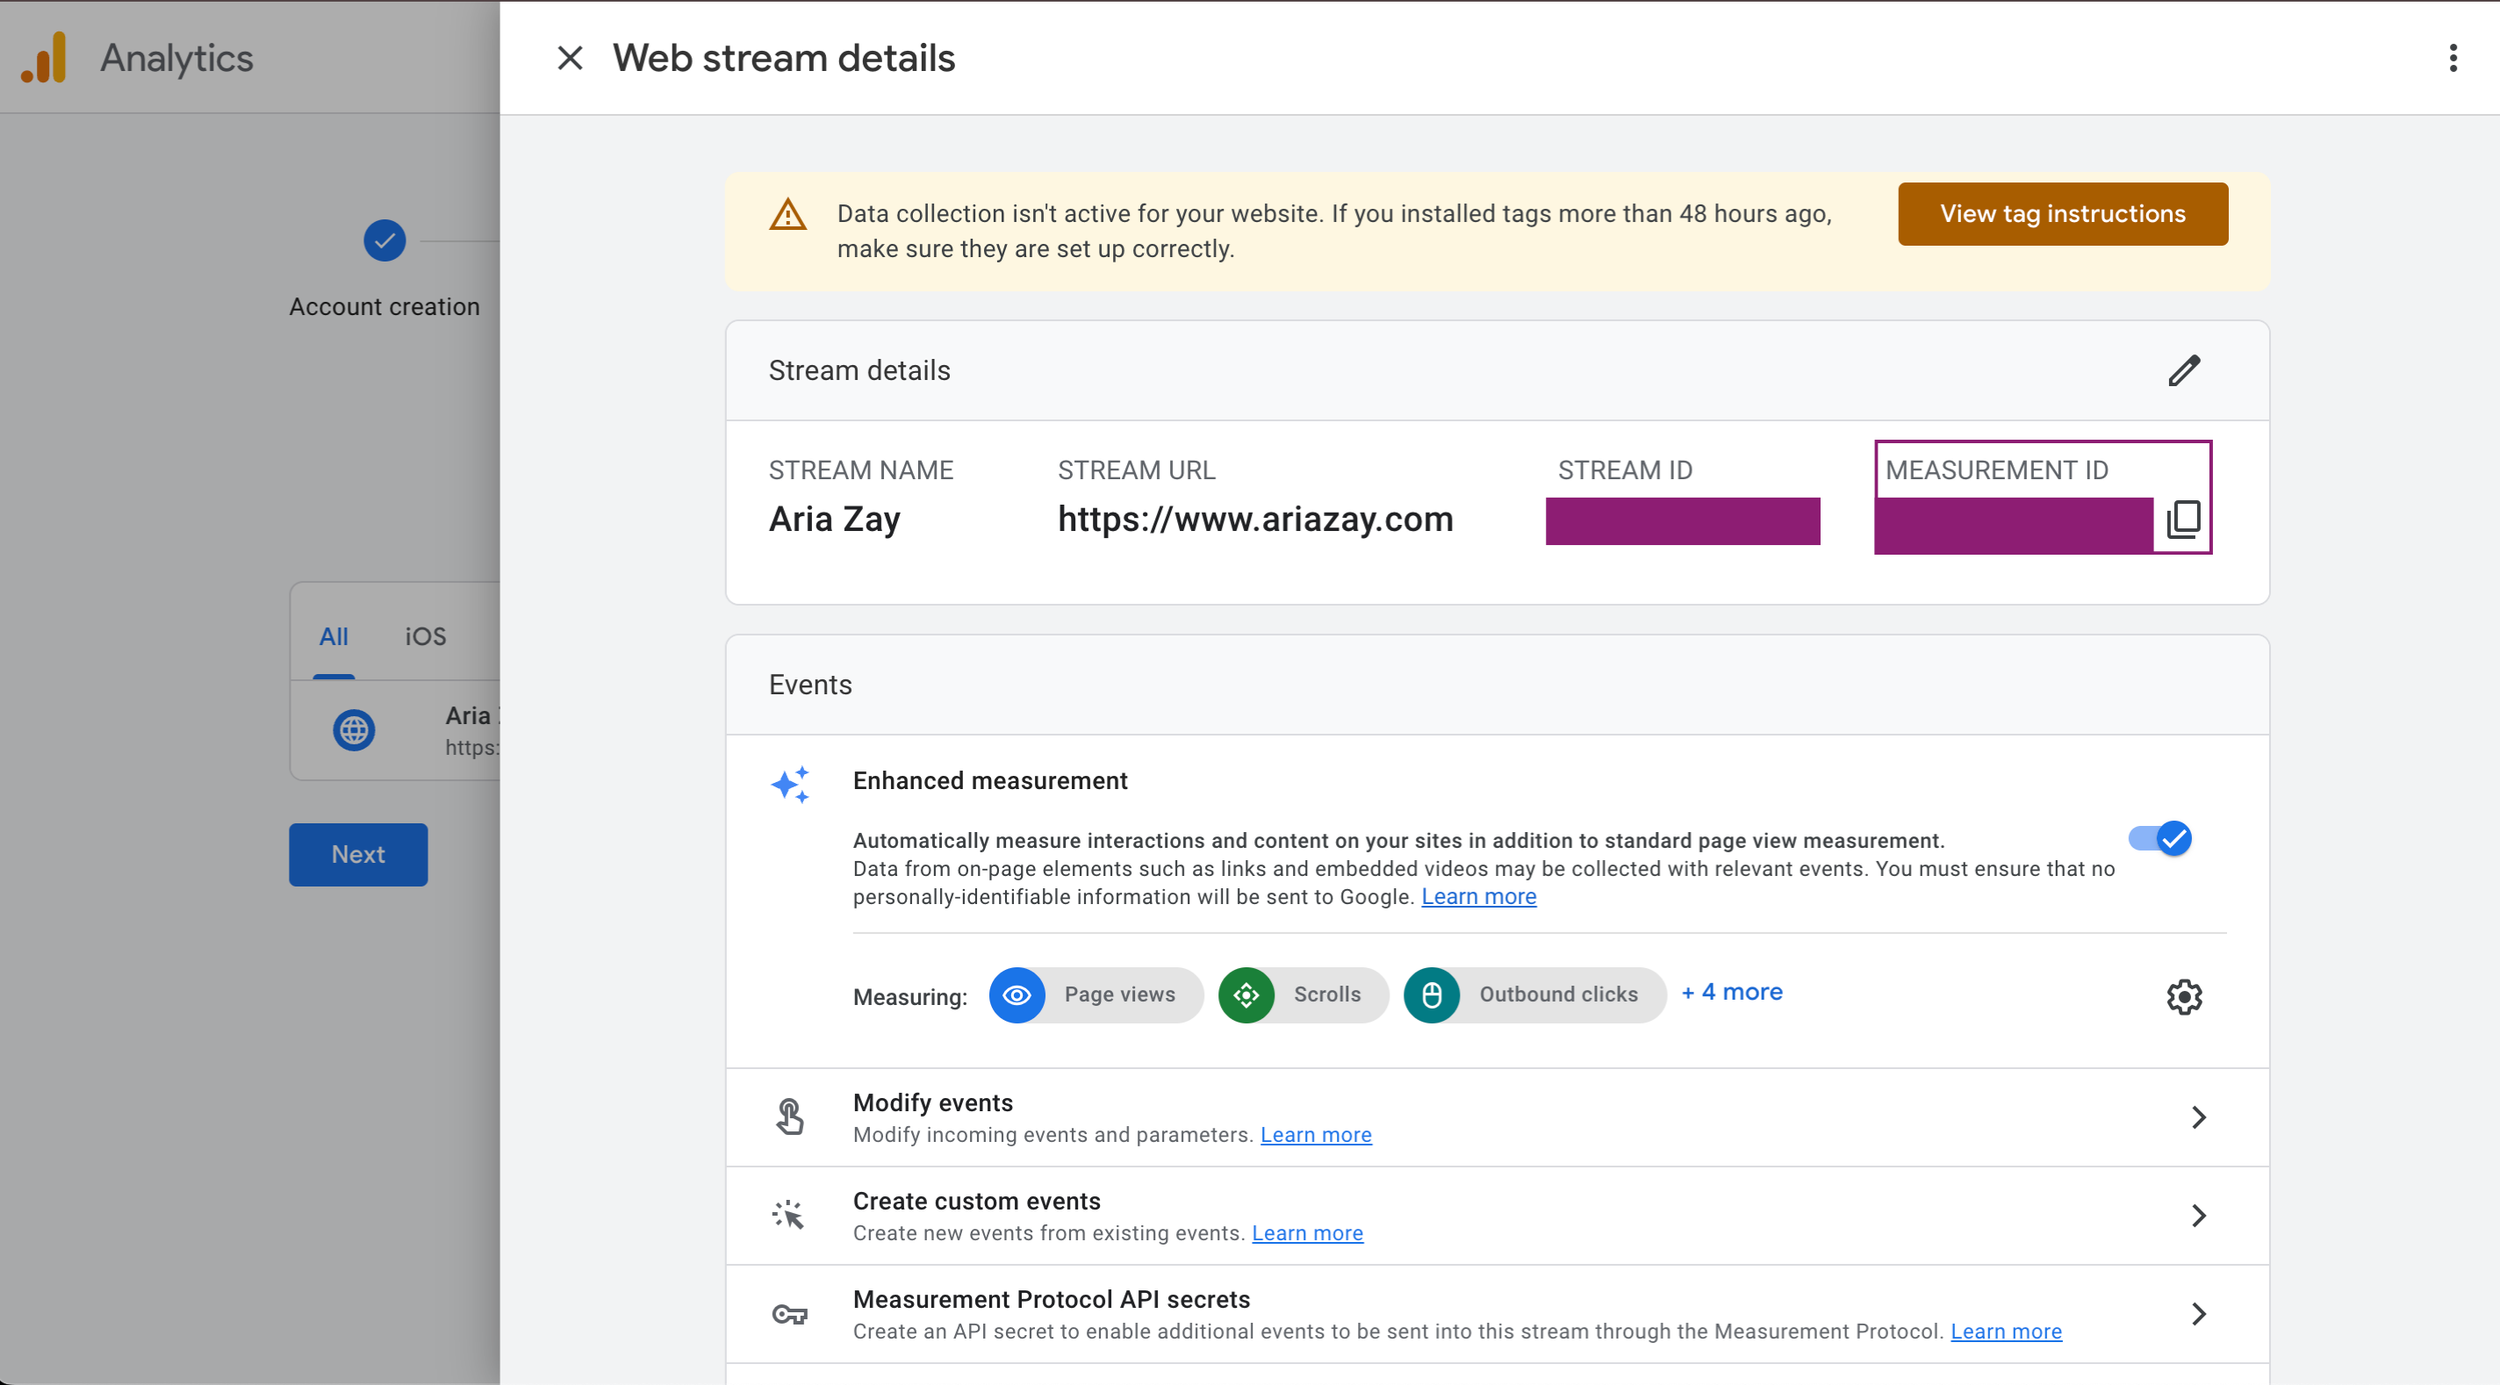
You’ll now get the Web Stream Details page, and you’ll want to copy the Measurement ID.
Go Back to Google Tag Manager
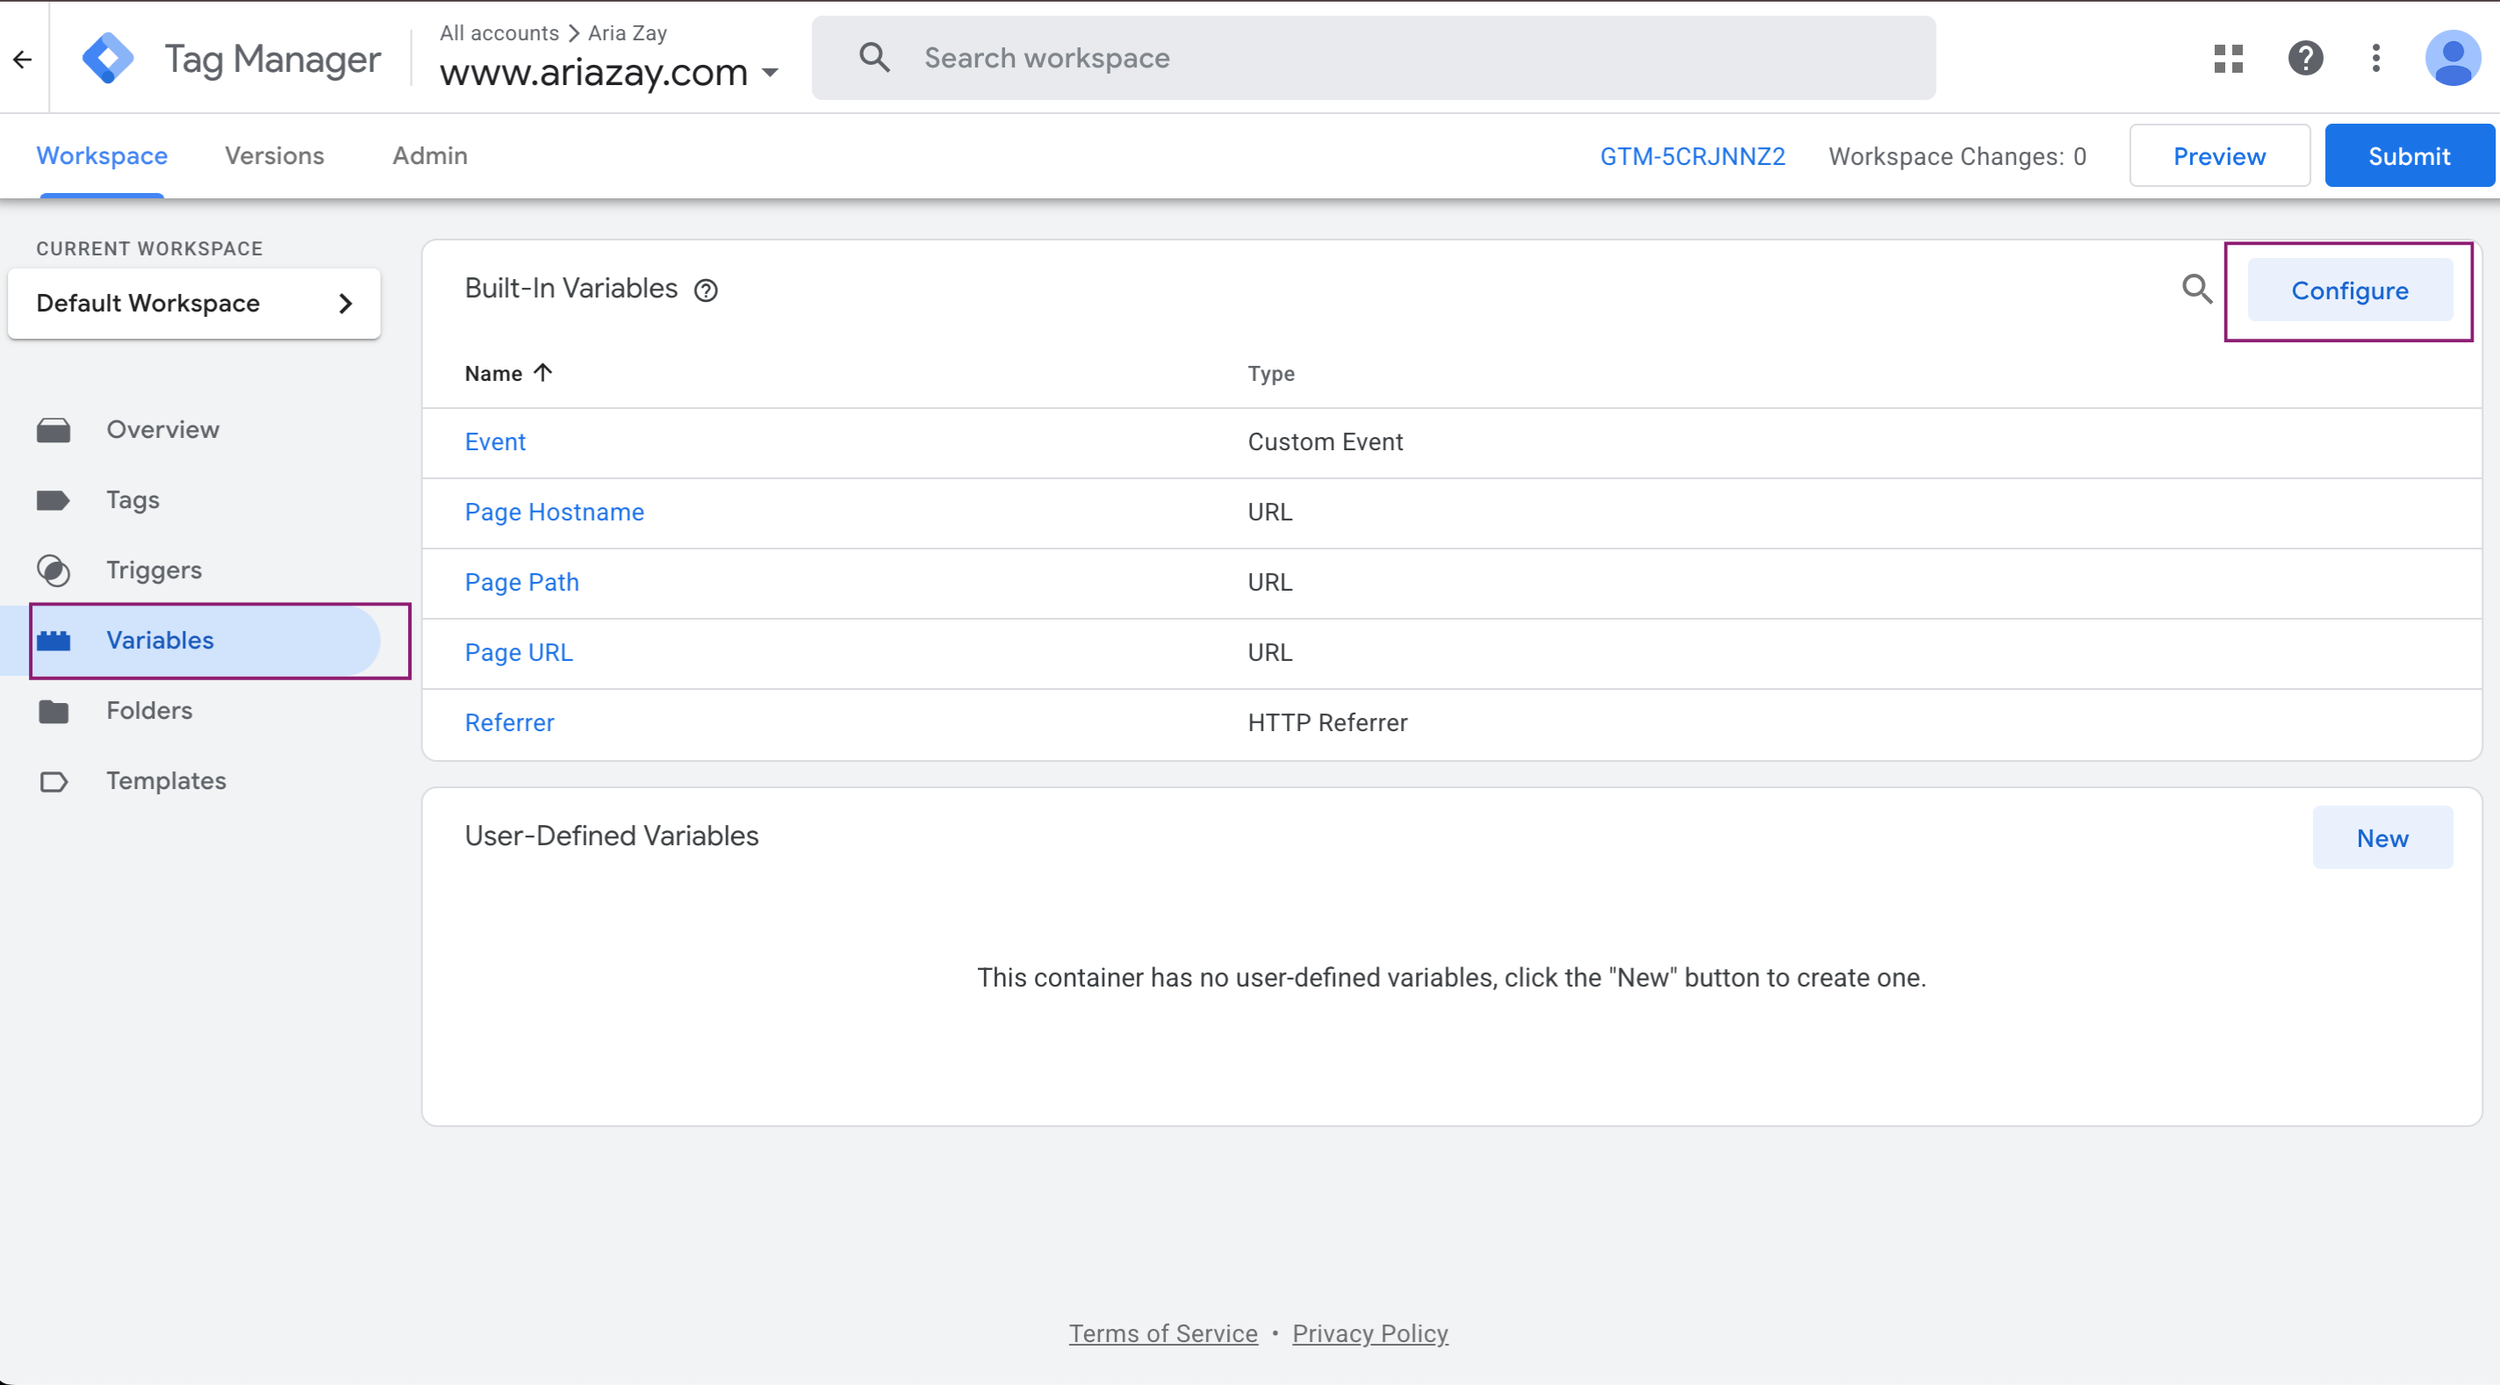
We’re now going to enable all variables. So, in the Workspace, choose “Variables” and then select “Configure”
Select the checkbox for every single variable.
Create GA4 Tracking Tag (Inside Google Tag Manager)
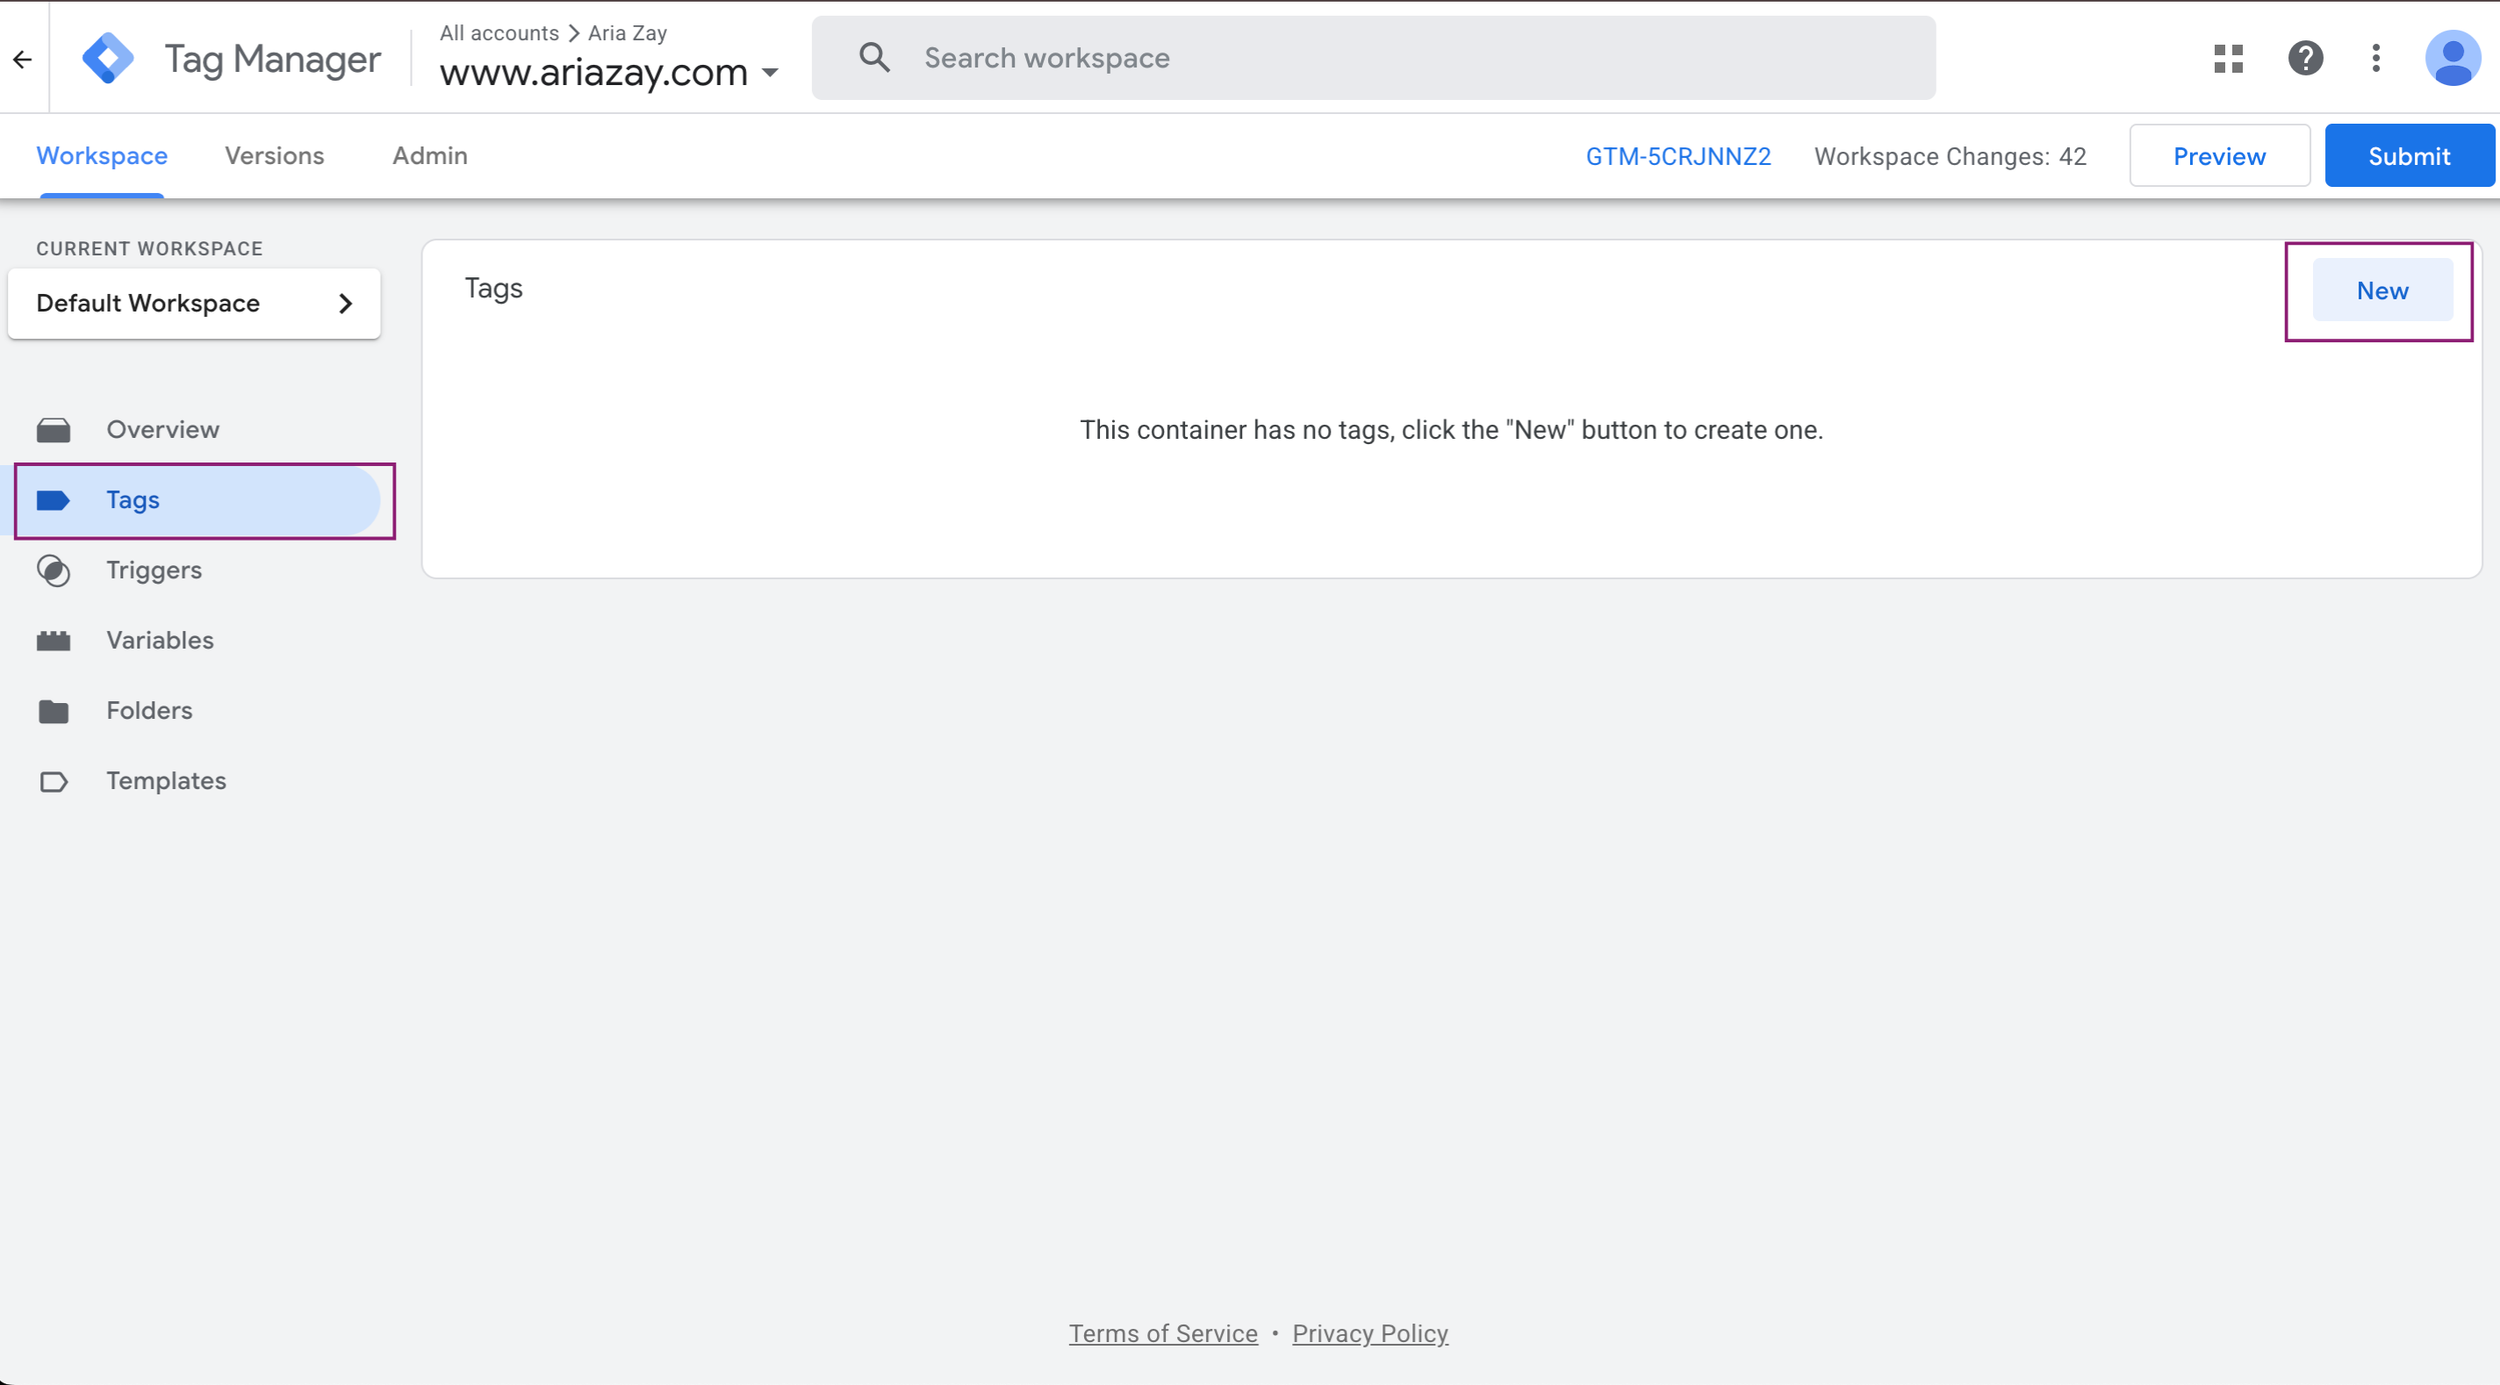
While still inside Google Tag Manager, go to Tags —> New
This is where we’re going to use our Measurement ID from Google Analytics.
Inside Tag Configuration, choose “Google Tag.”
Under Tag ID, enter your measurement ID.
Under Triggering, choose Initialization - All Pages
Save it.
Create GA4 Success Element (Still Inside Google Tag Manager
While still inside Google Tag Manager, go to: Triggers → New
Create Trigger - and choose Success Element
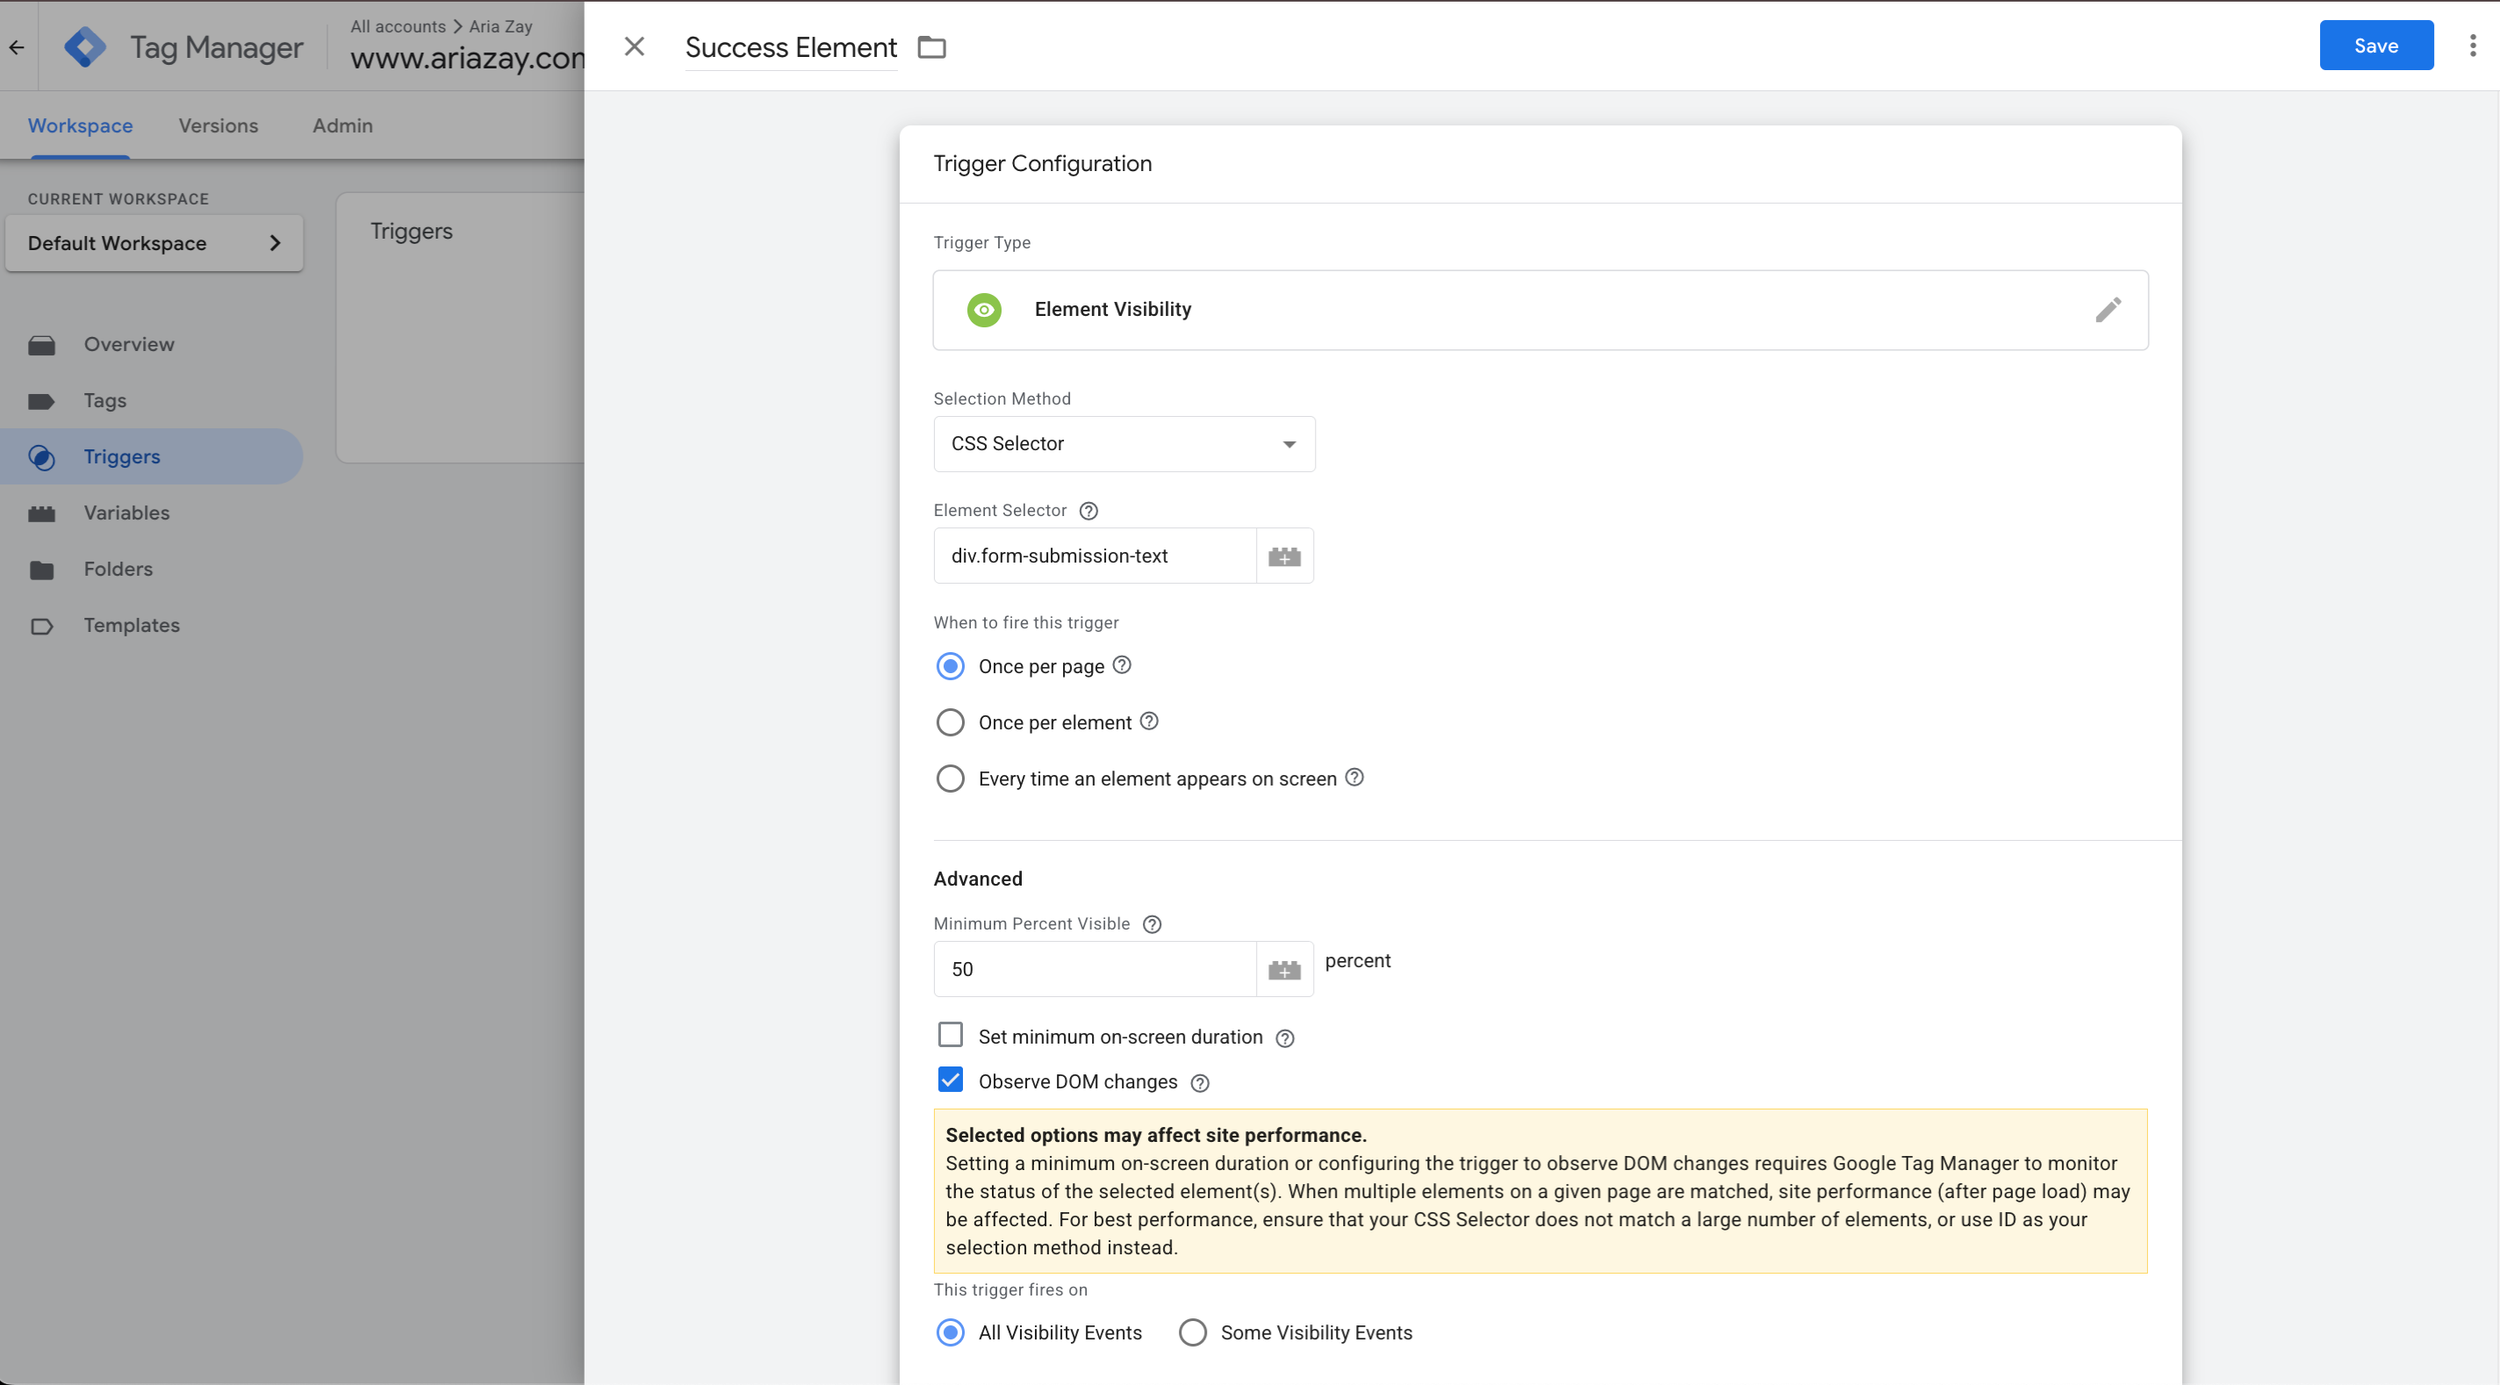
This is the information you’ll want to enter:
Trigger Type: Element Visibility
Selection Method: CSS Selector
Element Selector: div.form-submission-text
When to fire this trigger: Once per element
Advanced:
Minimum Percent Visible: 50
Select the check mark on the Observe DOM Changes
This trigger fires on: All Visibility Events
Save
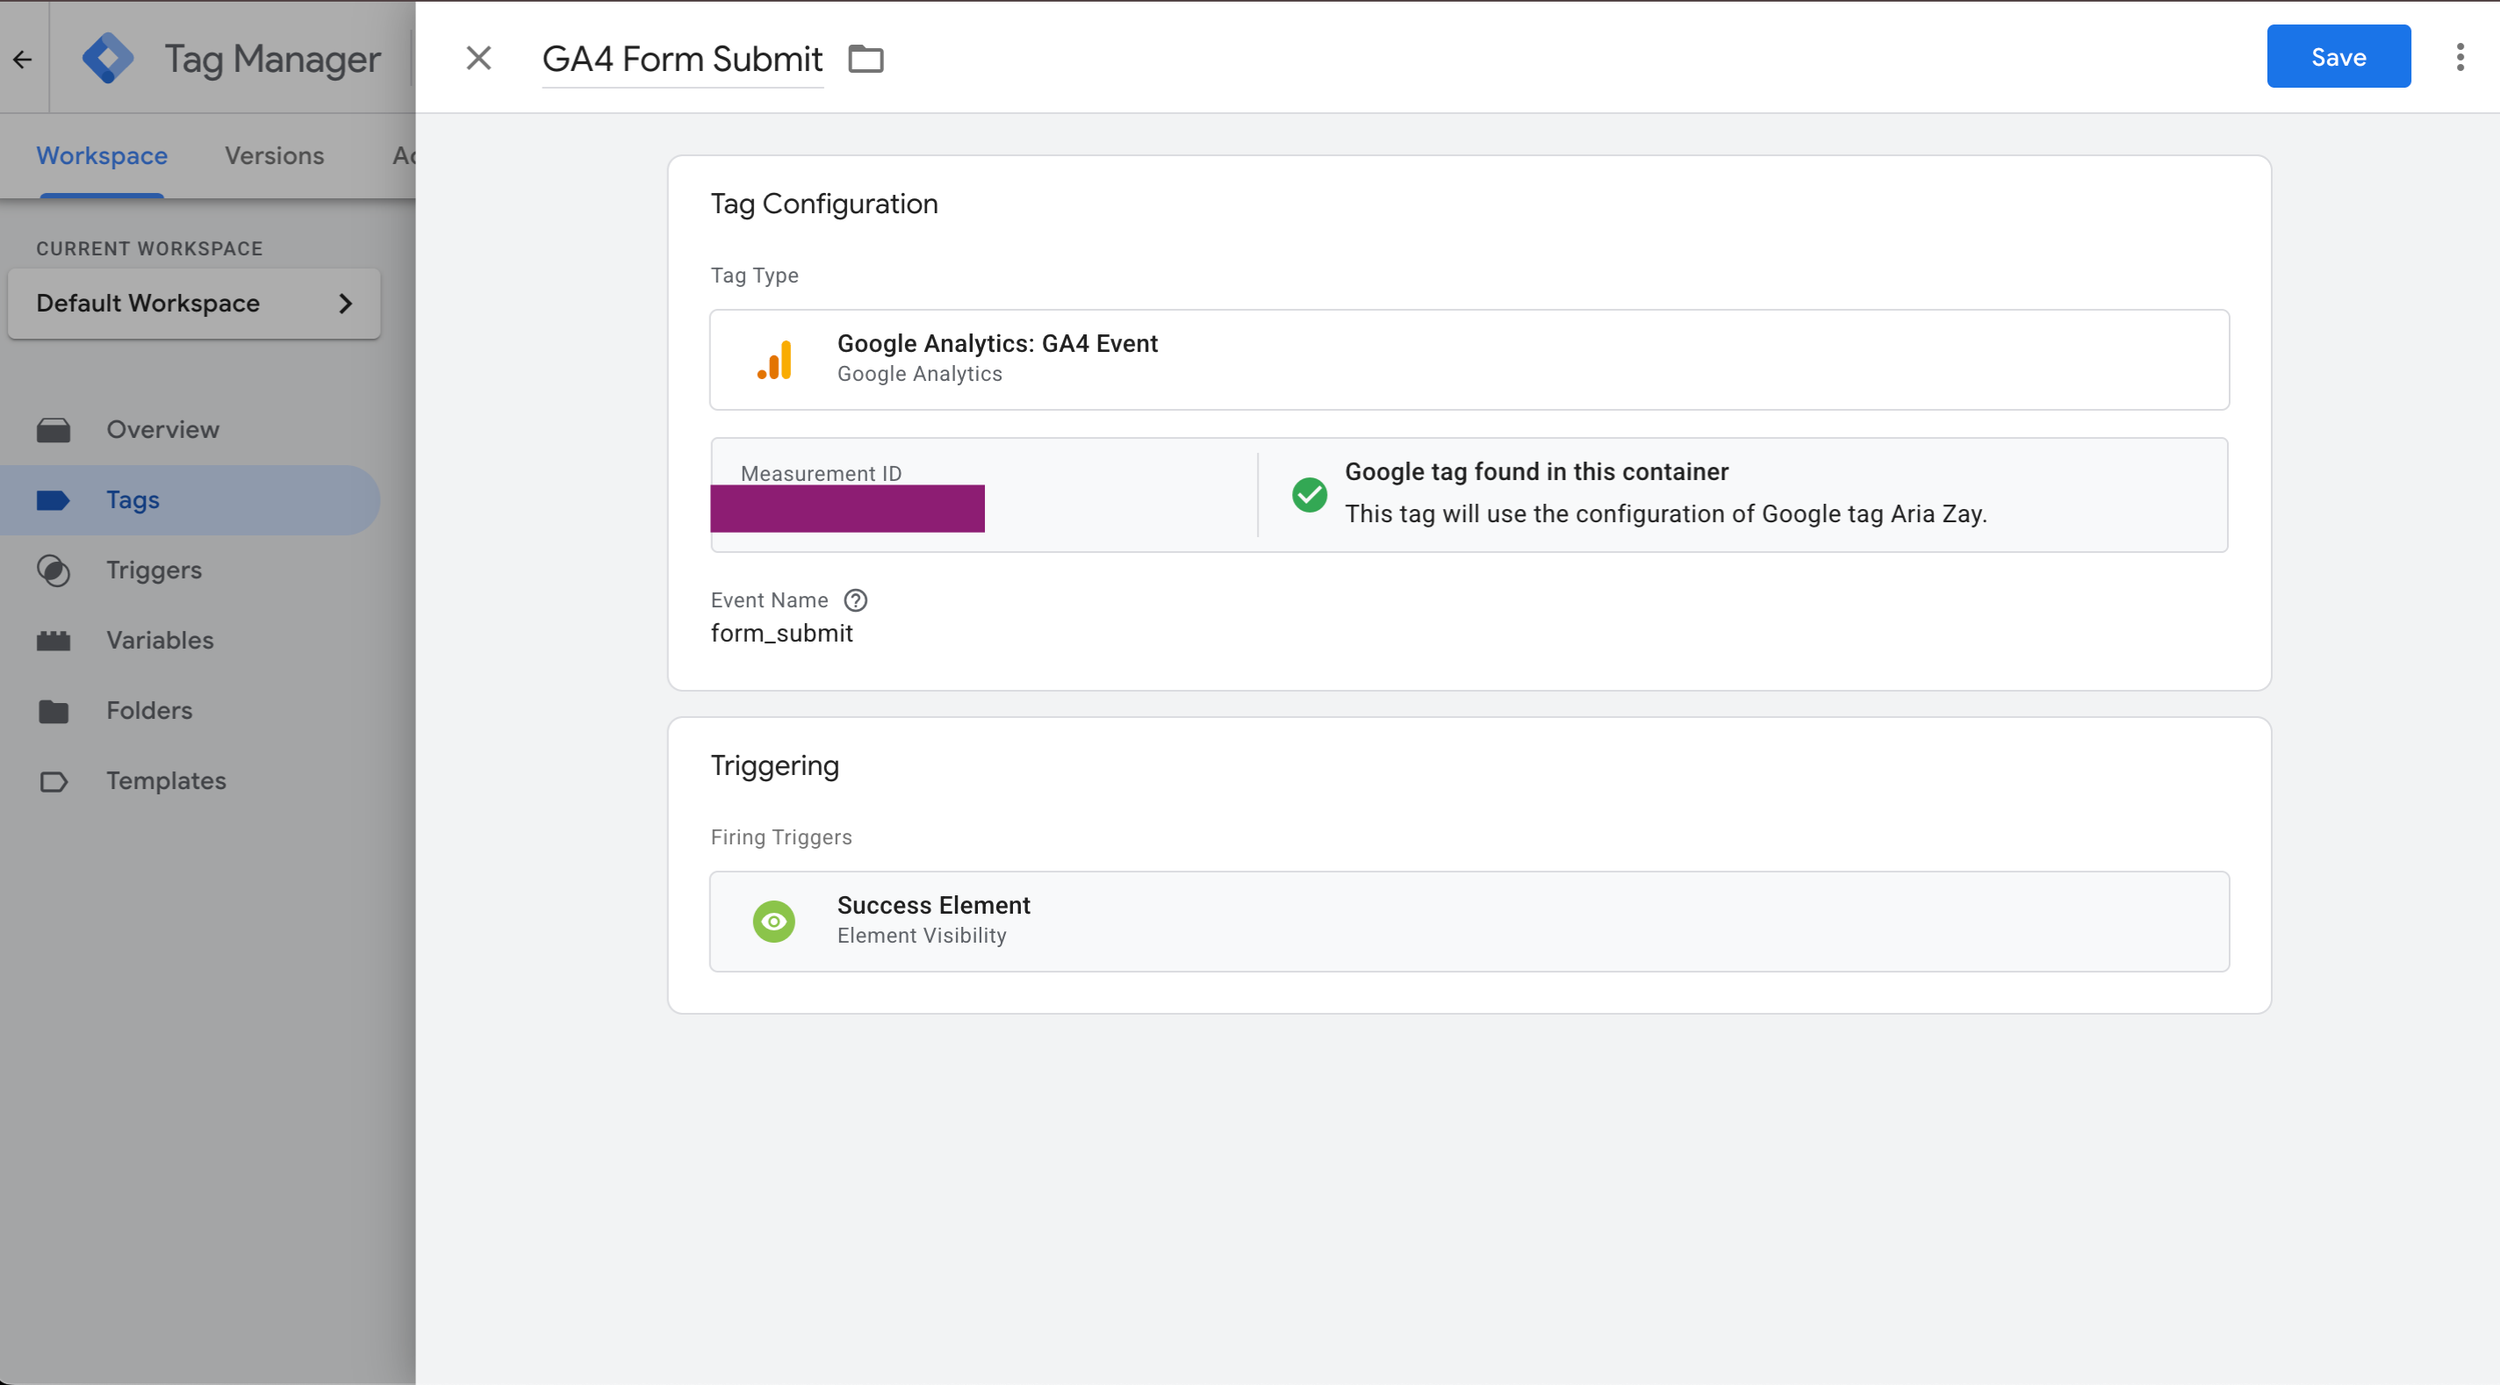
Create The GA4 Form Submit Tag (Still inside Google Tag Manager)
Now, we’ll create another tag. So, let’s head back to Tags and choose New
Name the tag “GA4 Form Submit”
This time, choose Google Analytics: GA4:Event as the Tag Type
Once again, enter your Measurement ID
Then, under Event Name, name it: form_submit
It’s VERY important you name it exactly that.
You don’t need to change the Event Parameters, User Properties, More Settings, or Advanced Settings
Triggering - Use the ‘Success Element’ we created
Save
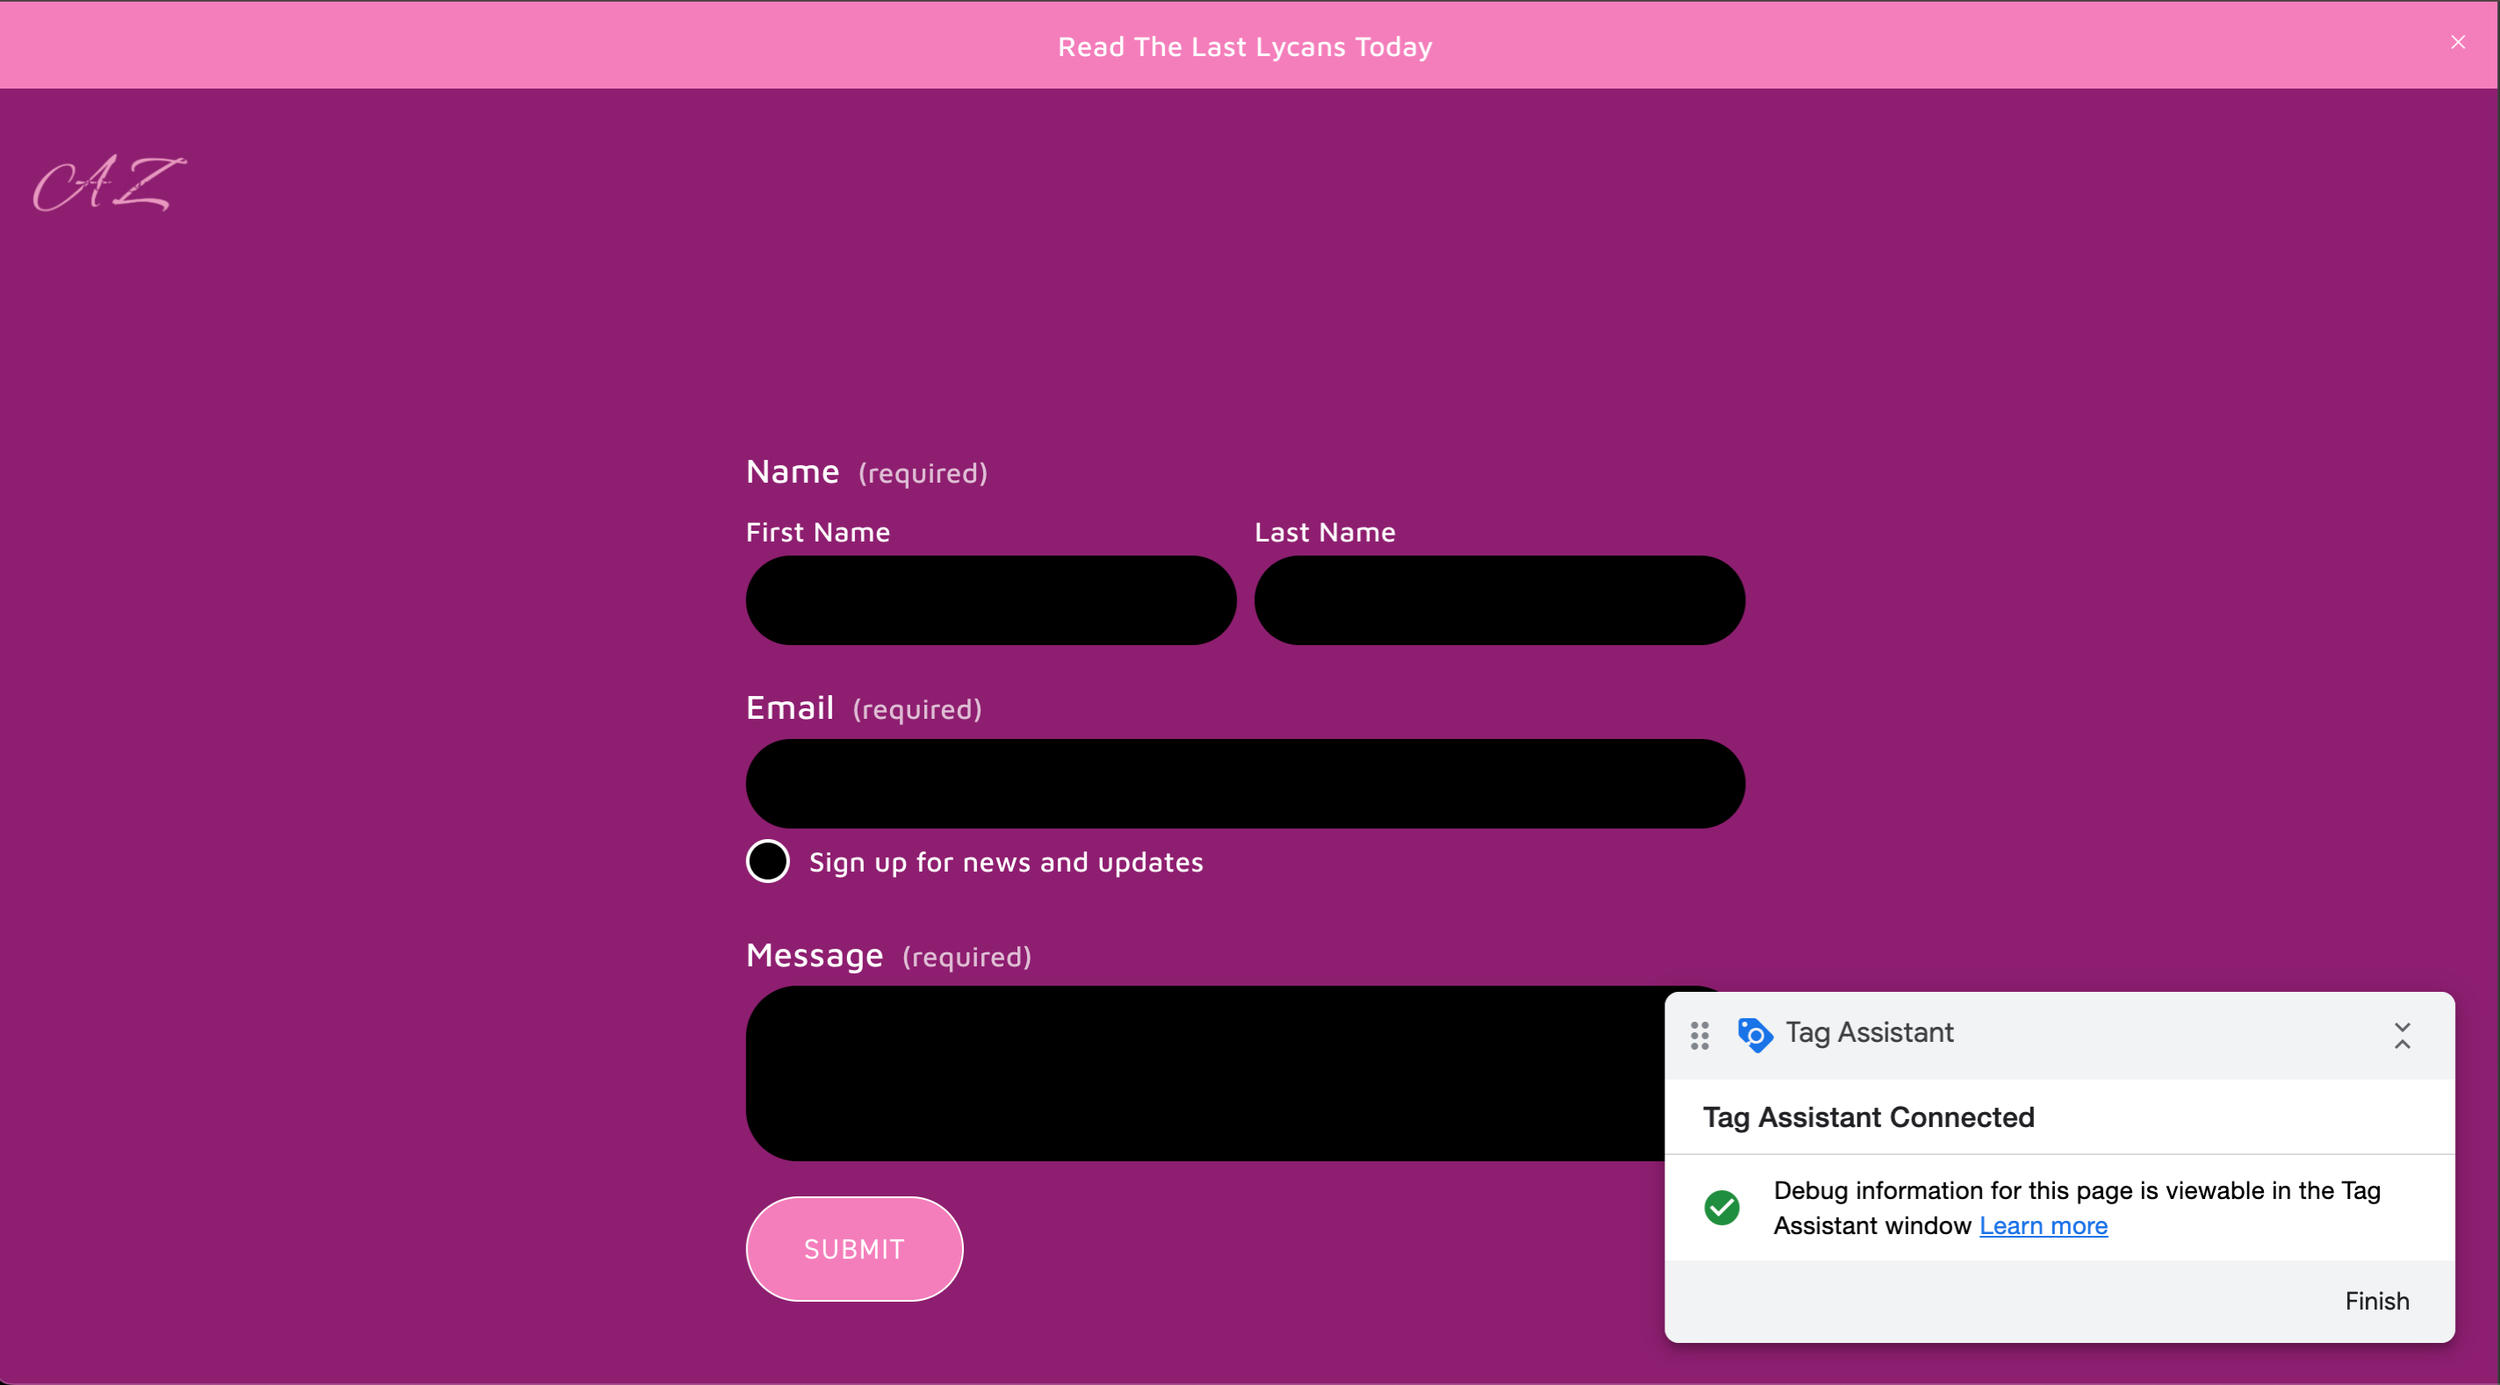
Time To Test
As long as you’ve done everything exactly as I explained here, it should work, but it’s always important to test everything.
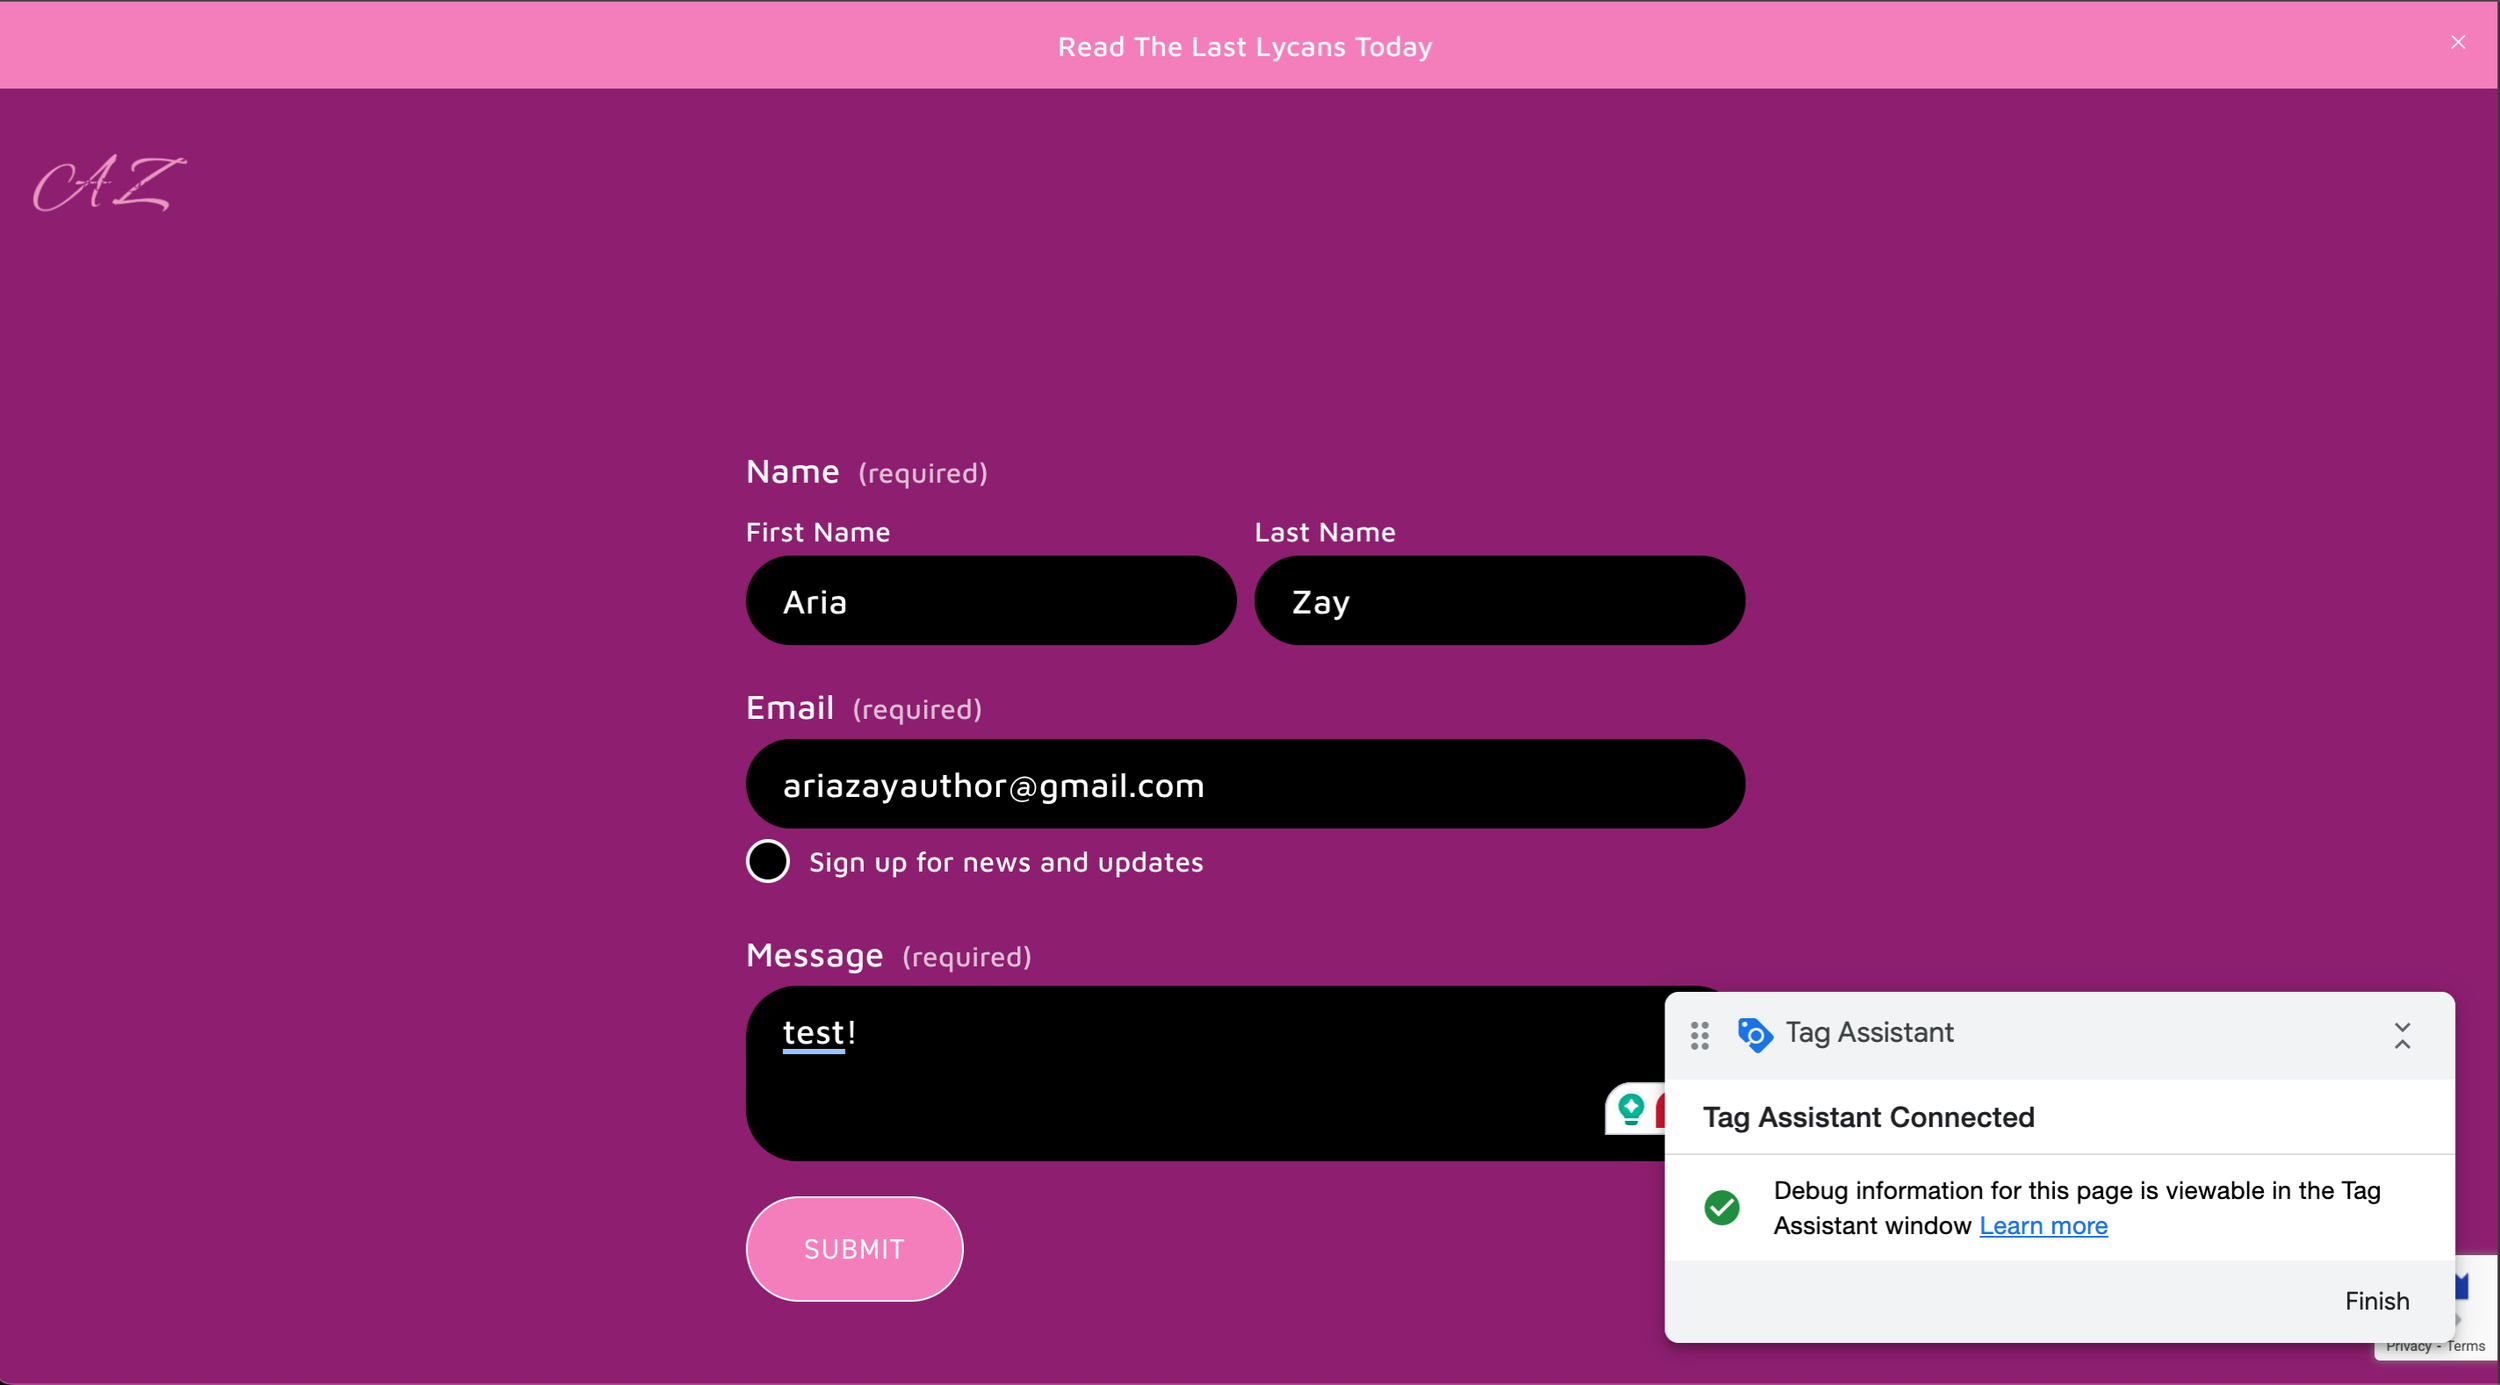
So, inside Google Tag Manager, in the top right choose “Preview”
Enter the URL where your form’s at, and choose Connect.
This is going to open up the page with a tag assistant in the corner.
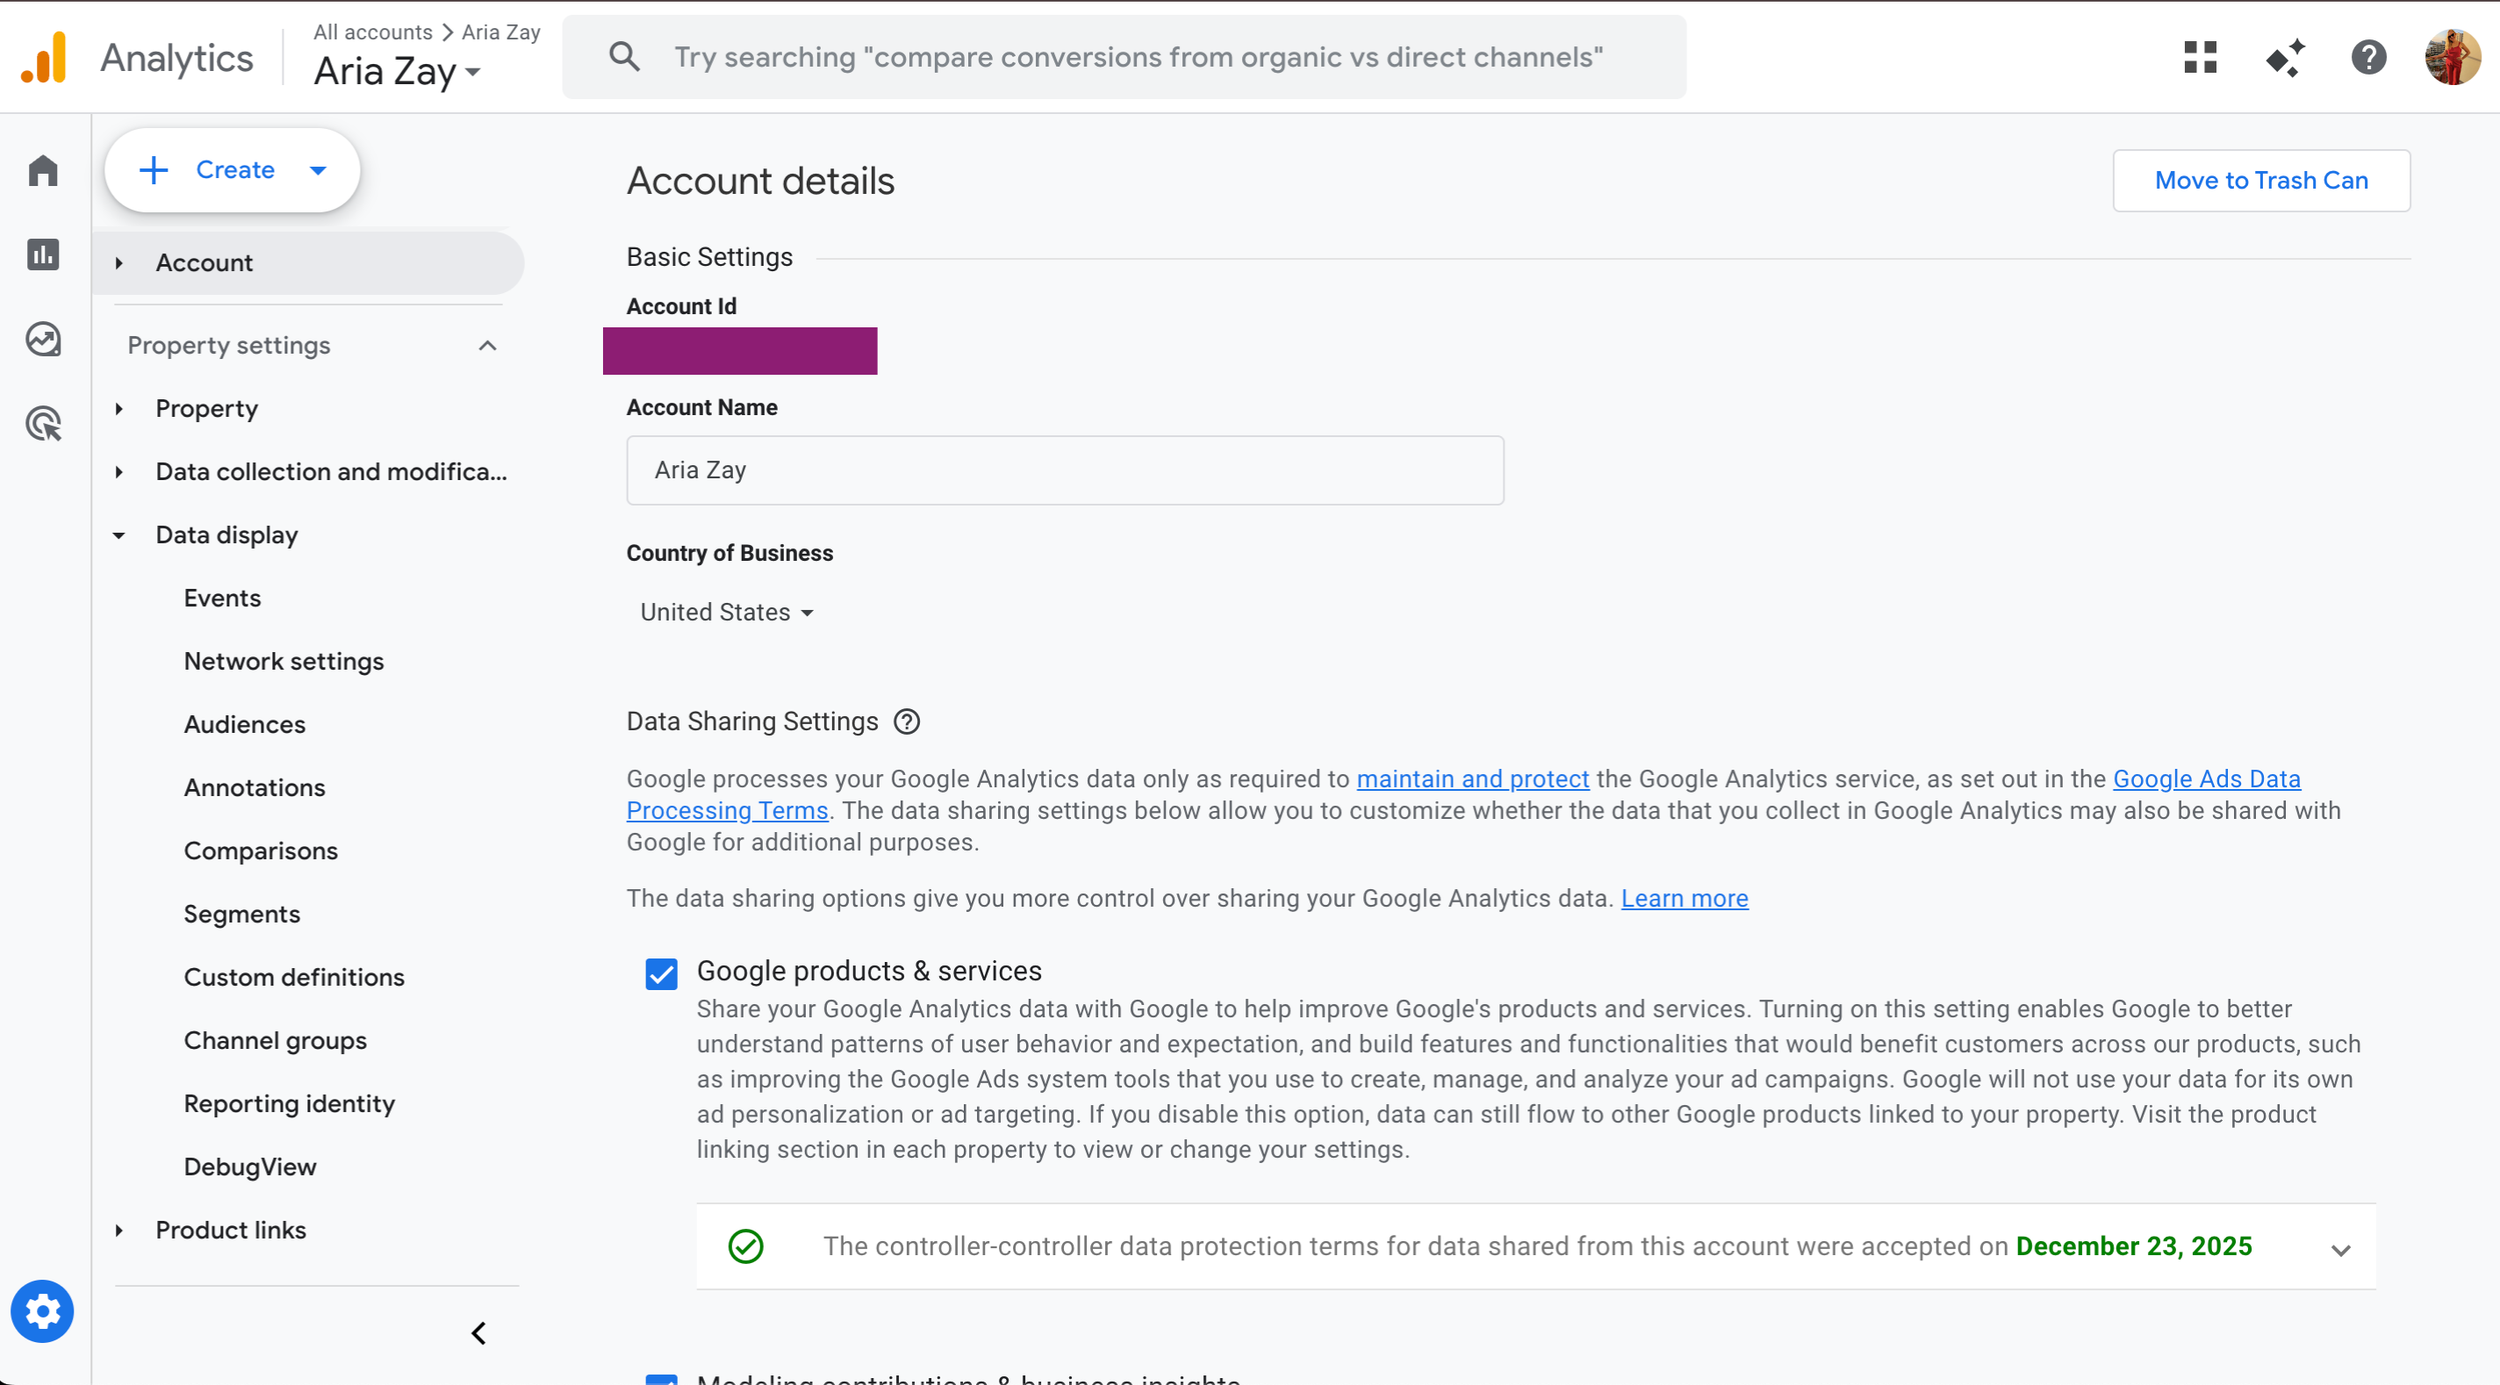
Back To GA4 We Go!
We now need to get to the Debug screen inside GA4, so head back there.
We’ll want to get into the Admin section of GA4, so on the left, you’ll hover over and it’ll open. At the bottom left choose the gear icon, it’ll say Admin.
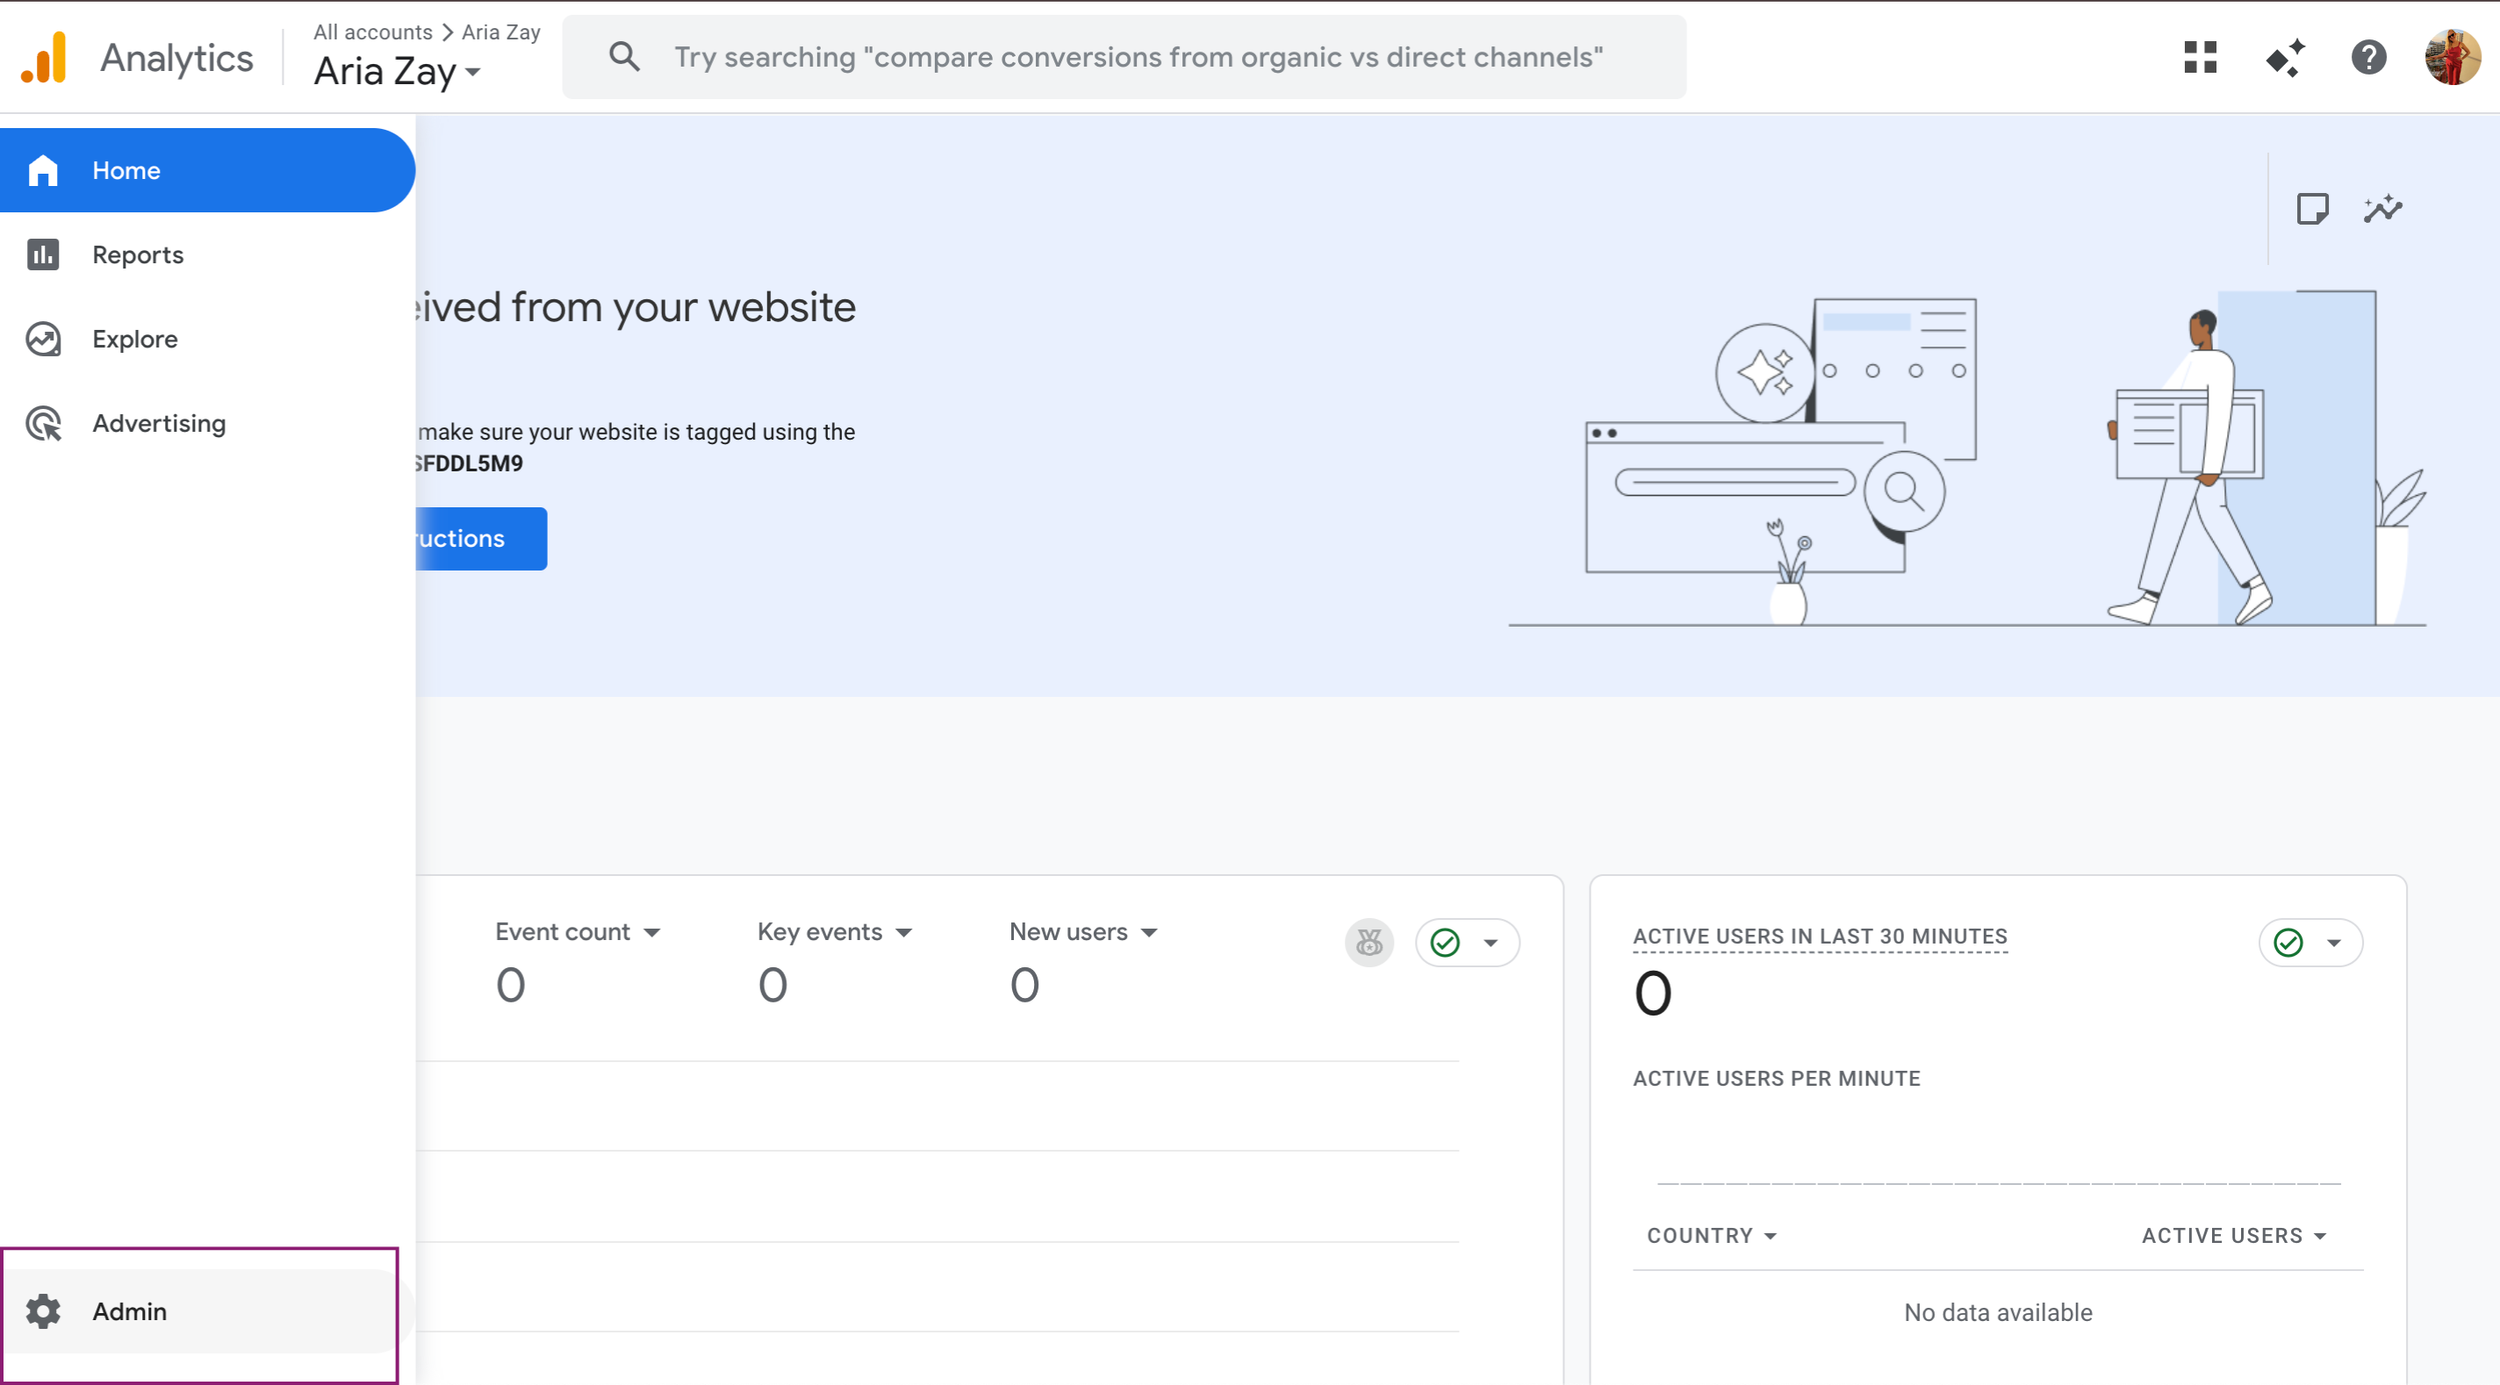
On the left you’ll want to expand Data display, and then choose DebugView
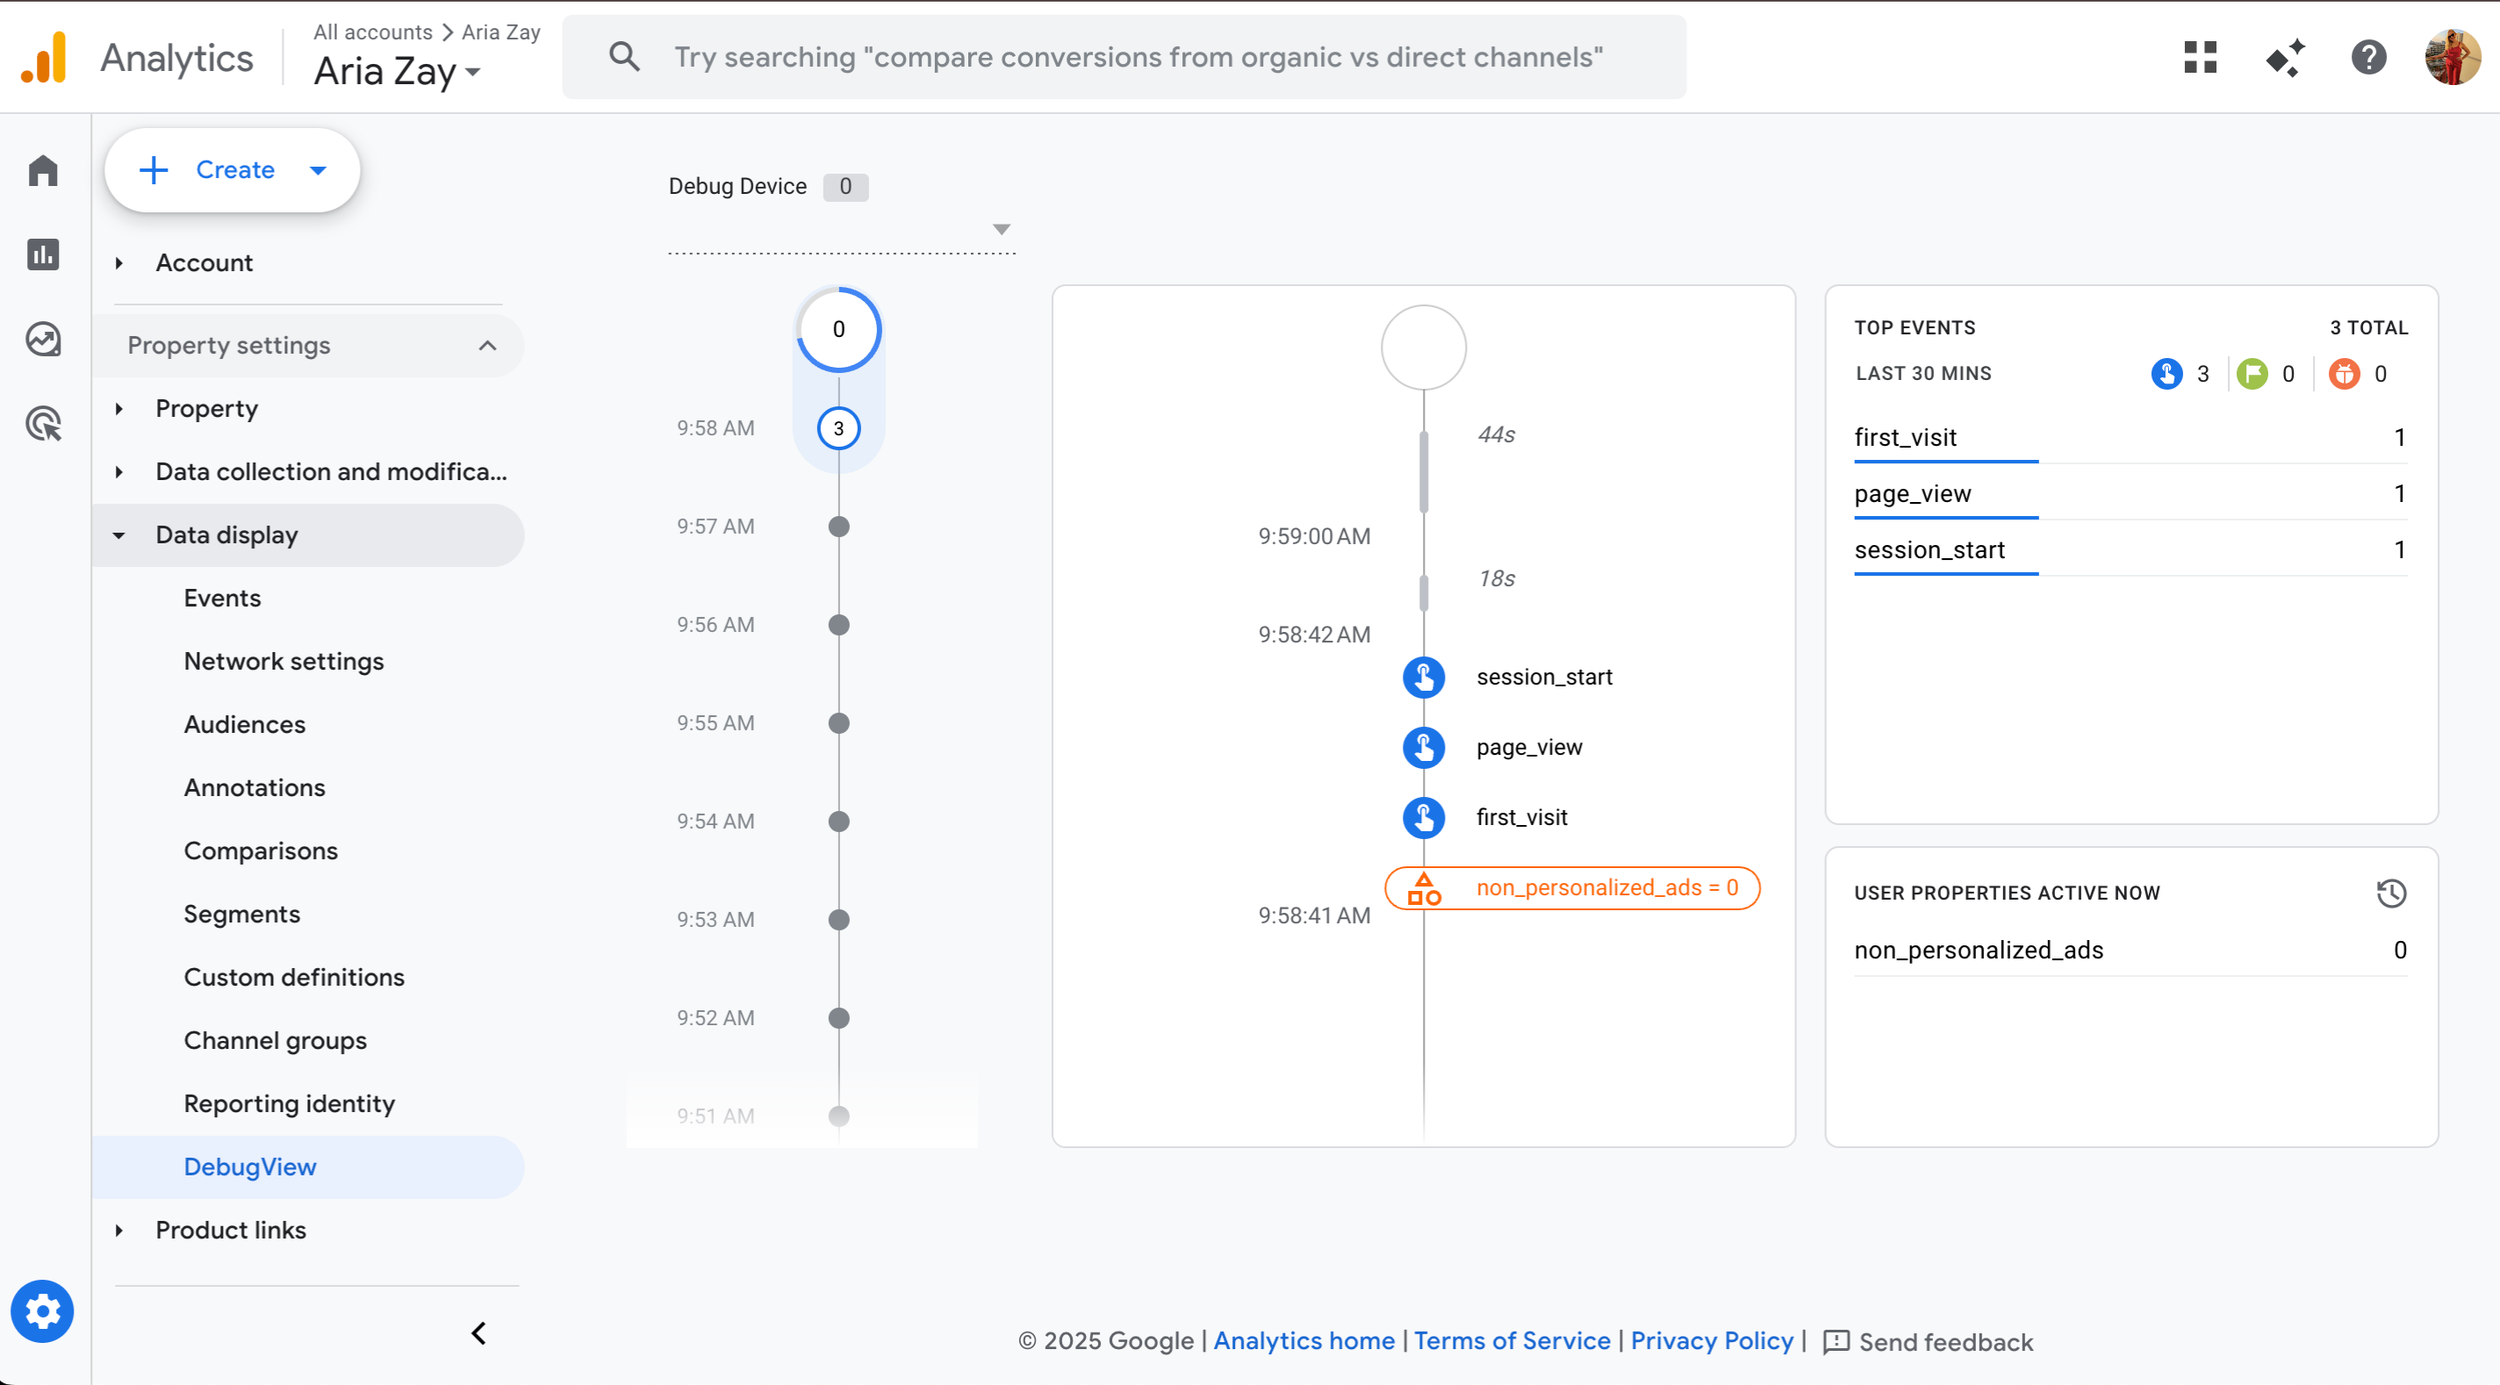
Great! Now, let’s go back to that page Google Tag Manager opened that has your contact form, and go ahead and fill out that form.
Once you hit Submit on your form, head back over to the GA4 Debug View. There is a delay, so give it some time to show up. However, if everything is set up properly you should see form_submit show up on the timeline.
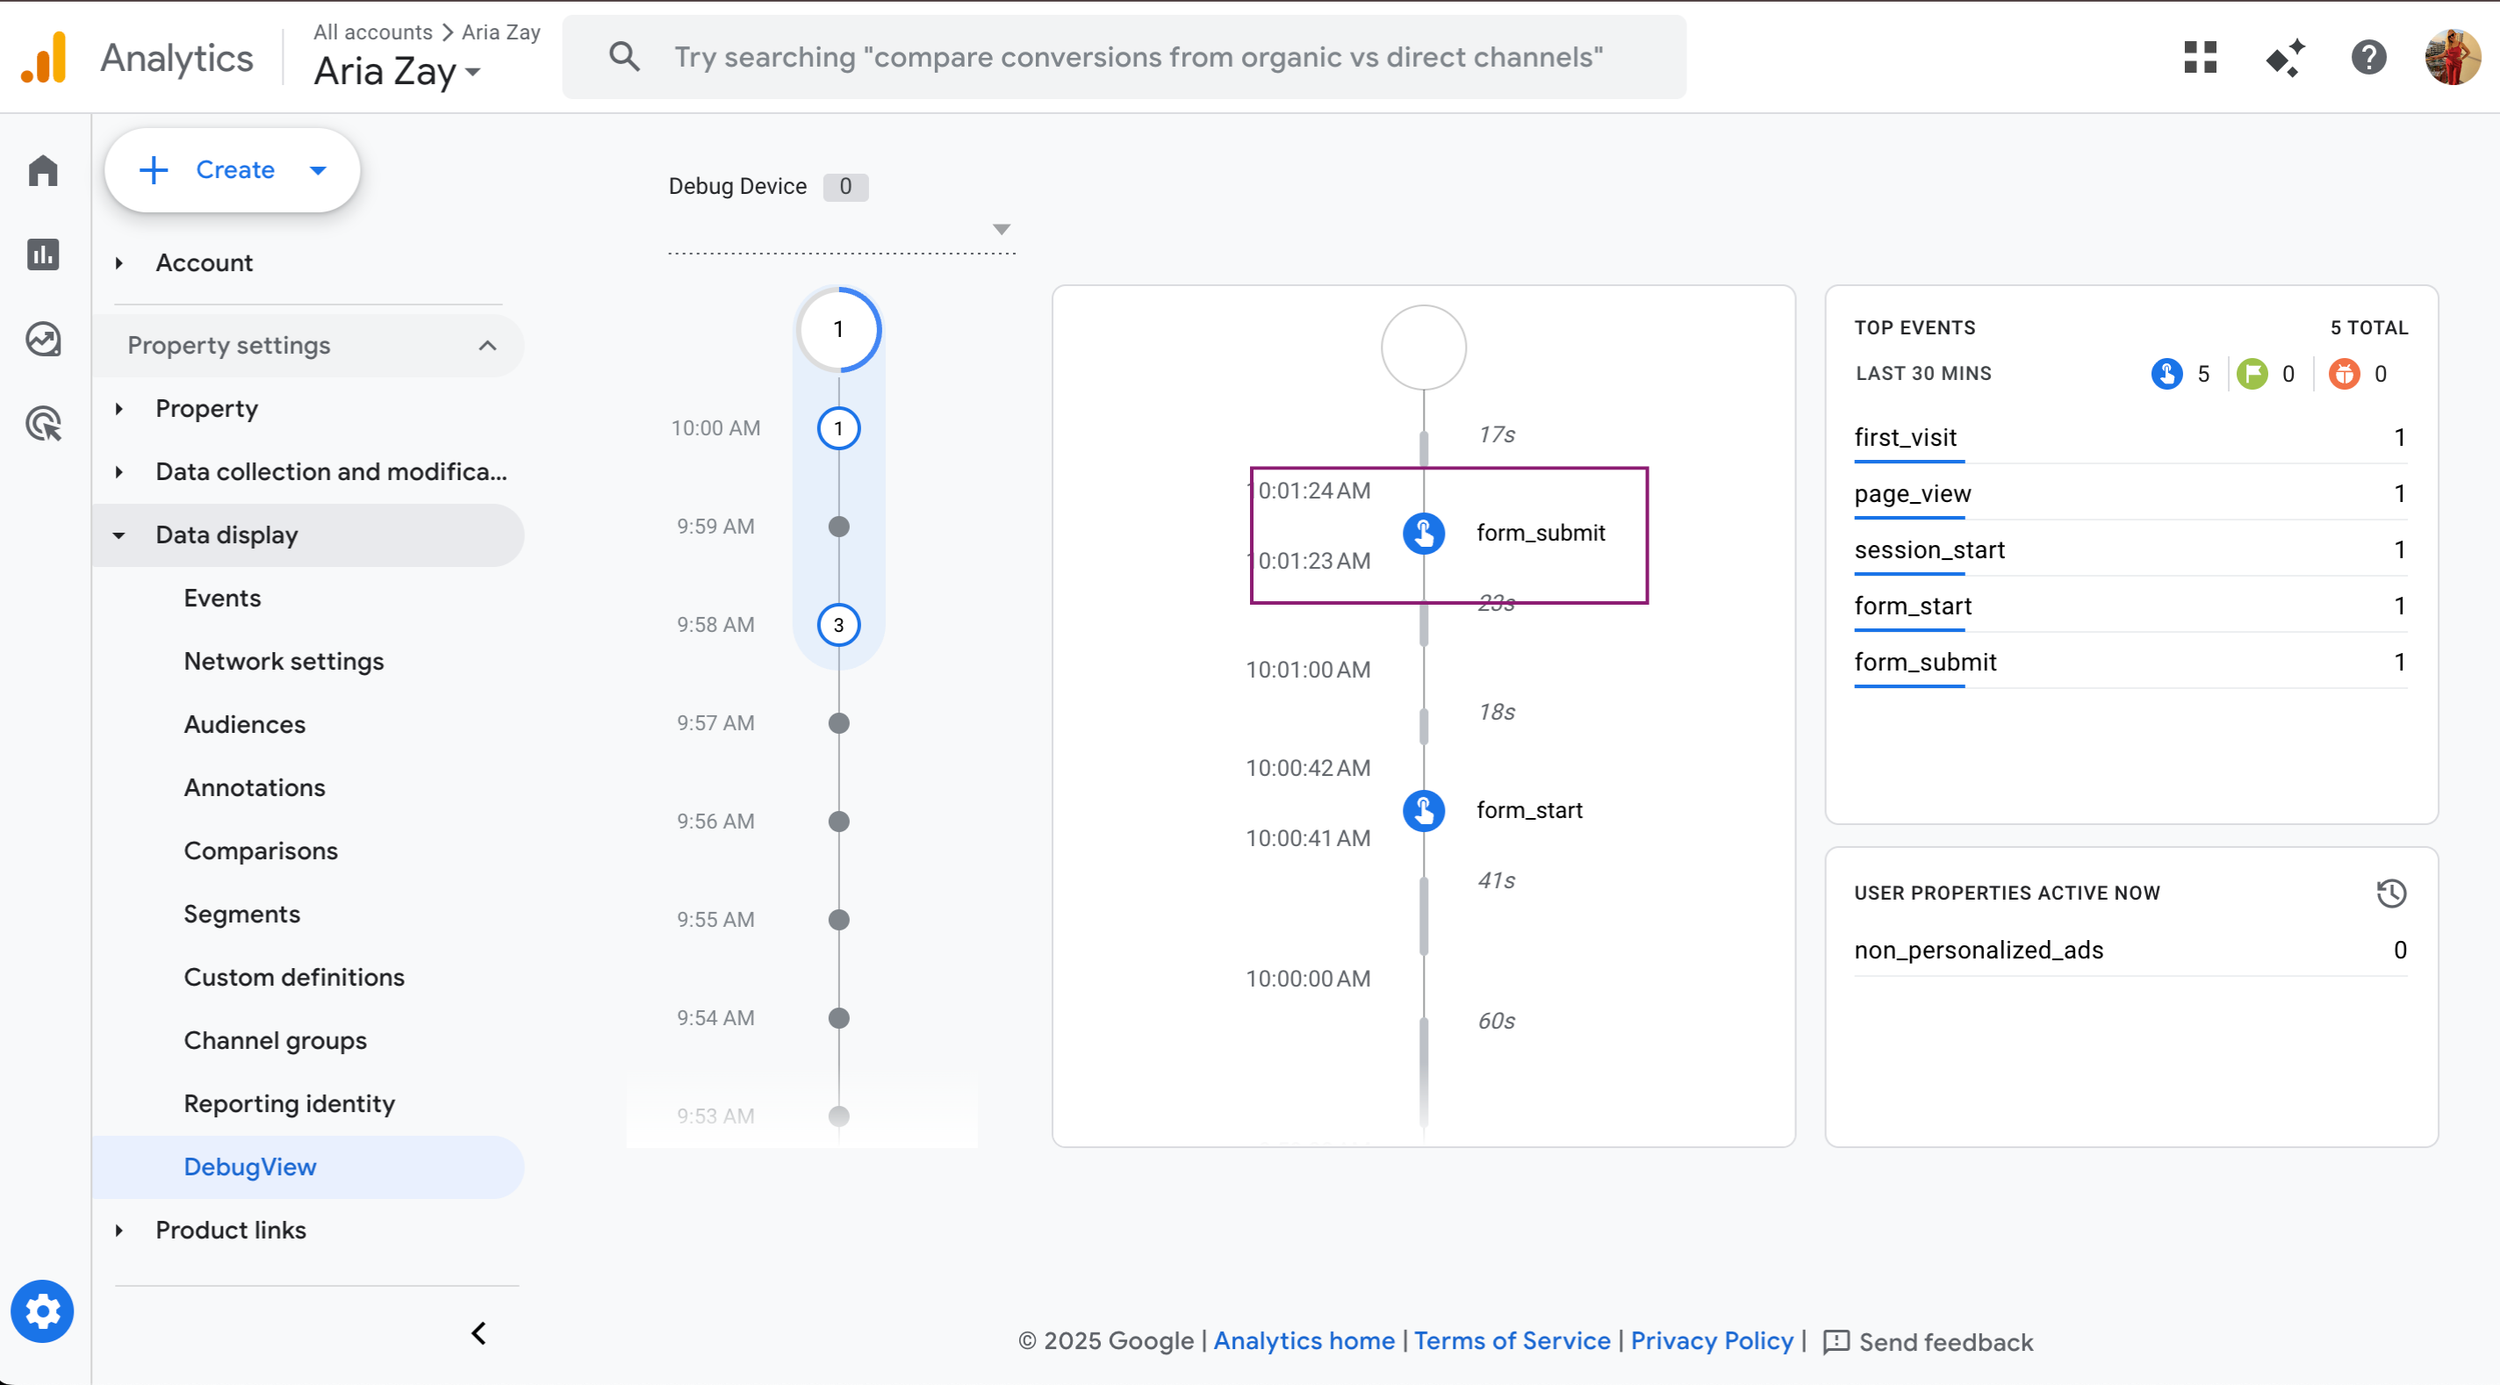
Great job, it’s working! However, we’re not done quite yet. Since we’ in the debug view, this isn’t actually live yet. If you leave now, you won’t be tracking real submissions.
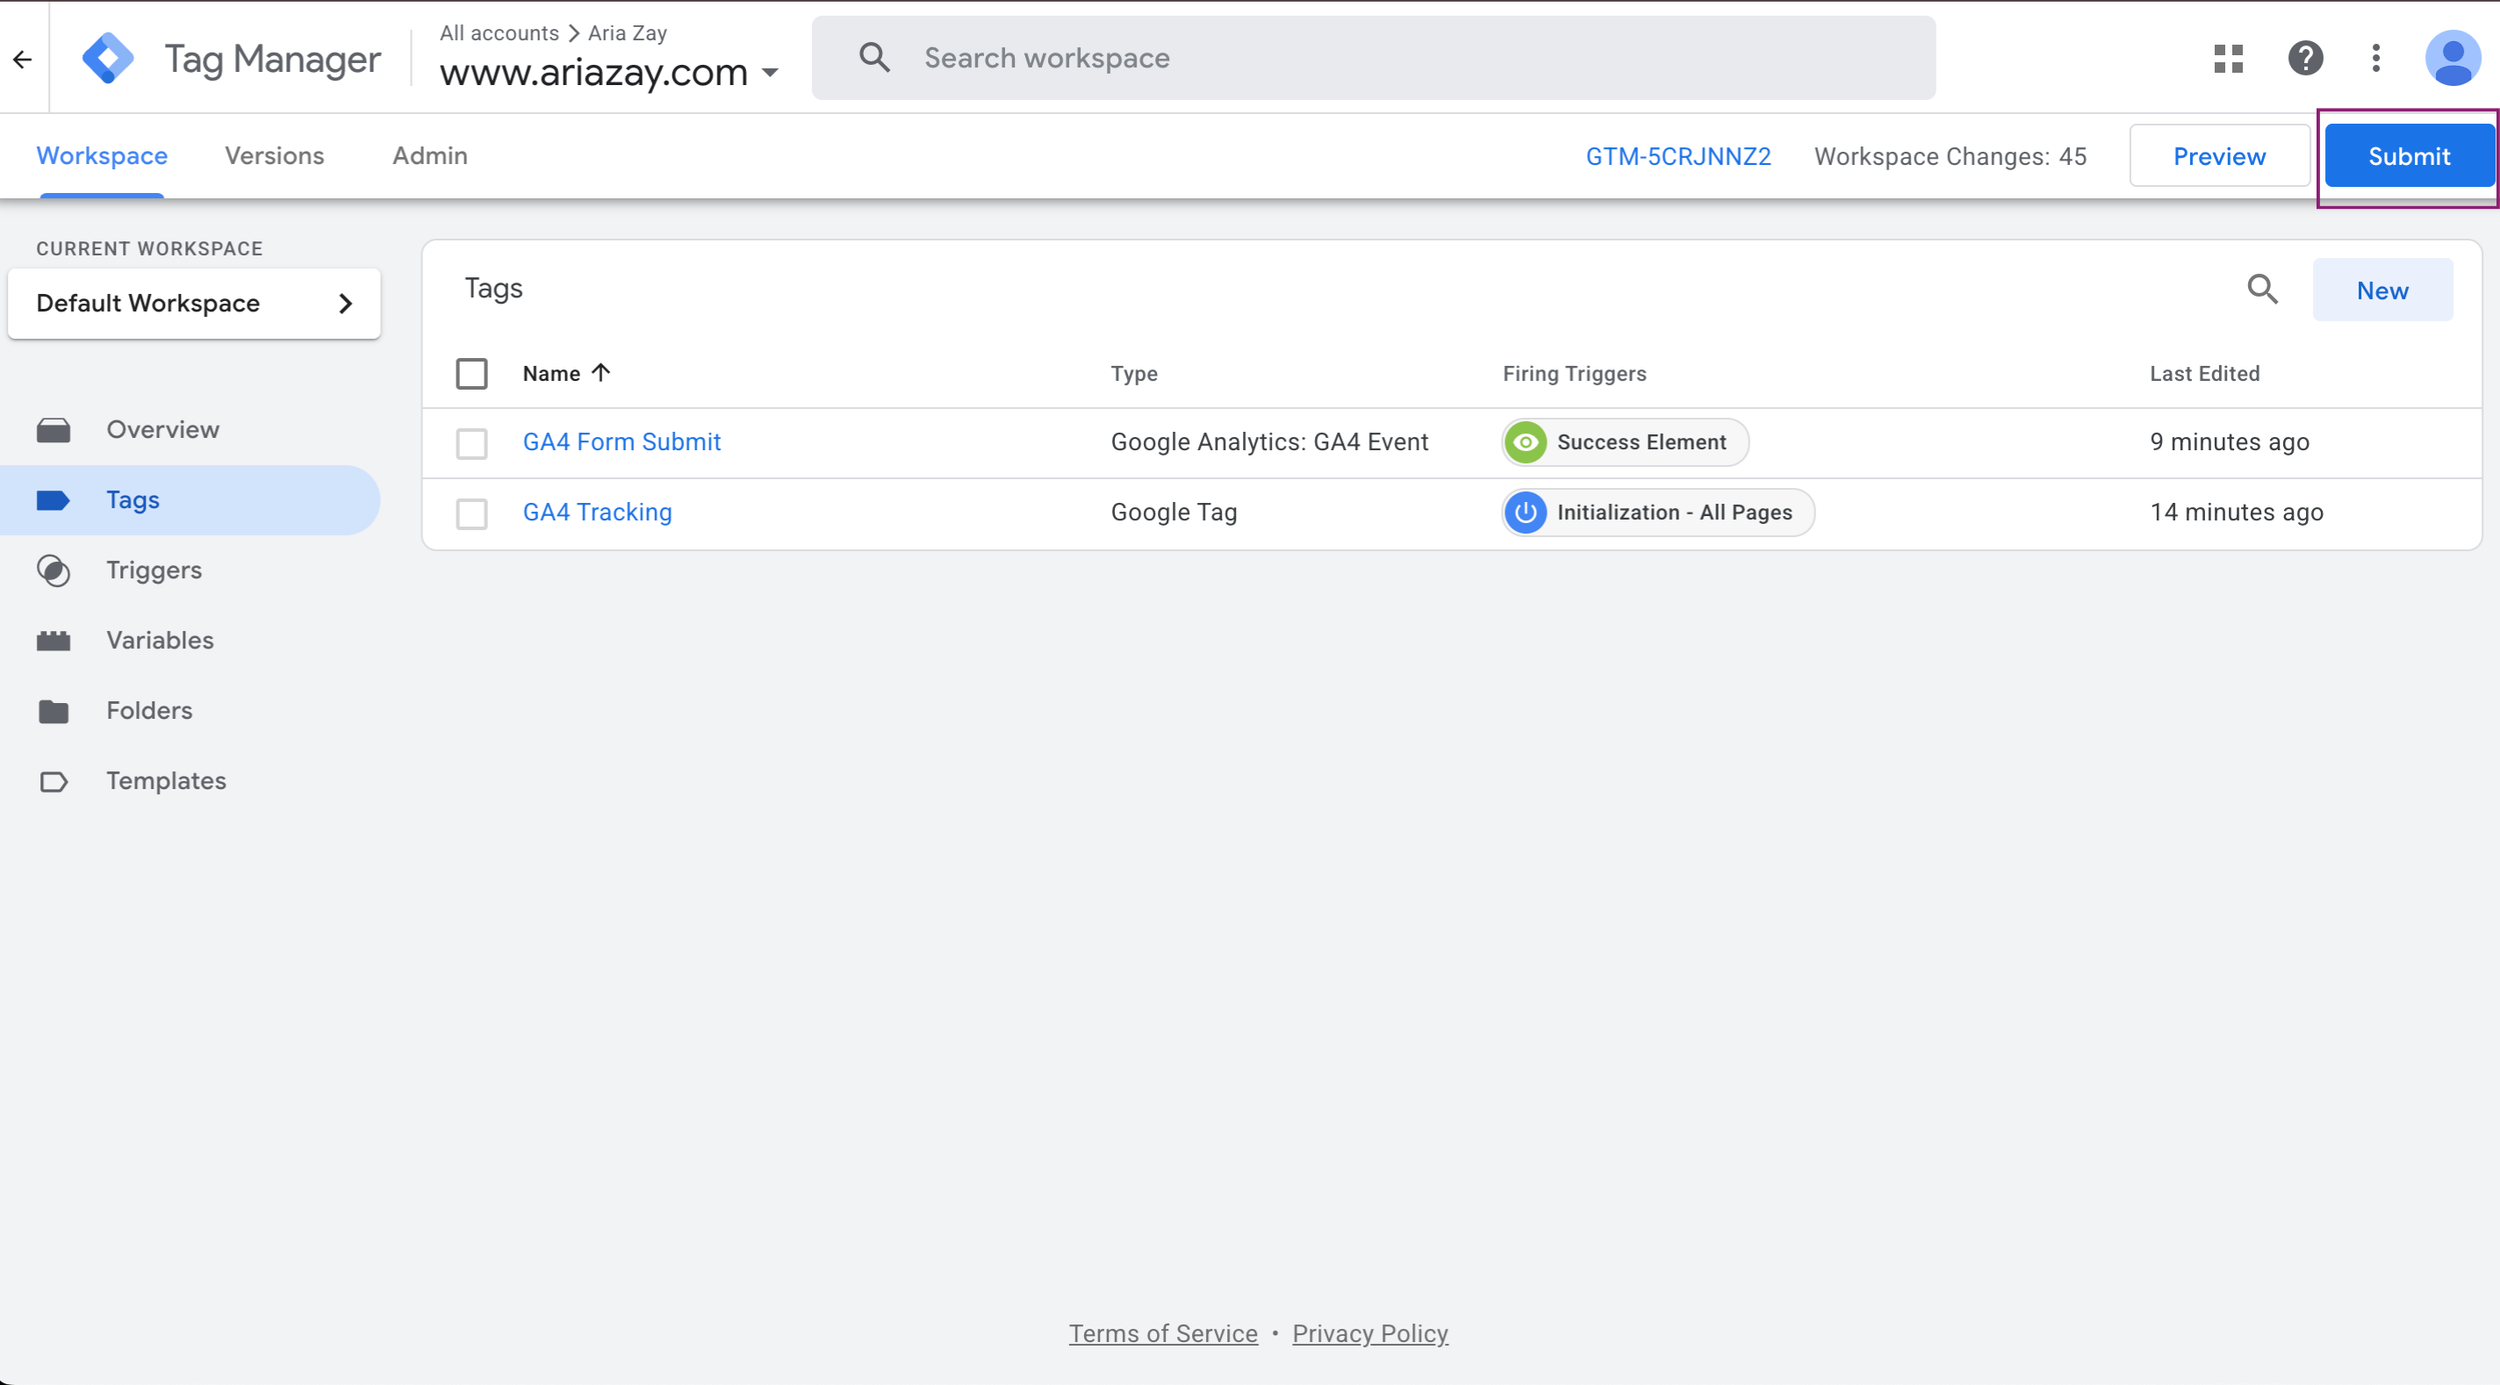
So, let’s head back to Google Tag Manager and get these changes published live.
In the top right, choose Submit.
Now, you can write a description stating that you’ve updated the tracking, and added form submission tracking. I personally just leave it blank, but best practice is to fill it out.
Here’s what I wrote this time
Version Name:
Account Initialization
Version Description:
Added GA4 Tracking
Updated variables to add all
Create Success Element for tracking form submissions
Create Form Submit tracking tag
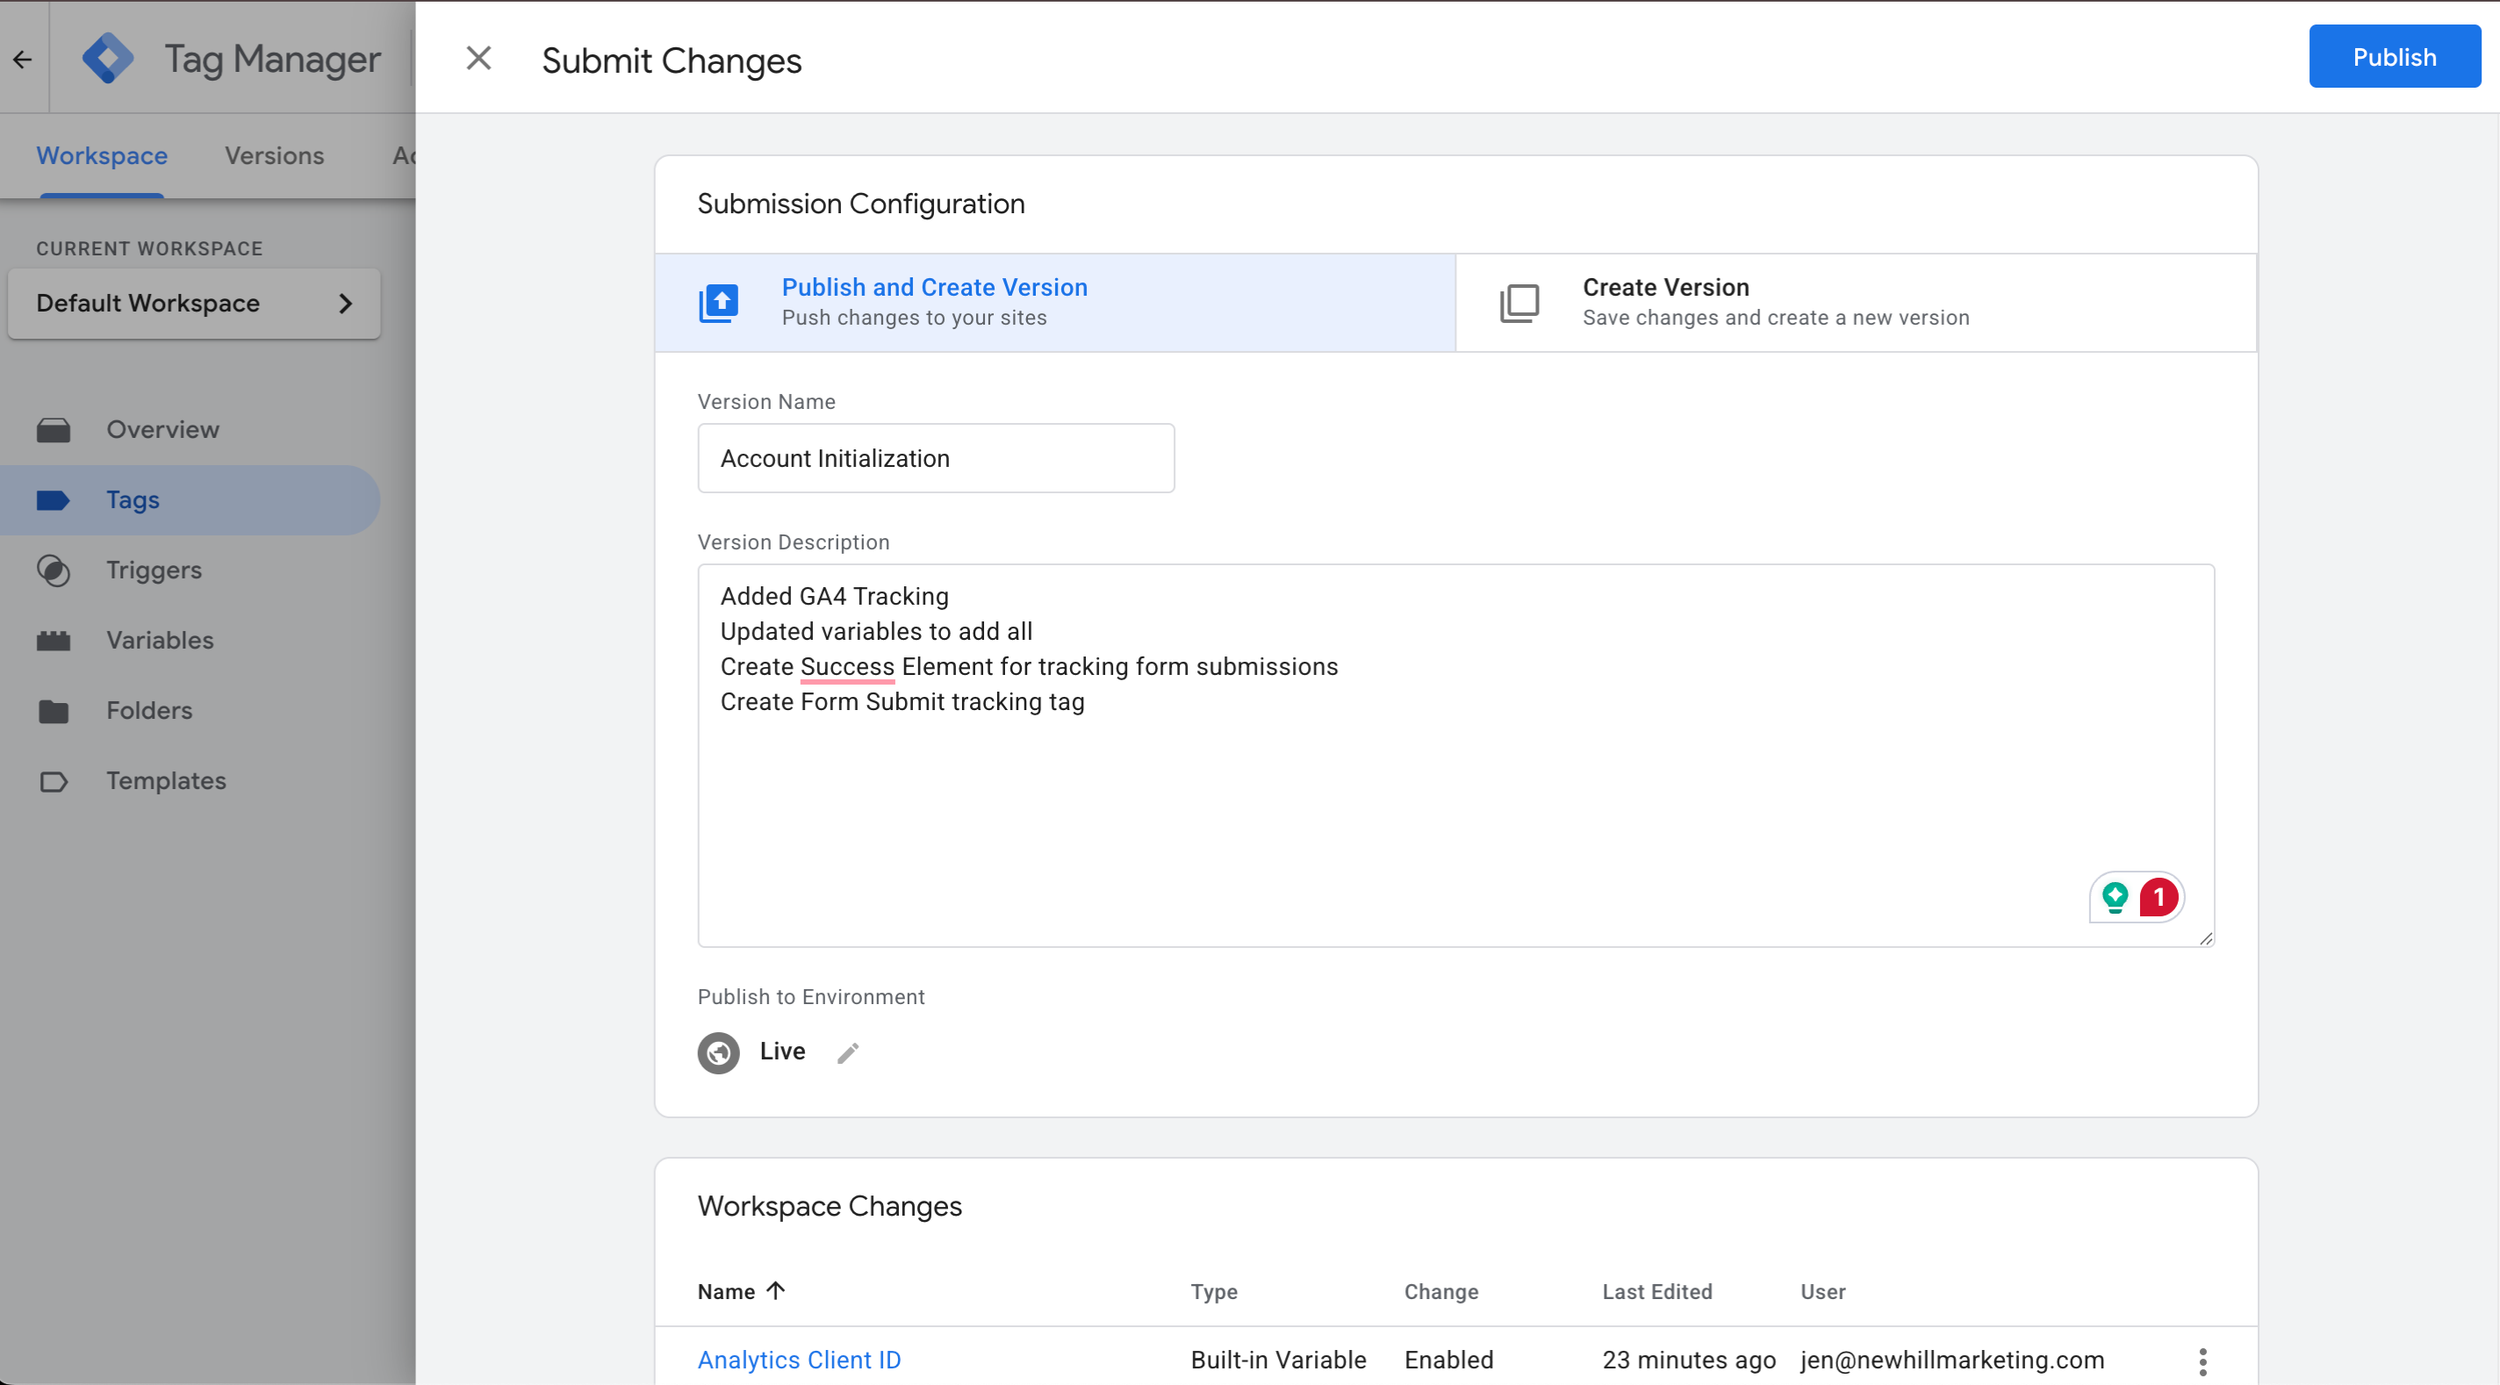
Then, select Publish, and now, all those changes are officially live!
Mark As Key Event
Now, what we’ve done here only makes the form_submit an event, it doesn’t automatically make it a key event, which we will want to do.
So, go to your live site with the form, and fill it out. This is going to make everything trigger now that it’s actually published.
Then, inside GA4, go to Data display and choose Events and then go to Recent Events
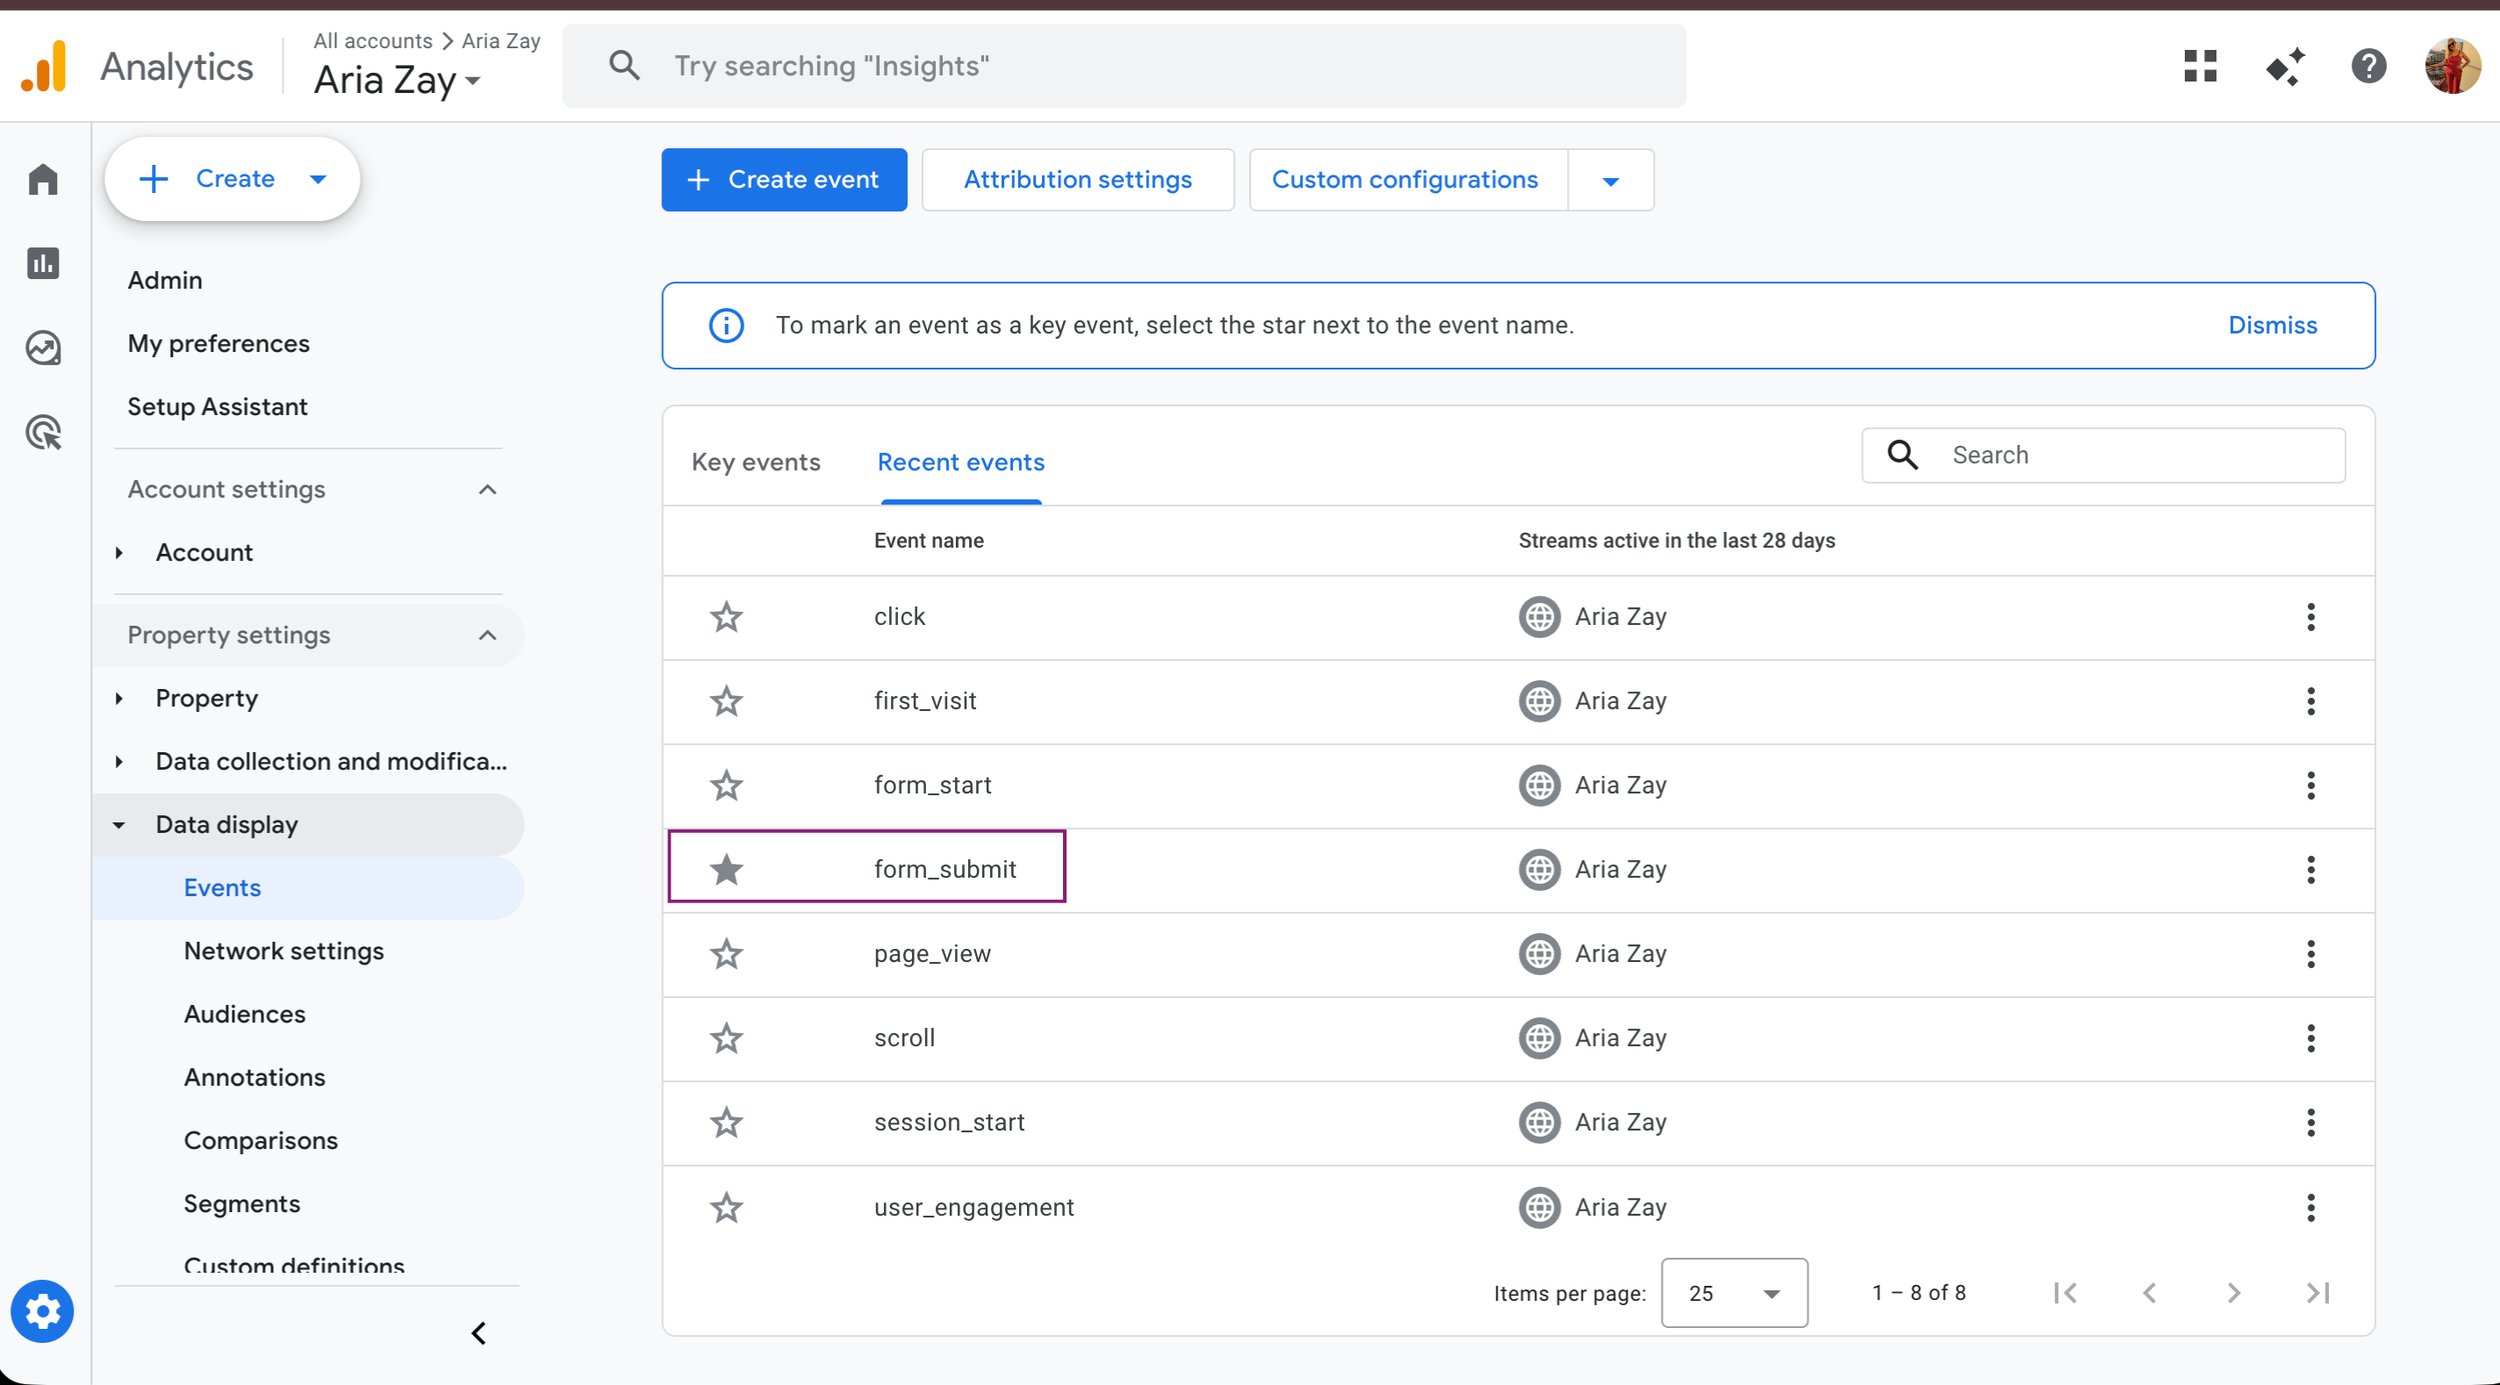
It will take a bit (like up to 24 hours) for the form_submit to show up.
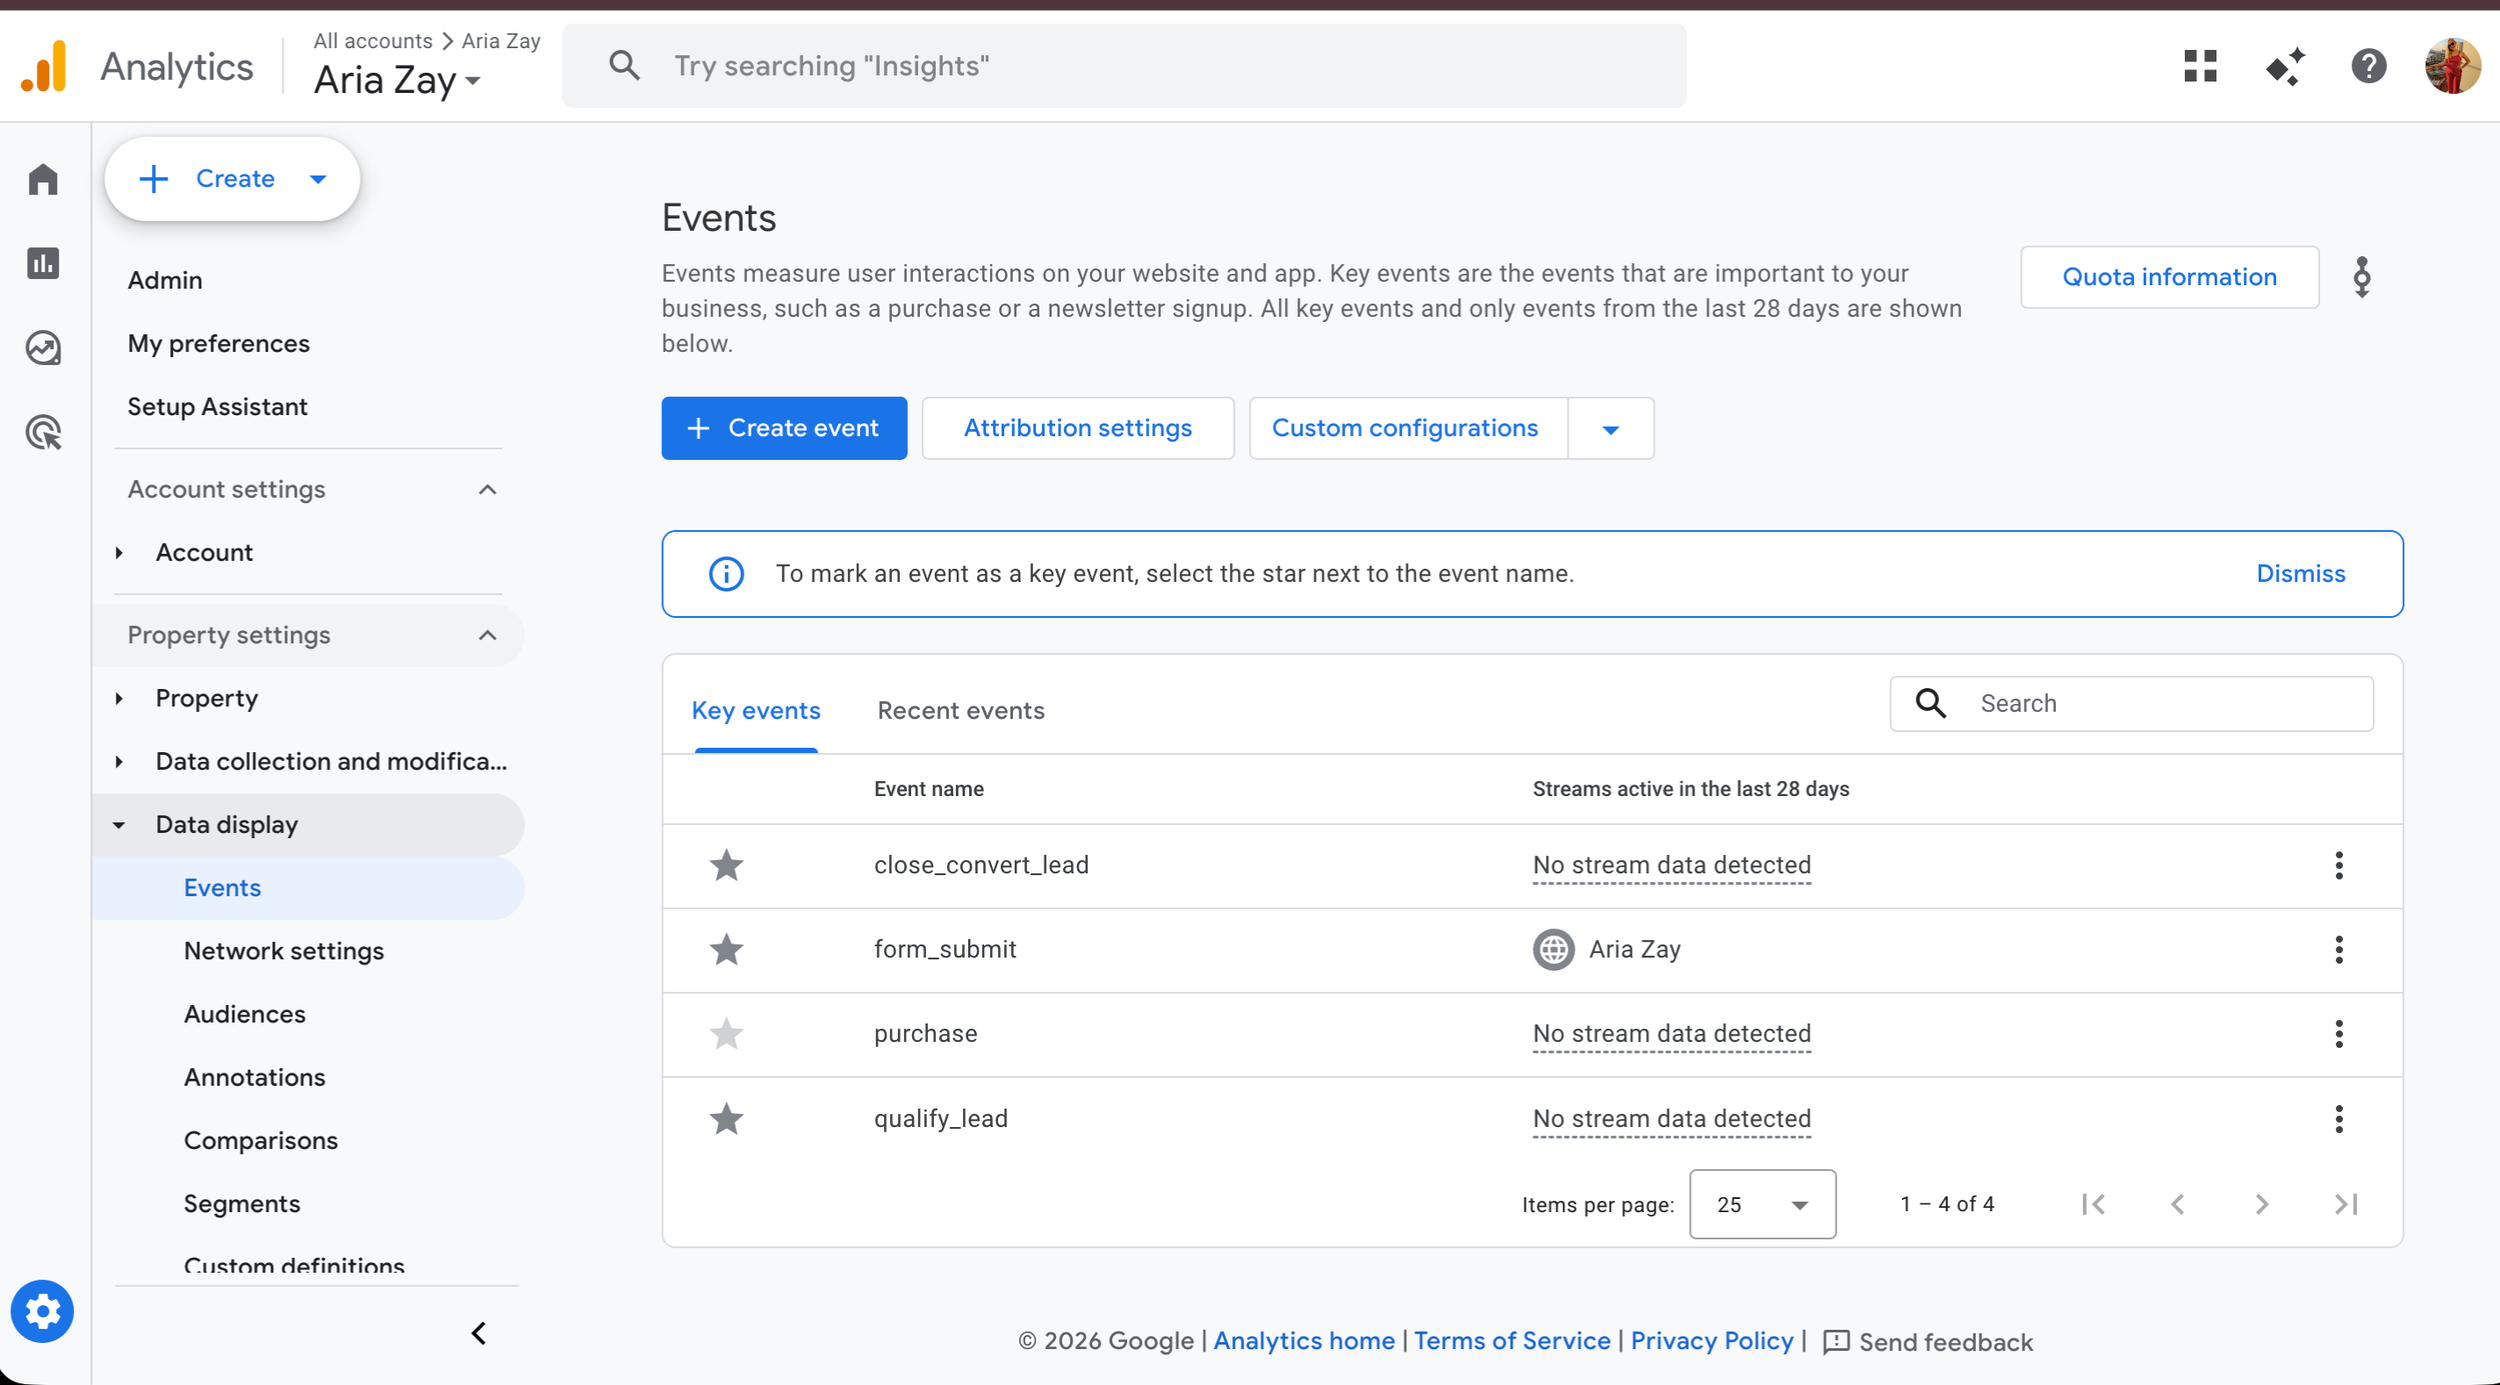
When you do find it there, select the star next to form_submit
And it’ll now show up as a key event!
Congratulations!
You’re officially tracking your form submissions from Squarespace inside GA4.
Have any issues while setting this up? Feel free to reach out and I’d be happy to help you get is figured out!
Frequently Asked Questions
Can I Make This Work On Squarespace Basic?
Since we have to use the custom code injection feature, you do need at least a Core subscription.
Why Isn’t My Form_Submit Showing Up in Debug View?
It’s easy to make a mistake during this process. Go through the steps again starting from the beginning and see if there’s a mistake in any of them. As long as you follow the instructions it should show up. When in doubt, delete everything from inside Google Tag Manager and start over fresh.
If you’re still having issues, I’d be happy to help you troubleshoot them if you reach out.
Does This Work On All The Forms?
Yes! This will track all the forms on your website. You can use GA4 to see which landing page a key event happened on to see which form was filled out.
Will This Interfere With Squarespace’s Contacts?
Nope! The contacts will still show up. This just tracks form submissions inside of GA4 so you can get more information about where your conversions came from.
Do You Have A Video I Can Follow?
I personally don’t, but I originally learned how to do this from another Squarespace user!
I Have Another Question - Can You Help?
I’d love to try! Reach out today, and I’ll see what I can do for you.